
Monster Eye Balls Rice Krispie Bites are a spooky twist on a classic treat, and they truly live up to their name. The bright, unnerving colors and those candy eyeballs make them look like they’ve just peeked out from under a monster’s bed. Everyone loves the satisfying crunch of the cereal mixed with the gooey, melted marshmallow, a texture that feels both nostalgic and fun. What makes these treats especially special is how customizable they are. You can play with the colors to create a whole spectrum of monster eyes. They’re a fantastic option for Halloween parties or any event where you want to add a bit of playful fright to the dessert table. The simple process means even younger helpers can get involved in making these monstrously good bites. Get ready to create some edible art that’s as fun to look at as it is to eat.
Ingredients:
- 6 cups Kellogg’s Rice Krispies Cereal
- 6 tablespoons Butter (we use salted, sweet cream butter)
- 6 cups Mini Marshmallows
- Wilton Color Right Food Coloring System
- 33 Wilton Candy Eyes – Large
Making the Monster Base
The first step is to create the base for our monster eyes. You’ll want to work quickly once the marshmallows are melted, as they start to set up pretty fast. It’s also a good idea to have everything else you’ll need ready to go before you start melting the butter. This includes your food coloring, the Rice Krispies cereal, and your prepared pan. Make sure to get into all the corners.
Prepare Your Pan:
Lightly grease a 9×13 inch baking pan with butter or cooking spray. You can also line it with parchment paper, leaving some overhang on the sides to help lift the treats out later. This step is important to prevent the sticky mixture from clinging to the pan.
Melt the Butter and Marshmallows:
In a large saucepan, melt the 6 tablespoons of butter over low heat. Once the butter is fully melted, add the 6 cups of mini marshmallows. Stir continuously until the marshmallows are completely melted and smooth. This should take about 5-8 minutes. Keep the heat on low to prevent scorching the marshmallows. If the marshmallows start to puff up too much, you can briefly lift the pan off the heat while still stirring.
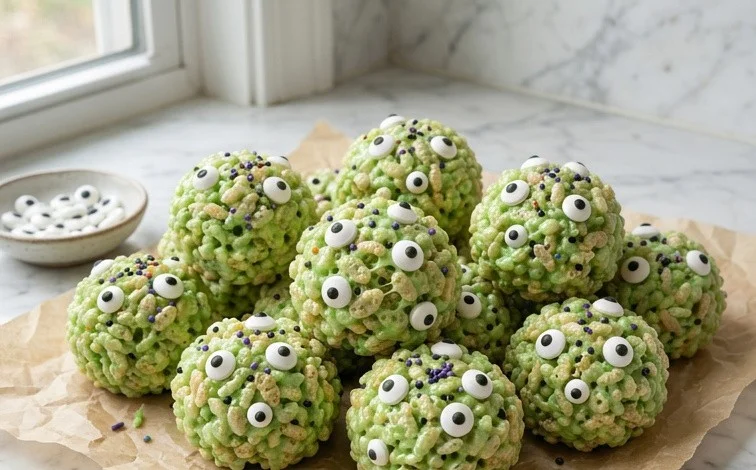
Monster Eye Balls Rice Krispie Bites
These Monster Eye Balls are a fun and spooky treat perfect for Halloween parties, classroom celebrations, or just a bit of monstrous fun anytime. They’re surprisingly easy to make, and the vibrant colors from the food coloring really bring the “monster” theme to life. The texture is that classic, chewy, crispy goodness that everyone loves in Rice Krispie treats, but with a fun visual twist.
Ingredients:
- 6 cups Kellogg’s Rice Krispies Cereal
- 6 tablespoons Butter (we use salted, sweet cream butter)
- 6 cups Mini Marshmallows
- Wilton Color Right Food Coloring System
- 33 Wilton Candy Eyes – Large
Making the Monster Base
The first step is to create the base for our monster eyes. You’ll want to work quickly once the marshmallows are melted, as they start to set up pretty fast. It’s also a good idea to have everything else you’ll need ready to go before you start melting the butter. This includes your food coloring, the Rice Krispies cereal, and your prepared pan.
- Prepare Your Pan: Lightly grease a 9×13 inch baking pan with butter or cooking spray. You can also line it with parchment paper, leaving some overhang on the sides to help lift the treats out later. This step is important to prevent the sticky mixture from clinging to the pan. Make sure to get into all the corners.
- Melt the Butter and Marshmallows: In a large saucepan, melt the 6 tablespoons of butter over low heat. Once the butter is fully melted, add the 6 cups of mini marshmallows. Stir constantly over low heat until the marshmallows are completely melted and smooth. It’s crucial to keep the heat low to avoid scorching the marshmallows, which can give your treats an undesirable burnt flavor. You’re looking for a smooth, uniform consistency without any lumps. This usually takes about 5-8 minutes.
- Add the Cereal: Once the marshmallows are melted and smooth, remove the saucepan from the heat. Immediately add the 6 cups of Kellogg’s Rice Krispies cereal to the melted marshmallow mixture. Stir gently but thoroughly until all the cereal is evenly coated. You want to make sure every crispy puff gets coated in the gooey marshmallow. Don’t overmix, as this can crush the cereal and make the treats less crispy. The goal is to coat, not to mash.
Coloring Your Monster Eyes
This is where the fun really begins! Using the Wilton Color Right Food Coloring System, you can create a variety of spooky and vibrant monster eye colors. You don’t need a lot of the coloring to get intense shades, so start with just a few drops and add more as needed to reach your desired hue. Remember that the colors will lighten slightly as they cool, so it’s okay if they seem a little darker when they’re still warm.
- Divide and Color: Quickly divide the Rice Krispie mixture into as many separate bowls as you want colors for your monster eyes. For example, you could have green, purple, and blue bowls. Add a few drops of your chosen Wilton Color Right Food Coloring to each bowl. It’s better to add the coloring gradually, mixing well after each addition, until you achieve the vibrant colors you desire. Stir each batch until the color is evenly distributed. Work fast here, as the mixture starts to firm up.
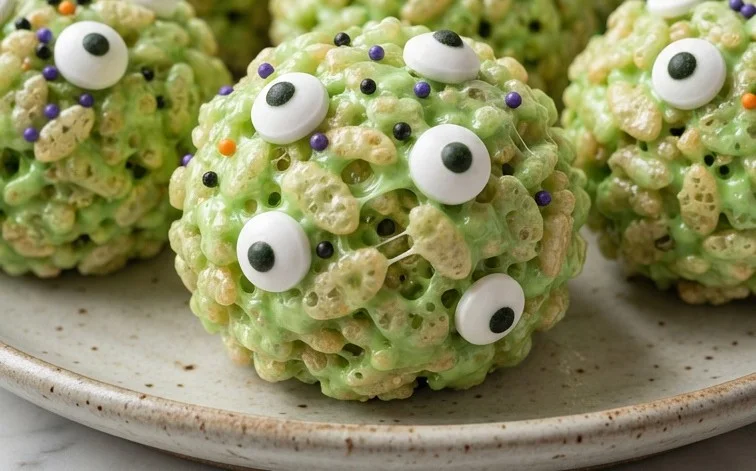
- Shape the Eye Balls: Once the mixture is colored, lightly grease your hands with butter or cooking spray to prevent sticking. Take about a 1/4 cup of the colored mixture at a time and gently roll it into a ball, about the size of a large marble or a small golf ball. Place each ball onto your prepared baking pan. Try to make them relatively uniform in size for a consistent look. You can also lightly press the balls down slightly so they aren’t perfectly round, making them look a bit more organic and less like perfect spheres. Continue this process until all the mixture is used up. You should get around 33-35 “eye balls” depending on the size you make them.
- Add the Pupils (Candy Eyes): While the Rice Krispie balls are still slightly warm and soft, gently press one large Wilton Candy Eye into the top of each “eye ball.” The warmth of the treat will help the candy eye adhere securely. If the mixture has cooled too much and the eye isn’t sticking, you can briefly warm the bottom of the eye ball in your hand or microwave for a few seconds (be careful not to melt it completely) to make it sticky again. Arrange the eyes so they look like they are looking in different directions for a more animated, monstrous effect.
Cooling and Serving
Letting these monster eyes cool completely is important for them to hold their shape. Once they’ve set, they’re ready to be enjoyed! They are best enjoyed within a few days of making them. Store them in an airtight container at room temperature. Avoid refrigerating them, as this can make them hard and less chewy. They also don’t need to be kept in the fridge for freshness, as the marshmallow and cereal combination is quite stable at room temperature.
These Monster Eye Balls are a delightful, no-bake treat that’s guaranteed to be a hit. They are a simple way to add a spooky touch to any gathering without much fuss. Enjoy creating your own ghastly goodies!
Conclusion:
These Monster Eye Balls Rice Krispie Bites are a total win for any occasion that calls for a bit of spooky fun. They combine that beloved crispy, chewy texture with a wonderfully monstrous visual appeal, making them a hit with kids and adults alike. The process is straightforward, allowing for plenty of creativity with colors. You’ve seen how simple it is to turn basic ingredients into something truly eye-catching (pun intended!). Don’t shy away from experimenting with different color combinations or even adding a sprinkle of edible glitter after they’ve cooled slightly for an extra bit of magic.
Serve these at your next Halloween party, bring them to a school event, or just make a batch to brighten up a regular afternoon. They are best served at room temperature for that perfect chewy consistency.
Frequently Asked Questions:
Can I make these ahead of time?
Yes, absolutely. Monster Eye Balls Rice Krispie Bites can be made up to two days in advance. Store them in an airtight container at room temperature. Make sure they are fully cooled before storing. If you stack them, place parchment paper or wax paper between layers to prevent sticking.
How do I get the colors to be so bright?
Using a gel food coloring system, like the Wilton Color Right system mentioned, is key. Gel colors are more concentrated than liquid food coloring, so a little goes a long way to achieve those intense, spooky hues. Add the color gradually, stirring well after each addition, until you reach your desired shade.
What if my mixture gets too sticky?
If your marshmallow mixture becomes too sticky to handle, it might have cooled down too much, or you may need to grease your hands or utensils more. You can gently warm the mixture for a few seconds over low heat if it has solidified too much, but be very careful not to overheat it, as this can change the texture. Working quickly and having greased hands helps manage the stickiness effectively.
Monster Eye Balls Rice Krispie Bites
Spooky and fun no-bake treats perfect for Halloween parties, featuring colorful monster eyes on classic Rice Krispie treats.
Ingredients
-
6 cups Kellogg’s Rice Krispies Cereal
-
6 tablespoons Butter
-
6 cups Mini Marshmallows
-
Wilton Color Right Food Coloring System
-
33 Wilton Candy Eyes – Large
Instructions
-
Step 1
Prepare a 9×13 inch baking dish by greasing it lightly. -
Step 2
In a large pot over low heat, melt the butter. Add the mini marshmallows and stir until completely melted and smooth. -
Step 3
Remove the pot from the heat. Add a few drops of desired food coloring from the Wilton Color Right Food Coloring System and stir until the color is evenly distributed. Repeat with different colors for multiple batches if desired. -
Step 4
Add the Kellogg’s Rice Krispies Cereal to the colored marshmallow mixture. Stir until well combined and coated. -
Step 5
Using lightly buttered hands or a buttered spatula, press the mixture evenly into the prepared baking dish. -
Step 6
While the treats are still slightly warm and sticky, press the Wilton Candy Eyes – Large onto the surface to resemble monster eyeballs. Allow to cool completely before cutting into desired bite-sized pieces.
Important Information
Nutrition Facts (Per Serving)
It is important to consider this information as approximate and not to use it as definitive health advice.
Allergy Information
Please check ingredients for potential allergens and consult a health professional if in doubt.


Leave a Comment