
Gingerbread Snowball Cookies start with a tender, melt-in-your-mouth cookie base that’s infused with classic gingerbread flavors. They’re rolled in a sweet, spiced sugar coating that gives them their signature ‘snowball’ appearance. These cookies are a delightful way to bring the cozy, warm spices of the holiday season right into your kitchen. They’re perfect for baking with family, sharing at cookie exchanges, or simply enjoying with a warm cup of tea on a chilly afternoon. The secret to their delightful texture is using softened butter and not overmixing the dough once the flour is added. This recipe is straightforward, and the results are consistently delicious, making them a go-to for anyone who loves the comforting taste of gingerbread. The aroma alone as they bake is enough to fill your home with festive cheer, evoking memories of Christmases past.
Ingredients:
- 1 Cup butter, softened
- 3/4 Cup confectioner’s sugar
- 2 Tablespoons molasses
- 1 teaspoon vanilla extract
- 2 1/4 Cups all-purpose flour
- 1 teaspoon cinnamon
- 1 teaspoon ginger
- 1/2 teaspoon nutmeg
- 1/2 teaspoon cloves
- 3/4 Cup confectioner’s sugar
- 1/2 teaspoon cinnamon
- 1/8 teaspoon ginger
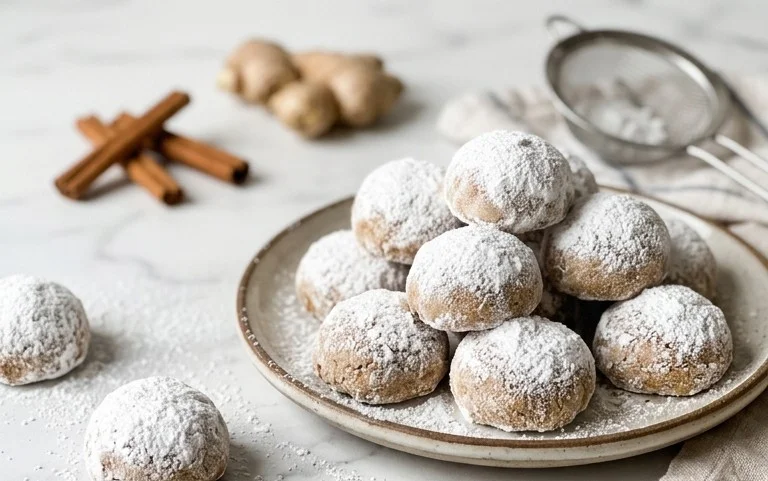
Gingerbread Snowball Cookies
These Gingerbread Snowball Cookies are a delightful way to bring the cozy, warm spices of the holiday season right into your kitchen. They start with a tender, melt-in-your-mouth cookie base that’s infused with classic gingerbread flavors, and then they’re rolled in a sweet, spiced sugar coating that gives them their signature “snowball” appearance. They’re perfect for baking with family, sharing at cookie exchanges, or simply enjoying with a warm cup of tea on a chilly afternoon. The secret to their delightful texture is using softened butter and not overmixing the dough once the flour is added. This recipe is straightforward, and the results are consistently delicious, making them a go-to for anyone who loves the comforting taste of gingerbread.
Ingredients:
- 1 Cup butter, softened
- 3/4 Cup confectioner’s sugar
- 2 Tablespoons molasses
- 1 teaspoon vanilla extract
- 2 1/4 Cups all-purpose flour
- 1 teaspoon cinnamon
- 1 teaspoon ginger
- 1/2 teaspoon nutmeg
- 1/2 teaspoon cloves
- 3/4 Cup confectioner’s sugar
- 1/2 teaspoon cinnamon
- 1/8 teaspoon ginger
Making the Cookie Dough
The first step to creating these wonderful cookies is to properly cream together the butter and sugar. This process incorporates air into the dough, which helps with the cookie’s tender texture. I like to use a stand mixer for this, but a hand mixer works perfectly well too. Make sure your butter is truly softened, meaning it’s pliable and easy to indent with a finger, but not melted. In a large bowl, beat the 1 Cup softened butter and 3/4 Cup confectioner’s sugar together until the mixture is light and fluffy. This usually takes about 3 to 5 minutes of consistent beating. Once that’s achieved, add in the 2 Tablespoons molasses and 1 teaspoon vanilla extract. Molasses is key for that deep, rich gingerbread flavor and gives the cookies their characteristic color. Beat these wet ingredients in until they are thoroughly combined with the butter and sugar mixture.
Next, it’s time to add the dry ingredients. In a separate medium-sized bowl, whisk together the 2 1/4 Cups all-purpose flour, 1 teaspoon cinnamon, 1 teaspoon ginger, 1/2 teaspoon nutmeg, and 1/2 teaspoon cloves. Using freshly ground spices will give you the most intense flavor, but pre-ground spices are perfectly fine. Whisking them together ensures that the spices are evenly distributed throughout the flour. Gradually add the dry ingredient mixture to the wet ingredients in the large bowl. Mix on low speed until just combined. It’s really important not to overmix the dough once the flour is added. Overmixing can develop the gluten in the flour too much, resulting in tougher cookies. You want to stop mixing as soon as you no longer see streaks of dry flour. The dough will be soft and slightly sticky at this stage, which is exactly what we’re looking for.
Shaping and Baking the Snowballs
Now comes the fun part: shaping the cookies. This dough is quite soft, so chilling it can make it a bit easier to handle, although it’s not strictly necessary. If you find it too sticky, you can cover the bowl with plastic wrap and refrigerate it for about 30 minutes before proceeding. Once the dough is ready, scoop out portions of the dough using a small cookie scoop or by rolling tablespoon-sized balls between your palms. Aim for uniform size so that the cookies bake evenly. As you roll them, try to make them as smooth as possible. The goal is a round ball that will become our “snowball.” Place these rolled cookie dough balls onto baking sheets lined with parchment paper. Parchment paper not only prevents sticking but also makes for easy cleanup. Leave a little space between each cookie, as they will spread slightly as they bake.
Preheat your oven to 350 degrees Fahrenheit (175 degrees Celsius). This temperature is ideal for baking most cookies, ensuring they cook through without burning on the outside. Bake the cookies for about 10 to 12 minutes. You’re looking for the edges to be lightly golden brown, but the centers should still appear soft. They will continue to set up as they cool. It’s tempting to bake them longer to ensure they are firm, but resist the urge, as this will result in dry cookies. Once they are out of the oven, let them sit on the baking sheet for about 5 minutes. This allows them to firm up enough to be moved without falling apart. After this short resting period, carefully transfer the cookies to a wire rack to cool completely.
Creating the Spiced Sugar Coating
While the cookies are cooling, it’s time to prepare the delicious spiced sugar coating that gives them their snowball appearance. In a shallow bowl or a pie plate, combine the remaining 3/4 Cup confectioner’s sugar with 1/2 teaspoon cinnamon and 1/8 teaspoon ginger. Whisk these ingredients together thoroughly to ensure the spices are evenly distributed throughout the sugar. This mixture will be sweet with a subtle warmth from the spices, complementing the gingerbread flavor of the cookie itself.
Once the cookies have cooled completely, it’s time to roll them in the spiced sugar. This is a two-step rolling process to ensure a good, even coating. First, gently roll each cooled cookie in the spiced sugar mixture until it’s lightly coated. Press very gently to help the sugar adhere. Then, allow these first-coated cookies to rest for about 10 minutes. This brief rest helps the first layer of sugar to adhere better to the cookie. After the rest, roll each cookie a second time in the spiced sugar mixture. This second coating will give them their signature thick, snowy appearance. Place the double-coated cookies back onto the wire rack or a clean plate to allow the coating to set. These cookies are best enjoyed within a few days of baking and can be stored in an airtight container at room temperature.
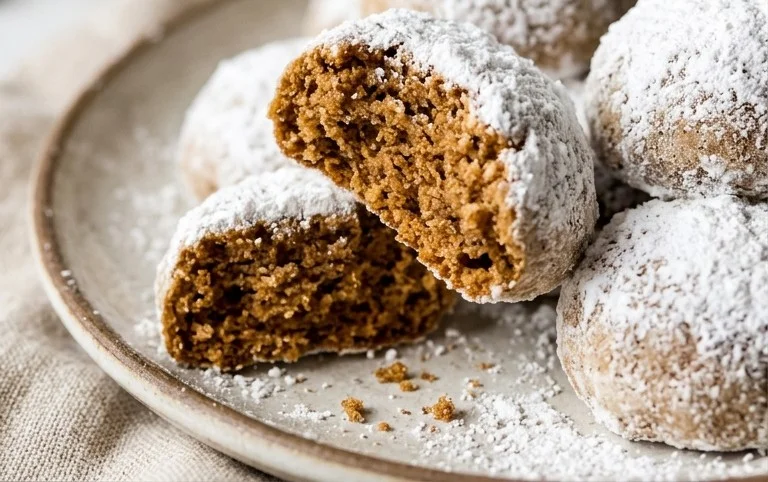
Conclusion:
These Gingerbread Snowball Cookies truly capture the essence of the holidays. Their delicate spice, tender texture, and festive snowy coating make them a stand-out treat. They’re not overly complicated, making them a joy to bake, whether you’re a beginner or have been making holiday cookies for years. The way the spices meld together is just wonderful, and they have that perfect melt-in-your-mouth quality that everyone loves. Serve them alongside a glass of cold milk or a warm mug of cider during holiday gatherings, or pack them into tins for thoughtful edible gifts. For a slight variation, you could add a pinch of black pepper to the cookie dough for a subtle kick, or even a tablespoon of finely chopped candied ginger for extra texture and zing. Storing them in an airtight container at room temperature keeps them fresh for up to a week, though they rarely last that long!
Frequently Asked Questions:
Can I make these cookies ahead of time?
Yes, absolutely. Gingerbread Snowball Cookies can be baked a few days in advance and stored in an airtight container at room temperature. They often taste even better the next day as the flavors meld.
What is the best way to store them?
Store the cooled cookies in a single layer or with parchment paper between layers in an airtight container. Keep them at room temperature, away from direct sunlight and heat.
My cookies spread too much. What went wrong?
This can happen if your butter was too soft or melted, or if you overmixed the dough after adding the flour. Make sure your butter is softened but not greasy, and mix the flour in just until combined.
Gingerbread Snowball Cookies
Delightful, melt-in-your-mouth snowball cookies with a warm gingerbread spice.
Ingredients
-
1 Cup butter, softened
-
3/4 Cup confectioner’s sugar
-
2 Tablespoons molasses
-
1 teaspoon vanilla extract
-
2 1/4 Cups all-purpose flour
-
1 teaspoon cinnamon
-
1 teaspoon ginger
-
1/2 teaspoon nutmeg
-
1/2 teaspoon cloves
-
3/4 Cup confectioner’s sugar (for rolling)
-
1/2 teaspoon cinnamon (for rolling)
-
1/8 teaspoon ginger (for rolling)
Instructions
-
Step 1
In a large bowl, cream together the softened butter and 3/4 cup confectioner’s sugar until light and fluffy. -
Step 2
Beat in the molasses and vanilla extract until well combined. -
Step 3
In a separate bowl, whisk together the flour, 1 teaspoon cinnamon, 1 teaspoon ginger, nutmeg, and cloves. -
Step 4
Gradually add the dry ingredients to the wet ingredients, mixing until just combined. Do not overmix. -
Step 5
Roll the dough into 1-inch balls and place them on ungreased baking sheets. -
Step 6
Bake at 350°F (175°C) for 10-12 minutes, or until the edges are lightly golden. The centers should still be soft. -
Step 7
While the cookies are still warm, combine the remaining 3/4 cup confectioner’s sugar, 1/2 teaspoon cinnamon, and 1/8 teaspoon ginger in a shallow bowl. -
Step 8
Gently roll the warm cookies in the sugar mixture until fully coated. Allow to cool completely on a wire rack.
Important Information
Nutrition Facts (Per Serving)
It is important to consider this information as approximate and not to use it as definitive health advice.
Allergy Information
Please check ingredients for potential allergens and consult a health professional if in doubt.



Leave a Comment