
The scent of Danish butter cookies baking is pure comfort. These delicate, melt-in-your-mouth cookies are deceptively simple to make, relying on good quality butter and a few key ingredients to achieve their signature crumbly texture and rich flavor. They’re perfect for an afternoon treat with a cup of tea, a special holiday bake, or even a thoughtful homemade gift. The magic is in the butter, and using European-style butter with a higher fat content really makes a difference. These Danish butter cookies are a classic for a reason. Unlike many modern cookies that are chewy or cakey, these have a crisp yet tender bite that crumbles beautifully. It’s this texture, combined with the pure butter flavor, that makes them so addictive. You can create these delightful cookies right in your own kitchen with just a few simple steps.
Ingredients:
- 1 cup (227 g) European salted butter (room temperature)
- 1/2 cup (100 g) granulated sugar
- 1/8 teaspoon salt
- 2 egg yolks
- 2 teaspoons (10 g) vanilla extract
- 1 tablespoon (15 g) whole milk (or more to soften)
- 2 cups (220 g) all-purpose flour
- 1/2 cup (50 g) cake flour
- coarse sugar (for decorating)
Creaming the Butter and Sugar
Start by ensuring your butter is truly at room temperature. It should be soft enough to easily indent with your finger, but not so soft that it’s greasy or melting. This is essential for proper creaming. In a large bowl, combine the softened European salted butter with the granulated sugar and the 1/8 teaspoon of salt. Using an electric mixer (a stand mixer with a paddle attachment is ideal, but a hand mixer works too), cream these ingredients together on medium-high speed for about 3-5 minutes. You’re looking for a pale, fluffy mixture. This process incorporates air into the dough, which contributes to the cookies’ light texture.
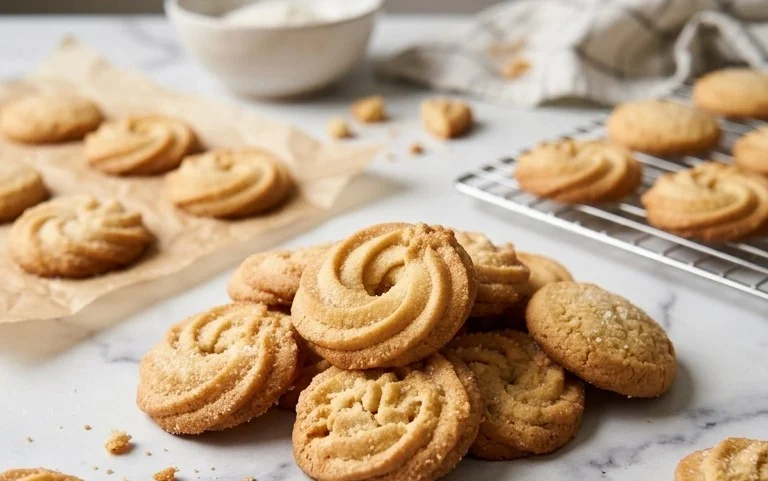
Danish Butter Cookies (Melt in your mouth)
The scent of Danish butter cookies baking is pure comfort. These delicate, melt-in-your-mouth cookies are deceptively simple to make, relying on good quality butter and a few key ingredients to achieve their signature crumbly texture and rich flavor. They’re perfect for an afternoon treat with a cup of tea, a special holiday bake, or even a thoughtful homemade gift. The magic is in the butter, and using European-style butter with a higher fat content really makes a difference.
Ingredients:
- 1 cup (227 g) European salted butter (room temperature)
- 1/2 cup (100 g) granulated sugar
- 1/8 teaspoon salt
- 2 egg yolks
- 2 teaspoons (10 g) vanilla extract
- 1 tablespoon (15 g) whole milk (or more to soften)
- 2 cups (220 g) all-purpose flour
- 1/2 cup (50 g) cake flour
- coarse sugar (for decorating)
Creaming the Butter and Sugar
Start by ensuring your butter is truly at room temperature. It should be soft enough to easily indent with your finger, but not so soft that it’s greasy or melting. This is essential for proper creaming. In a large bowl, combine the softened European salted butter with the granulated sugar and the 1/8 teaspoon of salt. Using an electric mixer (a stand mixer with a paddle attachment is ideal, but a hand mixer works too), cream these ingredients together on medium-high speed for about 3-5 minutes. You’re looking for a pale, fluffy mixture. This process incorporates air into the dough, which contributes to the cookies’ light texture and helps them spread just the right amount when baking. Scrape down the sides of the bowl a couple of times during this stage to ensure everything is evenly incorporated. Don’t rush this step; it’s fundamental to the cookie’s final structure.
Adding the Wet Ingredients
Once the butter and sugar are well-creamed, it’s time to add the egg yolks. Add them one at a time, beating well after each addition until fully incorporated. The yolks add richness and help bind the dough. Next, mix in the vanilla extract. Give it a good stir to distribute the vanilla’s aromatic flavor throughout the mixture. Now, for the tablespoon of whole milk. This might seem like a small amount, but it helps to achieve the perfect consistency. If your dough feels a little too stiff at this point, you can add an extra teaspoon or two of milk, a little at a time, until it reaches a workable, slightly soft consistency. Be careful not to add too much milk, as this can make the cookies spread too much during baking.
Incorporating the Dry Ingredients
In a separate medium bowl, whisk together the all-purpose flour and the cake flour. The combination of the two flours is key to achieving that signature tender, crumbly texture. All-purpose flour provides structure, while cake flour, with its lower protein content, makes the cookies more delicate and tender. Gradually add the flour mixture to the wet ingredients. Mix on low speed until just combined. It’s very important not to overmix the dough at this stage. Overmixing develops the gluten in the flour, which will result in tough cookies. You want to mix until there are no visible streaks of flour remaining. The dough will be quite soft and may seem a bit sticky, but that’s exactly what you want.
Shaping and Baking the Cookies
There are a few ways to shape these cookies, depending on the look you prefer. For traditional Danish butter cookies, you can use a piping bag fitted with a large star tip. Fill the piping bag with the dough and pipe small rosettes or swirls onto baking sheets lined with parchment paper. Leave about 2 inches between each cookie, as they will spread slightly. Alternatively, you can simply roll small portions of the dough into balls and then flatten them slightly with the palm of your hand or the bottom of a glass. For an even simpler approach, you can chill the dough for about 30 minutes, then roll it into a log and slice it into cookies about 1/2 inch thick. Whichever method you choose, you can sprinkle the tops with coarse sugar for a delightful crunch and sparkle before baking. Preheat your oven to 350°F (175°C). Bake the cookies for 10-12 minutes, or until the edges are lightly golden brown. The centers should still appear slightly pale. Do not overbake, as this will make them hard instead of melt-in-your-mouth tender. Keep an eye on them, as oven temperatures can vary.
Cooling and Storing
Once baked, let the cookies cool on the baking sheet for 5 minutes before carefully transferring them to a wire rack to cool completely. This initial cooling on the baking sheet allows them to firm up just enough to be moved without breaking. They will be quite delicate when warm. Danish butter cookies are best stored in an airtight container at room temperature. They can stay fresh for up to a week. If they lose some of their crispness, you can briefly re-crisp them in a low oven (around 200°F / 95°C) for a few minutes. These cookies are a joy to make and even more of a joy to eat, offering a taste of simple, pure butter goodness.
Conclusion:
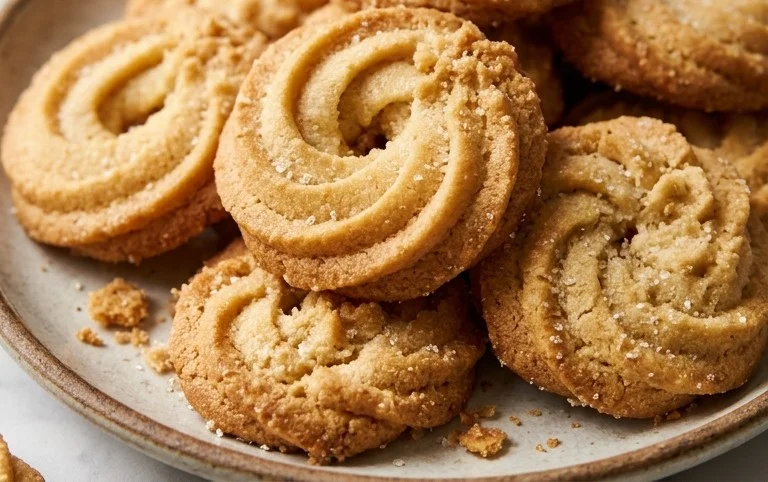
Baking these Danish butter cookies is a rewarding experience, filling your home with a comforting aroma and your cookie jar with pure bliss. The simple ingredients and straightforward method result in a cookie that truly melts in your mouth, offering a delicate crispness and rich butter flavor that is simply unmatched. They are fantastic on their own, but also pair beautifully with coffee, tea, or even a cold glass of milk. For a touch of elegance, try piping the dough into swirls before baking, or sprinkle them with a few extra crystals of coarse sugar for a delightful crunch and shimmer. If you want to change things up, a tiny pinch of cardamom or almond extract can add a subtle twist to the classic vanilla flavor. These cookies keep well, making them a great option for making ahead of time. You can easily store them in an airtight container for up to a week, ensuring you always have a homemade treat on hand for unexpected guests or a quiet moment of indulgence. Give these classic Danish butter cookies a try – you’ll be delighted by how simple it is to achieve such a special result.
Frequently Asked Questions:
Why do my cookies spread too much?
This often happens if the butter is too soft when you start creaming, or if the dough is overmixed after adding the flour. Ensure your butter is softened, not melted, and mix the flour in just until combined. Chilling the dough for 30 minutes before baking can also help prevent excessive spreading.
Can I use regular butter instead of European-style butter?
Yes, you can, but European-style butter with its higher fat content (around 82% or more) contributes significantly to the tender, crumbly texture and rich flavor. If using regular unsalted butter, you might need to slightly adjust the salt to taste.
How should I store Danish Butter Cookies?
Once completely cooled, store these cookies in an airtight container at room temperature. They will stay fresh and retain their delightful texture for about 5 to 7 days. Avoid storing them with moist baked goods, as this can make them soggy.
Danish Butter Cookies (Melt in your mouth)
Classic Danish butter cookies known for their rich, buttery flavor and melt-in-your-mouth texture. Perfect with a cup of coffee or tea.
Ingredients
-
1 cup (227 g) European salted butter (room temperature)
-
1/2 cup (100 g) granulated sugar
-
1/8 teaspoon salt
-
2 egg yolks
-
2 teaspoons (10 g) vanilla extract
-
1 tablespoon (15 g) whole milk (or more to soften)
-
2 cups (220 g) all-purpose flour
-
1/2 cup (50 g) cake flour
-
coarse sugar (for decorating)
Instructions
-
Step 1
In a large bowl, cream together the softened butter, granulated sugar, and salt until light and fluffy. -
Step 2
Beat in the egg yolks and vanilla extract until well combined. -
Step 3
Gradually add the all-purpose flour and cake flour to the wet ingredients, mixing until just combined. If the dough is too stiff, add the tablespoon of milk, or a little more, to soften. -
Step 4
Spoon the dough into a piping bag fitted with a star tip. Pipe the dough onto baking sheets lined with parchment paper, forming desired shapes (e.g., swirls, ribbons). -
Step 5
Sprinkle the tops of the cookies with coarse sugar. -
Step 6
Bake in a preheated oven at 350°F (175°C) for 12-15 minutes, or until the edges are lightly golden brown. -
Step 7
Let the cookies cool on the baking sheets for a few minutes before transferring them to a wire rack to cool completely.
Important Information
Nutrition Facts (Per Serving)
It is important to consider this information as approximate and not to use it as definitive health advice.
Allergy Information
Please check ingredients for potential allergens and consult a health professional if in doubt.



Leave a Comment