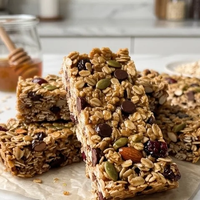
Protein Bars These homemade protein bars are a lifesaver for busy mornings or pre-workout fuel. They come together with minimal fuss and taste so much better than many store-bought options. The base is incredibly simple, relying on the creamy richness of peanut butter and the binding power of protein powder. What I love most is how easily they adapt to different flavors, making them endlessly interesting. You can whip up a batch on a Sunday and have healthy snacks ready for the entire week.
Ingredients:
1 1/2 cup peanut butter (or allergy-friendly sub like almond butter or sunflower seed butter)
3/4 cup protein powder (around 90g, choose your favorite flavor – vanilla or unflavored work well)
1/4 cup pure maple syrup (or honey, adjust for sweetness preference)
1/2 tsp salt
4 oz melted chocolate chips (optional, for drizzling or mixing in)
Preparation and Assembly
This recipe is delightfully straightforward, making it perfect even for beginners in the kitchen. The key is getting the right consistency, which usually means a bit of hands-on mixing.
Prepare Your Base Mixture: In a medium-sized mixing bowl, combine the peanut butter, protein powder, pure maple syrup, and salt. If you’re using a natural peanut butter that tends to separate, give it a good stir to recombine the oil before measuring. Using an allergy-friendly sub like almond butter or sunflower seed butter is perfectly fine here too; just ensure it’s smooth and creamy. The maple syrup provides sweetness and helps bind everything together into a dough-like consistency. If your mixture seems too dry and crumbly to hold its shape, add another tablespoon of peanut butter or maple syrup, a little at a time. If it’s too sticky, add a touch more protein powder. Aim for a consistency you can easily press into a pan without it sticking excessively to your hands. You want it to hold together when squeezed.
Protein Bars
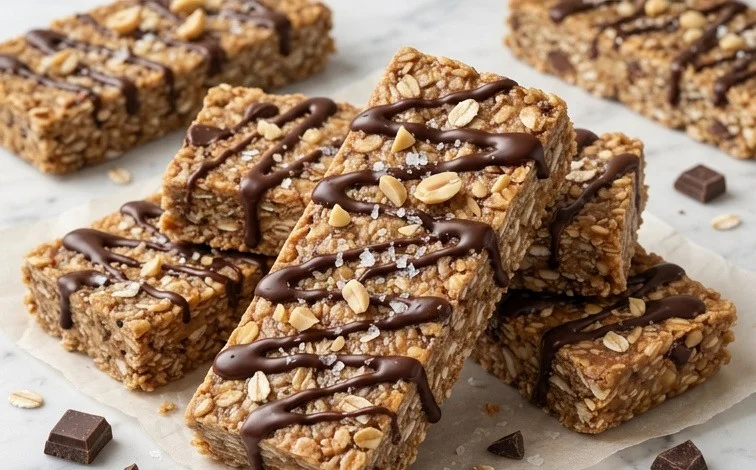
These homemade protein bars are a lifesaver for busy mornings or pre-workout fuel. They come together with minimal fuss and taste so much better than many store-bought options. The base is incredibly simple, relying on the creamy richness of peanut butter and the binding power of protein powder. What I love most is how easily they adapt to different flavors, making them endlessly interesting. You can whip up a batch on a Sunday and have healthy snacks ready for the entire week.
Ingredients:
- 1 1/2 cup peanut butter (or allergy-friendly sub like almond butter or sunflower seed butter)
- 3/4 cup protein powder (around 90g, choose your favorite flavor – vanilla or unflavored work well)
- 1/4 cup pure maple syrup (or honey, adjust for sweetness preference)
- 1/2 tsp salt
- 4 oz melted chocolate chips (optional, for drizzling or mixing in)
Preparation and Assembly
This recipe is delightfully straightforward, making it perfect even for beginners in the kitchen. The key is getting the right consistency, which usually means a bit of hands-on mixing.
- Prepare Your Base Mixture: In a medium-sized mixing bowl, combine the peanut butter, protein powder, pure maple syrup, and salt. If you’re using a natural peanut butter that tends to separate, give it a good stir to recombine the oil before measuring. Using an allergy-friendly sub like almond butter or sunflower seed butter is perfectly fine here too; just ensure it’s smooth and creamy. The maple syrup provides sweetness and helps bind everything together, but feel free to adjust the amount slightly based on how sweet you like your bars and the sweetness of your protein powder. A good starting point is the 1/4 cup, and you can always add a tablespoon more if the mixture feels too dry to combine.
- Mix Thoroughly: This is where you’ll get your hands a little messy, and that’s part of the fun! Use a sturdy spoon or a spatula to mix all the ingredients until they are well incorporated. You’re aiming for a thick, dough-like consistency that holds its shape. It might seem a bit stiff at first, especially if your protein powder is particularly absorbent. Don’t be afraid to really work the mixture, pressing it together. If it feels too dry and crumbly, you can add another tablespoon of maple syrup or a tiny splash of water or almond milk (just a teaspoon at a time) until it comes together. Conversely, if it feels too sticky or wet, add a little more protein powder, a tablespoon at a time. The goal is a pliable dough that you can press into a pan.
- Press into Pan: Line an 8×8 inch baking pan with parchment paper, leaving some overhang on the sides. This makes it super easy to lift the bars out later without sticking. Spoon the protein bar mixture into the prepared pan. Using the back of your spoon, a spatula, or even your hands (lightly dampened with water can help prevent sticking), press the mixture down firmly and evenly into the pan. You want a compact, dense layer. The firmer you press, the less likely your bars are to crumble when you cut them. Ensure the top surface is as smooth as possible for an even finish.
- Chill to Set: Once the mixture is pressed evenly into the pan, place the pan in the refrigerator for at least 30 minutes to an hour. This chilling time is essential. It allows the fats in the peanut butter to firm up and helps the protein powder absorb any remaining moisture, making the bars solid enough to cut cleanly. The longer you chill, the firmer they will become, which is ideal for a clean slice. If you’re in a real hurry, you can pop them in the freezer for about 15-20 minutes, but chilling in the fridge is generally preferred for the best texture.
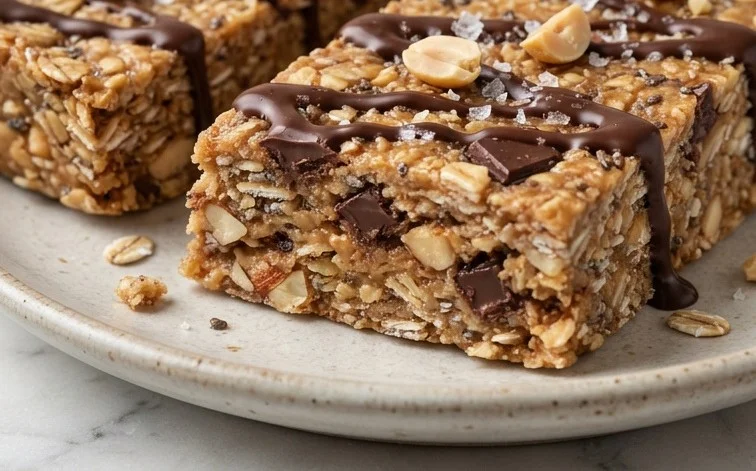
- Add Optional Chocolate and Cut: If you’re adding the melted chocolate chips, melt them gently in the microwave or over a double boiler. Once melted and smooth, you can either stir them into the main mixture before pressing into the pan (for a chocolate-peanut butter swirl effect) or drizzle them over the top of the chilled mixture. If drizzling, let the chocolate set slightly in the fridge for a few minutes before cutting. Once the bars are well-chilled and firm, lift the entire block out of the pan using the parchment paper overhang. Place it on a cutting board and use a sharp knife to cut it into your desired bar size. Squares or rectangles are common, but feel free to make them as big or small as you like.
Flavor Variations and Storage
The beauty of these protein bars lies in their adaptability. You can easily change the flavor profile to suit your taste. Consider adding a teaspoon of vanilla extract to the base mixture for a classic flavor. For a chocolate boost, you can add 1-2 tablespoons of unsweetened cocoa powder along with the protein powder. If you enjoy a hint of spice, a pinch of cinnamon can be lovely. For a textural contrast, you could fold in a handful of chopped nuts, seeds, or sugar-free chocolate chips after you’ve achieved the dough-like consistency but before pressing into the pan. Just be mindful that additions might alter the binding properties, and you may need to slightly adjust the liquid or protein powder amount.
These bars are best stored in an airtight container in the refrigerator. They will keep well for about a week. If you make a large batch, you can also freeze them individually wrapped for longer storage. Simply thaw them at room temperature for a few minutes before enjoying. This makes them a perfect grab-and-go option whenever hunger strikes.
Conclusion:
Making your own protein bars is a fantastic way to control exactly what goes into your snacks. These homemade protein bars are incredibly versatile, offering a convenient and satisfying bite whenever you need it. They are perfect for busy weekdays, post-workout recovery, or just a healthy treat. The simple base allows for endless flavor customizations, so you can keep them exciting batch after batch. Embrace the simplicity of this recipe and enjoy the benefit of having wholesome, delicious protein bars ready at your fingertips. You’ll find yourself reaching for them time and time again, knowing you made them with good ingredients.
FAQs
Can I use a different nut butter?
Yes, absolutely! Almond butter, cashew butter, or sunflower seed butter all work well as substitutes for peanut butter. Just ensure they are smooth and creamy for the best texture and binding.
How should I store the protein bars?
Store your protein bars in an airtight container in the refrigerator. They will keep well for up to two weeks. You can also freeze them for longer storage, up to 2-3 months. If frozen, simply let them thaw at room temperature for a few minutes before enjoying.
Can I add mix-ins like nuts or seeds?
Definitely! Feel free to mix in chopped nuts, seeds (chia, flax, or pumpkin seeds), shredded coconut, or even some sugar-free chocolate chips into the base mixture before pressing it into the pan. Just be mindful that adding too many dry ingredients might require a little extra binder like peanut butter or syrup.
Protein Bars
Easy homemade protein bars for a quick and healthy snack. Customizable with various flavors.
Ingredients
-
1 1/2 cup peanut butter
-
3/4 cup protein powder
-
1/4 cup pure maple syrup
-
1/2 tsp salt
-
4 oz melted chocolate chips
Instructions
-
Step 1
In a medium bowl, combine peanut butter, protein powder, maple syrup, and salt. -
Step 2
Mix until well combined and a dough-like consistency forms. -
Step 3
Press the mixture evenly into a parchment-lined 8×8 inch baking pan. -
Step 4
If using, melt the chocolate chips and drizzle over the top of the pressed mixture. -
Step 5
Place the pan in the refrigerator for at least 30 minutes to set. -
Step 6
Cut into bars and store in an airtight container in the refrigerator.
Important Information
Nutrition Facts (Per Serving)
It is important to consider this information as approximate and not to use it as definitive health advice.
Allergy Information
Please check ingredients for potential allergens and consult a health professional if in doubt.


Leave a Comment