
Candy Cookie Cone Christmas Trees are a festive and fun project that looks impressive but is surprisingly simple to make. They start with basic sugar cones and transform into edible, decorated trees perfect for holiday parties or as a sweet homemade gift. We’ll be using cookie dough baked right inside the cones, then decorating them with colorful candy melts and sprinkles. Ingredients: 12 sugar cones 12 long-size lollipop sticks 3 pieces of foil (each one about 10 inches long) 12 tablespoons of prepared cookie dough 12 tablespoons chocolate chips (semi-sweet or sweet) 8 ounces vanilla candy coating (4 squares of vanilla Almond Bark) 8 ounces chocolate candy coating (4 squares of chocolate Almond Bark) 1/2 cup shredded coconut 1/2 cup mini M&M candies 1/4 cup chocolate chips 1/4 cup white morsels Colored candy sprinkles Preparing Your Workspace and Cones Before we start assembling our trees, it’s important to have everything ready. This project involves melted candy coating, so it’s helpful to have a clean, clear space to work. Line a baking sheet with parchment paper or wax paper; this will be where your finished trees rest. Also, gather all your decorative elements—the shredded coconut, mini M&Ms, extra chocolate chips, white morsels, and sprinkles—and place them in small bowls so they are easy to grab when you need them. This will make the decorating process much smoother and less messy. The foil pieces are for creating a stable base for your cones while the cookie dough bakes inside.
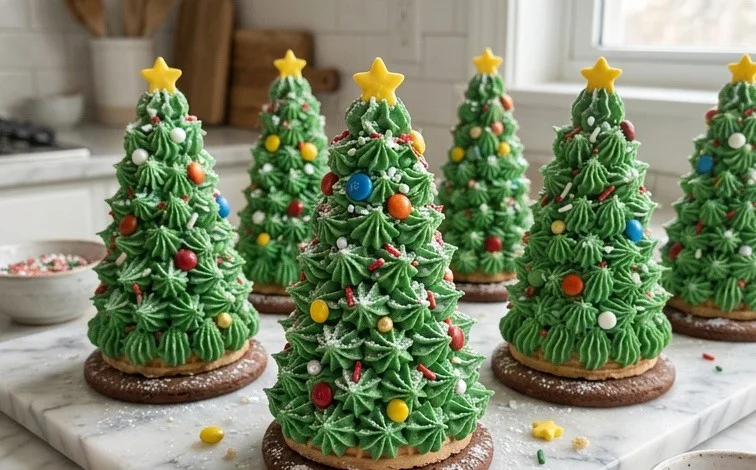
Candy Cookie Cone Christmas Trees
These Candy Cookie Cone Christmas Trees are a festive and fun project that looks impressive but is surprisingly simple to make. They start with basic sugar cones and transform into edible, decorated trees perfect for holiday parties or as a sweet homemade gift. We’ll be using cookie dough baked right inside the cones, then decorating them with colorful candy melts and sprinkles.
Ingredients:
- 12 sugar cones
- 12 long-size lollipop sticks
- 3 pieces of foil (each one about 10 inches long)
- 12 tablespoons of prepared cookie dough
- 12 tablespoons chocolate chips (semi-sweet or sweet)
- 8 ounces vanilla candy coating (4 squares of vanilla Almond Bark)
- 8 ounces chocolate candy coating (4 squares of chocolate Almond Bark)
- 1/2 cup shredded coconut
- 1/2 cup mini M&M candies
- 1/4 cup chocolate chips
- 1/4 cup white morsels
- Colored candy sprinkles
Preparing Your Workspace and Cones
Before we start assembling our trees, it’s important to have everything ready. This project involves melted candy coating, so it’s helpful to have a clean, clear space to work. Line a baking sheet with parchment paper or wax paper; this will be where your finished trees rest. Also, gather all your decorative elements—the shredded coconut, mini M&Ms, extra chocolate chips, white morsels, and sprinkles—and place them in small bowls so they are easy to grab when you need them. This will make the decorating process much smoother and less messy.
The foil pieces are for creating a stable base for your lollipop sticks. Take each 10-inch piece of foil and roll it into a sturdy cylinder, about 1 inch in diameter. These will act as holders to keep the lollipop sticks upright and the cones from tipping over while the candy coating sets.
Baking the Cookie “Trunks”
Our Christmas trees need a solid foundation, and that’s where the cookie dough and lollipop sticks come in.
- Insert the Lollipop Sticks: Take each sugar cone and gently insert a long-size lollipop stick into the wider opening, pushing it about halfway up into the cone. This stick will serve as the central support for your tree.
- Add the Cookie Dough and Chocolate Chips: Place about one tablespoon of prepared cookie dough into the tip of each cone, pressing it down gently. Then, add one tablespoon of chocolate chips on top of the cookie dough. This creates a delicious, chewy “trunk” for our edible trees. The chocolate chips will melt slightly during baking, adding extra flavor and binding the cookie dough.
- Prepare for Baking: Take your foil cylinders and stand them upright on a baking sheet. Place one cookie cone, with the lollipop stick inserted, into each foil cylinder. The foil will help keep the cones stable and prevent them from falling over in the oven. Make sure the cones are standing straight.
- Bake the Cookie Dough: Preheat your oven to 350°F (175°C). Bake the cones for approximately 10-12 minutes, or until the cookie dough is golden brown and cooked through. Keep a close eye on them, as cone tips can brown quickly. Once baked, carefully remove the baking sheet from the oven. Let the cones cool completely on the baking sheet within their foil holders. It’s essential they are fully cooled before proceeding to the next step, otherwise the candy coating will melt prematurely.
Decorating the Christmas Trees
Once your cookie-filled cones are completely cool, it’s time for the fun part – decorating them to look like festive Christmas trees!
- Melt the Candy Coating: Prepare your candy coating. You’ll need to melt both the vanilla and chocolate candy coating. The easiest way to do this is in separate microwave-safe bowls. Break each type of candy coating into pieces and microwave on medium power (50%) for 30-second intervals, stirring well after each interval, until smooth and melted. Be patient; do not overheat, as this can cause the coating to seize. You can also melt them in a double boiler if you prefer.
- Coat the Cones: Have your foil cylinders ready again, standing upright on a parchment-lined baking sheet. Dip the top, wider part of each cooled cone into the melted vanilla candy coating, allowing the excess to drip off. You want a good, even coating that will resemble snow or frosting. Immediately after coating, you can roll the wet candy coating in shredded coconut to give it a snowy, textured appearance. Alternatively, you can use the chocolate candy coating for a different color effect, or alternate between the two. Work quickly, as the candy coating sets rather fast.
- Add the “Garland” and “Ornaments”: While the vanilla or chocolate coating is still wet, use a spoon or a piping bag to drizzle the contrasting colored candy coating over the trees. If using vanilla coating on the whole tree, drizzle with chocolate. If you used chocolate coating, drizzle with vanilla. This creates a garland effect. Then, immediately press mini M&M candies into the wet candy coating to act as colorful “ornaments.” You can also sprinkle on extra chocolate chips or white morsels for added decoration.
- Finishing Touches with Sprinkles: For that extra festive sparkle, liberally apply colored candy sprinkles over the still-wet candy coating. You can go for a classic green and red theme, or choose any color combination that suits your holiday style. Ensure the sprinkles adhere well before the coating starts to set.
- Allow to Set: Place the decorated cookie cone Christmas trees back onto the parchment-lined baking sheet. Allow them to set completely at room temperature, or for faster setting, you can refrigerate them for about 15-20 minutes. Once fully hardened, they are ready to be displayed or enjoyed.
These trees are best enjoyed within a few days of making them. You can store them in an airtight container at room temperature. Avoid storing them in the refrigerator for too long, as condensation can make the candy coating appear dull. Enjoy your delicious and festive edible creations!
Conclusion:
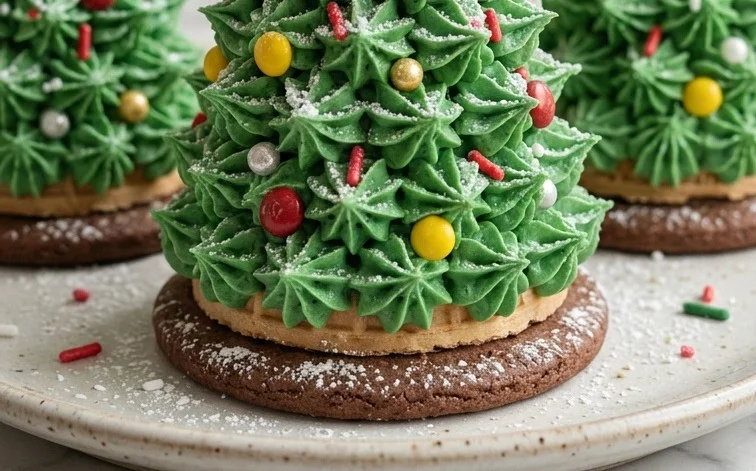
These Candy Cookie Cone Christmas Trees are a delightful addition to any holiday celebration. They offer a fun, hands-on activity for families and result in edible decorations that are almost too pretty to eat. Their festive appearance and sweet taste make them a hit with both kids and adults. They are perfect for decorating cookies, as a centerpiece on your holiday dessert table, or even as a unique edible gift for friends and neighbors. The base is a simple sugar cone, which gets filled with cookie dough and baked, creating a crunchy, cookie-lined cone. This is then transformed into a miniature Christmas tree using colorful candy melts and festive toppings like coconut for snow and M&Ms for ornaments.
Serving Suggestions: Serve these as part of a cookie platter, alongside hot chocolate, or as individual treats for guests.
Variations: You can experiment with different colored candy melts or different types of sprinkles. For a different flavor, try a chocolate cookie dough. You could also use different candies for decoration, like small gumdrops or silver dragees.
FAQ: Can I make these ahead of time?
Yes, you can assemble the trees a day or two in advance. Store them in an airtight container at room temperature, away from direct sunlight and heat, to prevent the candy coating from melting or becoming sticky.
FAQ: What if I don’t have candy melts?
You can substitute with white or dark chocolate chips melted with a little bit of vegetable shortening (about 1 teaspoon per cup of chocolate) to help with fluidity. However, candy melts tend to set up firmer and faster, making them ideal for decorating.
Candy Cookie Cone Christmas Trees
Edible Christmas trees made from sugar cones, cookie dough, and festive candies, perfect for holiday decorating and treats.
Ingredients
-
12 sugar cones
-
12 long-size lollipop sticks
-
3 pieces of foil (each one about 10 inches long)
-
12 tablespoons of prepared cookie dough
-
12 tablespoons chocolate chips (semi-sweet or sweet)
-
8 ounces vanilla candy coating
-
8 ounces chocolate candy coating
-
1/2 cup shredded coconut
-
1/2 cup mini M&M candies
-
1/4 cup chocolate chips
-
1/4 cup white morsels
-
Colored candy sprinkles
Instructions
-
Step 1
Prepare your work surface by covering it with parchment paper or wax paper. Have all your ingredients measured and ready. -
Step 2
For each tree, insert a lollipop stick into the wide end of a sugar cone. Wrap the bottom 10 inches of the lollipop stick in foil. This will be the trunk. -
Step 3
Place 1 tablespoon of prepared cookie dough into a microwave-safe bowl. Add 1 tablespoon of chocolate chips. Microwave for 15-20 seconds, or until softened and slightly melty. Stir to combine and form a ‘star’ shape with the dough on top of the cone, pressing it onto the sides to create the tree’s branches. Repeat for all 12 cones. -
Step 4
Melt the vanilla candy coating and chocolate candy coating separately in microwave-safe bowls according to package directions (usually in 30-second intervals, stirring between each). Stir in 1/4 cup shredded coconut into the melted vanilla coating. Stir in 1/4 cup mini M&M candies into the melted chocolate coating. -
Step 5
Dip each cookie dough-topped cone into the melted vanilla candy coating, allowing excess to drip off. Place on parchment paper. While the vanilla coating is still wet, press the remaining shredded coconut onto the sides to resemble snow. Repeat with the chocolate coating for some trees, and press the mini M&Ms onto the sides. -
Step 6
While the candy coating is still slightly wet, decorate the trees with colored candy sprinkles. You can also add a few extra chocolate chips or white morsels as ornaments. -
Step 7
Allow the candy coating to set completely. This can be done at room temperature or in the refrigerator for about 10-15 minutes.
Important Information
Nutrition Facts (Per Serving)
It is important to consider this information as approximate and not to use it as definitive health advice.
Allergy Information
Please check ingredients for potential allergens and consult a health professional if in doubt.


Leave a Comment