
This Peppermint Bark Recipe is a holiday tradition in my house. I love making it because it smells amazing while it’s setting and tastes even better. The way the rich, dark chocolate melts into the smooth white chocolate, studded with bright, crunchy peppermint pieces, is just so satisfying. It’s a classic holiday candy that brings a festive touch to any gathering. People love it because it’s not overly complicated to make but feels incredibly special. The key to this peppermint bark is good quality chocolate; it makes a huge difference in the final texture and taste. Plus, you can customize the size of your peppermint pieces from fine dust to chunky bits for different textures.
Ingredients:
- 18 ounces dark chocolate chips (or semi-sweet/milk chocolate)
- 18 ounces white chocolate chips
- 1/2 cup crushed candy canes or hard peppermint candies
Instructions:
Prepare Your Workspace: First, you need to get your baking sheet ready. Line a large baking sheet (about 10×15 inches is a good size) with parchment paper. Make sure the parchment paper covers the entire surface and goes up the sides a bit; this will make it super easy to lift the bark out once it’s set. Also, have your crushed candy canes ready to go. If you’re crushing them yourself, you can put them in a zip-top bag and give them a good whack with a rolling pin or the flat side of a meat mallet. You want a mix of fine dust and some small pieces, not just powder.
Melt the Dark Chocolate: In a medium-sized, heatproof bowl, add the 18 ounces of dark chocolate chips. You can melt chocolate using a double boiler or in the microwave. For the microwave method, heat the chocolate in 30-second intervals, stirring carefully between each interval until it’s almost completely melted. Remove from heat and stir until smooth. If you see any small bits of chocolate remaining, the residual heat will melt them. Be careful not to overheat, or the chocolate can seize up and become grainy. Once smooth, pour the melted dark chocolate onto the parchment-lined baking sheet. Spread it evenly into a thin layer, about 1/4 inch thick, using an offset spatula or the back of a spoon. Work quickly before the chocolate starts to set.
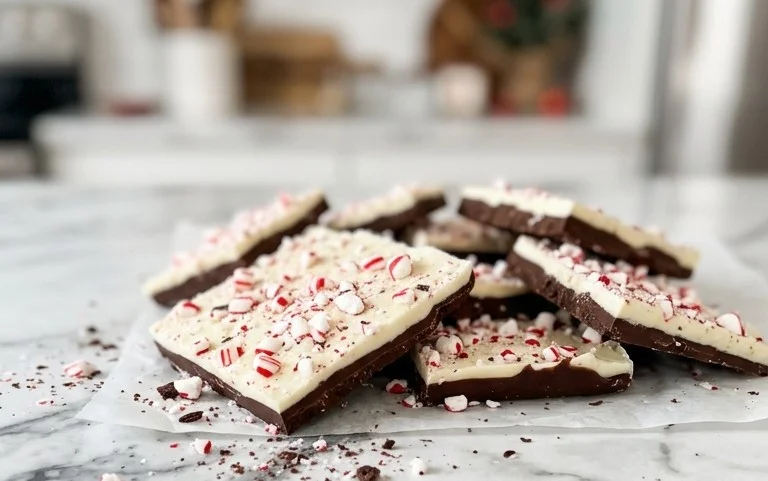
Peppermint Bark Recipe
This peppermint bark is something I make every year around the holidays. It’s so easy to put together, and the contrast between the rich dark chocolate and the sweet, cool white chocolate with those crunchy peppermint bits is just fantastic. It makes a wonderful homemade gift or a festive treat to have on hand for unexpected guests. The key is using good quality chocolate and taking your time when melting it to get a smooth finish.
Ingredients:
- 18 ounces dark chocolate chips (you can use semi-sweet or milk chocolate chips if you prefer a sweeter bark)
- 18 ounces white chocolate chips
- 1/2 cup crushed candy canes or hard peppermint candies
Instructions:
-
Prepare Your Workspace: First, you need to get your baking sheet ready. Line a large baking sheet (about 10×15 inches is a good size) with parchment paper. Make sure the parchment paper covers the entire surface and goes up the sides a bit; this will make it super easy to lift the bark out once it’s set. Also, have your crushed candy canes ready to go. If you’re crushing them yourself, you can put them in a zip-top bag and give them a good whack with a rolling pin or the flat side of a meat mallet. You want a mix of fine dust and some small pieces, not just powder.
-
Melt the Dark Chocolate: In a medium-sized, heatproof bowl, add the 18 ounces of dark chocolate chips. You can melt chocolate using a double boiler or in the microwave. For the microwave method, heat the chocolate in 30-second intervals, stirring well after each interval. Be patient here; it’s better to melt it slowly than to overheat it and scorch it. You’re looking for smooth, glossy chocolate with no lumps. If using a double boiler, fill a saucepan with about an inch of water and bring it to a gentle simmer. Place the bowl of chocolate chips over the saucepan, making sure the bottom of the bowl doesn’t touch the water. Stir the chocolate constantly until it’s completely melted and smooth. Once melted, remove the bowl from the heat.
-
Spread the Dark Chocolate Layer: Pour the melted dark chocolate onto the prepared parchment-lined baking sheet. Use an offset spatula or the back of a spoon to spread it into a thin, even layer, about 1/8 to 1/4 inch thick. Try to get it as uniform as possible so the bark bakes and breaks evenly. If you want a perfectly rectangular bark, you can use a ruler to help guide your spreading, but for a rustic look, just aim for an even coating across most of the baking sheet. Let this layer set slightly. You don’t need it to be completely hard, but it should be firm enough that the white chocolate won’t completely sink into it. You can speed this up by placing the baking sheet in the refrigerator for about 10-15 minutes, but keep an eye on it; you don’t want it to get too cold and brittle.
-
Melt and Spread the White Chocolate: While the dark chocolate layer is setting, melt the 18 ounces of white chocolate chips using the same method as the dark chocolate (microwave in 30-second intervals or a double boiler). White chocolate can be a bit trickier to melt as it’s more prone to scorching, so definitely stir frequently and heat gently. Once it’s smooth and glossy, remove it from the heat. If your dark chocolate layer is firm but not completely hardened, you can carefully spoon the melted white chocolate over the dark chocolate layer. Use your offset spatula again to spread it into another thin, even layer. Again, try to get it as uniform as possible. Work relatively quickly so the white chocolate doesn’t start to set before you can spread it evenly.
-
Add the Peppermint Topping and Set: Immediately after spreading the white chocolate, sprinkle the 1/2 cup of crushed candy canes evenly over the top. You can gently press them down with your hands or the spatula to help them adhere to the melted white chocolate. Once the candy canes are sprinkled, let the bark sit at room temperature until it is completely firm. This can take a few hours, depending on the temperature of your kitchen. For faster results, you can carefully place the baking sheet in the refrigerator for about 30-60 minutes, or until the chocolate is hard. Once it’s fully set, lift the parchment paper with the bark off the baking sheet. Break the bark into pieces of various sizes by hand or use a sharp knife to score it and then break it along those lines. Store your peppermint bark in an airtight container at room temperature.
Tips for Success:
When melting chocolate, it’s important to use clean, dry bowls and utensils. Any water can cause chocolate to seize, meaning it becomes thick and lumpy, and it’s very difficult to recover from that. If you find your chocolate is getting too thick as you work, you can gently warm it up again for a few seconds in the microwave or over the double boiler. Don’t be afraid to experiment with the type of chocolate. While dark and white is a classic combination, you could try semi-sweet and white, or even milk chocolate if you have a sweet tooth. Some people like to add a tiny pinch of peppermint extract to the white chocolate for an extra minty kick, but do this very sparingly as it’s potent. For a decorative touch, you can drizzle a little bit of the melted dark chocolate over the white chocolate layer before adding the candy canes, or vice versa. For storage, as long as it’s kept in an airtight container in a cool, dry place, peppermint bark can last for several weeks. If your kitchen is very warm, it’s best to store it in the refrigerator, but let it come to room temperature for a few minutes before serving for the best texture.
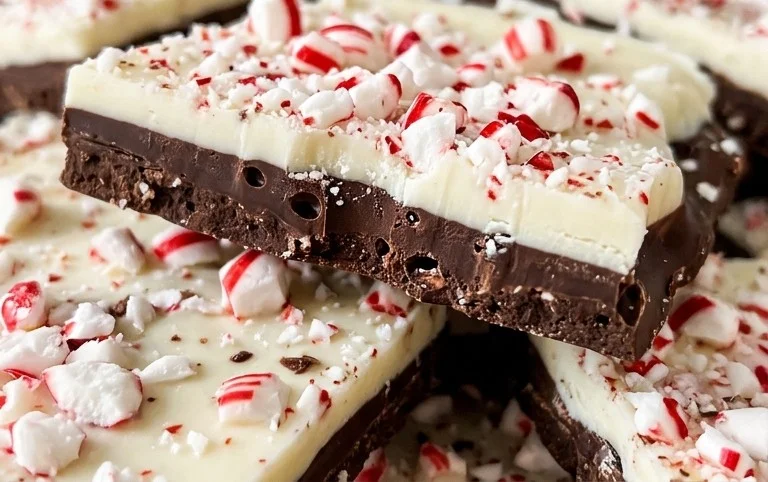
Conclusion:
This Peppermint Bark Recipe truly captures the spirit of the holidays. It’s simple enough for any home cook but impressive enough to give as a gift or serve at a party. The contrast of the deep chocolate with the cool, sweet peppermint is always a hit. Once you’ve made it, you’ll see why it’s such a popular treat year after year. Enjoy sharing this festive candy!
Serving Suggestions: This peppermint bark is fantastic on its own, but you can also break it into smaller pieces and add it to cookie platters, gift tins, or even use it as a topping for ice cream or hot chocolate. For a beautiful presentation, arrange different-sized pieces artfully.
Variations: While this classic dark and white chocolate version is wonderful, feel free to experiment. You could use milk chocolate for a sweeter base, or add a pinch of cayenne pepper to the dark chocolate layer for a spicy kick. If you don’t have candy canes, crushed peppermint candies work just as well. You can also try different types of chocolate chips or even drizzle a third chocolate color over the top once it has set slightly.
Storage: Store the peppermint bark in an airtight container at cool room temperature. It can also be refrigerated, but let it come to room temperature before serving for the best texture. It should keep well for up to two weeks.
Frequently Asked Questions:
What is the best way to melt chocolate for peppermint bark?
Using a double boiler is a gentle method. If microwaving, use 30-second intervals, stirring each time, and remove when almost melted, stirring until smooth. Avoid overheating, which makes chocolate seize.
Can I use different types of chocolate?
Absolutely. While dark and white are classic, feel free to use semi-sweet or milk chocolate chips for the base. You can also experiment with colored melting chocolates for decoration.
How should I store homemade peppermint bark?
Store in an airtight container at cool room temperature or in the refrigerator. Let it warm up slightly before eating if refrigerated for the best flavor and texture.
Peppermint Bark Recipe
A festive and easy-to-make peppermint bark recipe, perfect for holiday gifting or enjoying as a sweet treat. Features layers of rich dark and creamy white chocolate, topped with crunchy crushed candy canes.
Ingredients
-
18 ounces dark chocolate chips
-
18 ounces white chocolate chips
-
1/2 cup crushed candy canes
-
1 tablespoon coconut oil (optional, for smoother melting)
-
1/2 teaspoon peppermint extract (optional, for extra peppermint flavor)
-
1/4 cup crushed peppermint candies
Instructions
-
Step 1
Line a baking sheet with parchment paper. -
Step 2
Melt the dark chocolate chips. You can do this in a microwave-safe bowl in 30-second intervals, stirring between each, or use a double boiler. -
Step 3
Pour the melted dark chocolate onto the prepared baking sheet and spread it into a thin, even layer using an offset spatula. -
Step 4
Allow the dark chocolate to set slightly, about 15-20 minutes, or until it’s firm but not completely hardened. -
Step 5
Melt the white chocolate chips using the same method as the dark chocolate. Stir in the peppermint extract if using. -
Step 6
Pour the melted white chocolate over the semi-hardened dark chocolate layer and spread it evenly. Work quickly before it sets. -
Step 7
Immediately sprinkle the crushed candy canes and crushed peppermint candies evenly over the white chocolate layer. -
Step 8
Gently press the candy canes into the white chocolate with your hands or the back of a spoon to help them adhere. -
Step 9
Refrigerate the baking sheet for at least 1 hour, or until the peppermint bark is completely firm and set. -
Step 10
Once firm, break the peppermint bark into pieces by hand or with a knife.
Important Information
Nutrition Facts (Per Serving)
It is important to consider this information as approximate and not to use it as definitive health advice.
Allergy Information
Please check ingredients for potential allergens and consult a health professional if in doubt.



Leave a Comment