
Peppermint bark is that classic holiday treat, a beautiful and delicious combination of crisp peppermint and rich chocolate. It’s so easy to make at home, you’ll wonder why you ever bought it. The contrast between the smooth, melting chocolate and the sharp, sweet crunch of the candy canes is what makes this so satisfying. It’s perfect for holiday cookie trays, edible gifts, or just a special treat for yourself during the festive season. Ingredients: 18 ounces dark chocolate chips (you can use semi-sweet or milk chocolate chips if you prefer a sweeter bark) 18 ounces white chocolate chips 1/2 cup crushed candy canes or hard peppermint candies Instructions: Prepare Your Workspace and Candy Canes Before you start melting chocolate, get everything ready. Line a large baking sheet (about 11×17 inches is ideal) with parchment paper or wax paper. You want the paper to extend up the sides a bit so you can easily lift the finished bark out. Next, crush your candy canes. You can put them in a sturdy zip-top bag and then gently bash them with a rolling pin or a heavy pan. Aim for pieces that range from fine dust to small chunks – this variety adds nice texture. You can also use a food processor for a finer crush, but be careful not to turn it into powder. Set the crushed candy canes aside; you’ll need them shortly. If your candy canes are sticky, you might want to let them air dry for a few minutes after crushing to prevent clumping. Melt the Dark Chocolate Layer
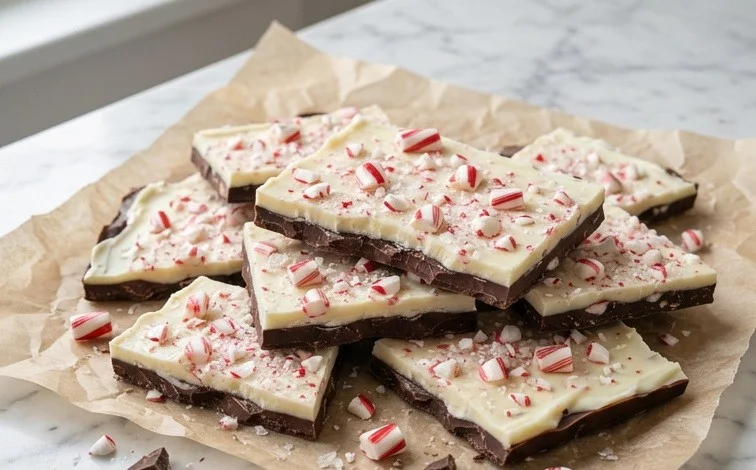
Peppermint Bark Recipe
Peppermint bark is that classic holiday treat, a beautiful and delicious combination of crisp peppermint and rich chocolate. It’s so easy to make at home, you’ll wonder why you ever bought it. The contrast between the smooth, melting chocolate and the sharp, sweet crunch of the candy canes is what makes this so satisfying. It’s perfect for holiday cookie trays, edible gifts, or just a special treat for yourself during the festive season.
Ingredients:
- 18 ounces dark chocolate chips (you can use semi-sweet or milk chocolate chips if you prefer a sweeter bark)
- 18 ounces white chocolate chips
- 1/2 cup crushed candy canes or hard peppermint candies
Instructions:
-
Prepare Your Workspace and Candy Canes
Before you start melting chocolate, get everything ready. Line a large baking sheet (about 11×17 inches is ideal) with parchment paper or wax paper. You want the paper to extend up the sides a bit so you can easily lift the finished bark out. Next, crush your candy canes. You can put them in a sturdy zip-top bag and then gently bash them with a rolling pin or a heavy pan. Aim for pieces that range from fine dust to small chunks – this variety adds nice texture. You can also use a food processor for a finer crush, but be careful not to turn it into powder. Set the crushed candy canes aside; you’ll need them shortly. If your candy canes are sticky, you might want to let them air dry for a few minutes after crushing to prevent clumping.
-
Melt the Dark Chocolate Layer
Now, it’s time to melt the dark chocolate. You have a couple of reliable methods for this. The stovetop double boiler method is excellent: fill a saucepan with about an inch of water and bring it to a gentle simmer. Place a heatproof bowl (glass or metal) on top of the saucepan, making sure the bottom of the bowl doesn’t touch the water. Pour the dark chocolate chips into the bowl. Stir constantly with a rubber spatula until the chocolate is completely melted and smooth. The key here is gentle heat; if the water boils too vigorously, it can make the chocolate seize. Alternatively, you can melt the chocolate in the microwave. Place the dark chocolate chips in a microwave-safe bowl and heat on 50% power in 30-second intervals, stirring well after each interval, until melted and smooth. This method requires more attention to avoid overheating. Once melted, let it sit for a minute or two to cool slightly before spreading.
-
Spread and Top the Dark Chocolate Layer
Pour the slightly cooled melted dark chocolate onto your prepared baking sheet. Use your spatula to spread it into an even layer, about 1/8 to 1/4 inch thick. You don’t need it to be perfectly smooth, as the texture adds to the appeal. While the dark chocolate is still wet, sprinkle about half of your crushed candy canes evenly over the surface. Press them down gently with your spatula or the palm of your hand so they adhere to the chocolate. This layer needs to set partially before you add the white chocolate. You can speed this up by placing the baking sheet in the refrigerator for about 10-15 minutes, or until the dark chocolate is firm to the touch but not completely hard.
-
Melt and Spread the White Chocolate Layer
While the dark chocolate layer is chilling, melt your white chocolate chips. White chocolate can be a bit more temperamental than dark chocolate, so melting it slowly and carefully is important. Use the same double boiler method or microwave technique as with the dark chocolate. Remember to use 50% power in the microwave and stir frequently to prevent scorching or seizing. White chocolate can also be melted by adding a tiny bit of vegetable shortening or coconut oil (about 1 teaspoon per cup of chips) to help it melt more smoothly, but this is optional. Once the white chocolate is completely melted and smooth, let it cool for a minute or two, just like you did with the dark chocolate.
-
Complete the Bark and Chill
Once the dark chocolate layer is partially set, carefully spread the melted white chocolate evenly over the top. Make sure to cover the entire surface. If any of the dark chocolate has hardened too much, you can gently warm it with your spatula as you spread the white chocolate. Immediately sprinkle the remaining crushed candy canes over the white chocolate layer. Again, press them down lightly to ensure they stick. You can also use the back of a clean spatula to gently swirl the candy canes into the white chocolate for a more artistic look, but be careful not to mix the layers too much. Place the entire baking sheet into the refrigerator and let the peppermint bark chill for at least 1 to 2 hours, or until it is completely firm and set. You want it solid all the way through before breaking.
-
Break and Store
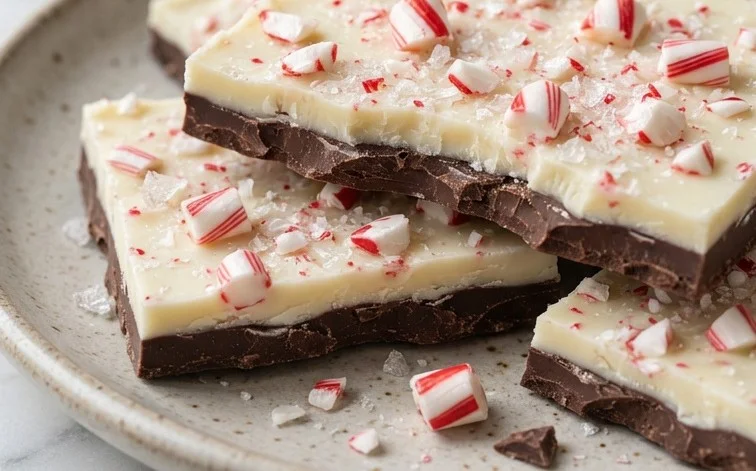
Once the peppermint bark is fully set, lift the parchment paper off the baking sheet. You can then break the bark into pieces by hand. For cleaner breaks, you can score the bark with a sharp knife while it’s still firm but before it’s fully rock hard, and then snap along the lines. Alternatively, use a sturdy knife or a bench scraper to chop it into irregular pieces. Store the peppermint bark in an airtight container at room temperature or in the refrigerator. If you store it in the refrigerator, allow it to come to room temperature for a few minutes before enjoying for the best flavor and texture. It keeps well for up to two weeks. This recipe makes a generous amount, perfect for sharing with friends, family, or colleagues during the holiday season.
Conclusion:
This peppermint bark recipe is a holiday winner for so many reasons. It’s incredibly straightforward, looks stunning on any dessert platter, and delivers that irresistible combination of sweet chocolate and refreshing peppermint. The crunchy candy cane bits are the perfect festive touch. You can easily make a big batch to share with neighbors, colleagues, or just enjoy throughout the week. It’s a treat that truly embodies the spirit of the season.
For serving, break the bark into irregular shards of various sizes for a rustic look. It pairs wonderfully with a warm mug of cocoa or coffee. If you want to switch things up, consider adding a pinch of sea salt to the dark chocolate layer before it sets, or a tiny bit of peppermint extract to the white chocolate for an extra minty punch.
Frequently Asked Questions:
Can I make peppermint bark ahead of time?
Yes, absolutely. Peppermint bark keeps well at room temperature in an airtight container for up to two weeks. Store it in a cool, dry place away from direct sunlight to prevent melting or discoloration.
What kind of chocolate is best for peppermint bark?
Good quality chocolate chips or bars will give you the best results. For this recipe, dark and white chocolate chips are listed, but feel free to use semi-sweet or even milk chocolate if that’s your preference. The key is to use chocolate that melts smoothly.
How should I store leftover peppermint bark?
Store your peppermint bark in an airtight container at room temperature. If your kitchen is particularly warm, you can store it in the refrigerator, but let it come to room temperature for a few minutes before serving for the best texture.
Peppermint Bark Recipe
A simple and festive recipe for classic peppermint bark, perfect for holiday gifting or enjoying yourself.
Ingredients
-
18 ounces dark chocolate chips
-
18 ounces white chocolate chips
-
1/2 cup crushed candy canes
-
1/4 teaspoon peppermint extract (optional, for enhanced flavor)
-
Pinch of salt (optional, to balance sweetness)
Instructions
-
Step 1
Line a baking sheet with parchment paper. Spread the crushed candy canes evenly on the parchment paper. -
Step 2
Melt the dark chocolate chips in a heatproof bowl set over a saucepan of simmering water, stirring until smooth. Alternatively, melt in the microwave in 30-second intervals, stirring between each. -
Step 3
Pour the melted dark chocolate over the crushed candy canes on the prepared baking sheet. Spread evenly with a spatula to form a thin layer. -
Step 4
Allow the dark chocolate layer to set slightly at room temperature, or speed up the process by refrigerating for about 10-15 minutes. -
Step 5
Melt the white chocolate chips using the same method as the dark chocolate. Stir in the peppermint extract and salt, if using, until smooth. -
Step 6
Once the dark chocolate is set, pour the melted white chocolate over it. Spread evenly to create the top layer of the bark. -
Step 7
Immediately sprinkle additional crushed candy canes over the white chocolate layer before it sets completely. Gently press them in. -
Step 8
Refrigerate the peppermint bark for at least 30 minutes, or until fully hardened. Once firm, break the bark into pieces.
Important Information
Nutrition Facts (Per Serving)
It is important to consider this information as approximate and not to use it as definitive health advice.
Allergy Information
Please check ingredients for potential allergens and consult a health professional if in doubt.



Leave a Comment