The aroma of freshly baked cookies often signals the end of summer, but for many parents, it also means the return of packing lunches. It can feel like a daily challenge to create meals that are not only nutritious but also appealing enough for picky eaters to actually consume. My strategy has always been to incorporate familiar flavors with a few fun twists. This recipe for “Submit a Party” Chicken Wraps is a go-to in my house because it’s simple to prepare, holds up well in a lunchbox, and is endlessly customizable. Kids can even get involved in the assembly, making it a fun activity and increasing their likelihood of eating what they’ve helped create. We’re using everyday ingredients that are likely already in your pantry, making this a practical choice for busy weeknights or weekend prep. Ingredients: 2 cups cooked shredded chicken (rotisserie chicken works great!) 1/2 cup mayonnaise 2 tablespoons finely chopped celery (optional, for a bit of crunch) 1 tablespoon sweet pickle relish (or finely chopped pickles) 1 teaspoon Dijon mustard 1/4 teaspoon salt 1/8 teaspoon black pepper 4-6 whole wheat tortillas or wraps 1 cup shredded lettuce 1/2 cup shredded cheddar cheese Optional additions: diced red onion, diced bell pepper, a squeeze of lemon juice Instructions: 1. Prepare the Chicken Mixture In a medium bowl, combine the 2 cups of cooked shredded chicken. This is your base, and I highly recommend using pre-cooked ch
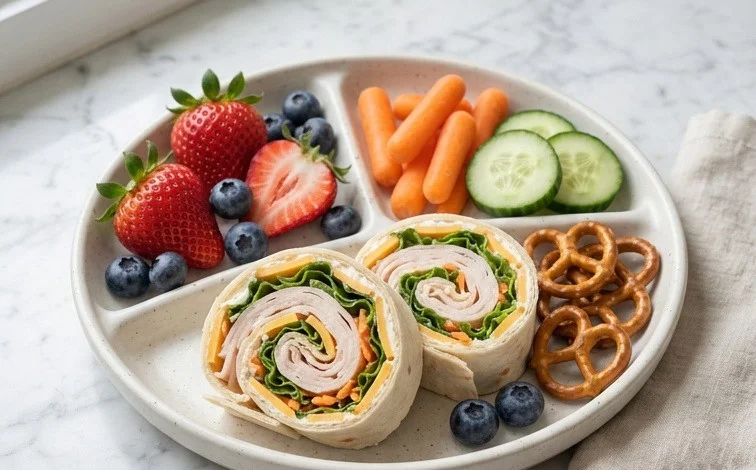
Back to School: School Lunches Your Kids Will Actually Eat
The aroma of freshly baked cookies often signals the end of summer, but for many parents, it also means the return of packing lunches. It can feel like a daily challenge to create meals that are not only nutritious but also appealing enough for picky eaters to actually consume. My strategy has always been to incorporate familiar flavors with a few fun twists. This recipe for “Submit a Party” Chicken Wraps is a go-to in my house because it’s simple to prepare, holds up well in a lunchbox, and is endlessly customizable. Kids can even get involved in the assembly, making it a fun activity and increasing their likelihood of eating what they’ve helped create. We’re using everyday ingredients that are likely already in your pantry, making this a practical choice for busy weeknights or weekend prep.
Ingredients:
- 2 cups cooked shredded chicken (rotisserie chicken works great!)
- 1/2 cup mayonnaise
- 2 tablespoons finely chopped celery (optional, for a bit of crunch)
- 1 tablespoon sweet pickle relish (or finely chopped pickles)
- 1 teaspoon Dijon mustard
- 1/4 teaspoon salt
- 1/8 teaspoon black pepper
- 4-6 whole wheat tortillas or wraps
- 1 cup shredded lettuce
- 1/2 cup shredded cheddar cheese
- Optional additions: diced red onion, diced bell pepper, a squeeze of lemon juice
Instructions:
1. Prepare the Chicken Mixture
In a medium bowl, combine the 2 cups of cooked shredded chicken. This is your base, and I highly recommend using pre-cooked chicken, like from a rotisserie chicken, to save significant time during the week. If you’re cooking chicken breasts from scratch, simply boil or bake them until cooked through, then shred them using two forks or a stand mixer fitted with the paddle attachment. Next, add the 1/2 cup of mayonnaise to the bowl. Mayonnaise is the binder that holds everything together and adds a creamy texture. If you prefer a lighter option, you can substitute half of the mayonnaise with plain Greek yogurt.
2. Add Flavor and Texture
Now it’s time to build the flavor profile. Stir in the 2 tablespoons of finely chopped celery, if you’re using it. The celery adds a subtle crunch that contrasts nicely with the tender chicken and creamy dressing. If your kids are particularly sensitive to texture, you can omit this step. Next, add the 1 tablespoon of sweet pickle relish. The relish brings a touch of sweetness and tang that many kids enjoy. If you don’t have relish, finely chopped dill pickles will also work, though they’ll offer a more vinegary flavor. Incorporate the 1 teaspoon of Dijon mustard. Dijon mustard provides a mild, complex spice that complements the other ingredients without being overpowering. Season with 1/4 teaspoon of salt and 1/8 teaspoon of black pepper to enhance all the flavors. Mix everything thoroughly until the chicken is evenly coated with the mayonnaise mixture and all the additions are well distributed. Make sure there are no dry clumps of chicken.
3. Assemble the Wraps
Lay out your 4-6 whole wheat tortillas or wraps on a clean, flat surface. I prefer whole wheat for the added fiber, but regular flour tortillas work just as well. Warm the tortillas slightly in a dry skillet or in the microwave for a few seconds; this makes them more pliable and less likely to crack when you roll them up. Spread a generous portion of the prepared chicken salad mixture evenly over each tortilla, leaving about a 1-inch border clear around the edges. This border will help prevent the filling from squeezing out when you roll the wrap. Don’t overfill, or it will become difficult to close neatly.
4. Add the Fillings
Sprinkle about 1/4 cup of shredded lettuce over the chicken mixture on each tortilla. The lettuce adds a fresh, crisp element to the wrap. Next, sprinkle 1/8 cup or so of shredded cheddar cheese over the lettuce and chicken. The cheese melts slightly from the residual warmth of the chicken and adds a savory, cheesy goodness that most kids love. If you’re adding any of the optional ingredients, like diced red onion for a bit of sharpness or diced bell pepper for extra color and crunch, now is the time to add them. A small squeeze of lemon juice over the filling can brighten the flavors even further. Distribute these fillings evenly across the chicken mixture.
5. Roll and Pack
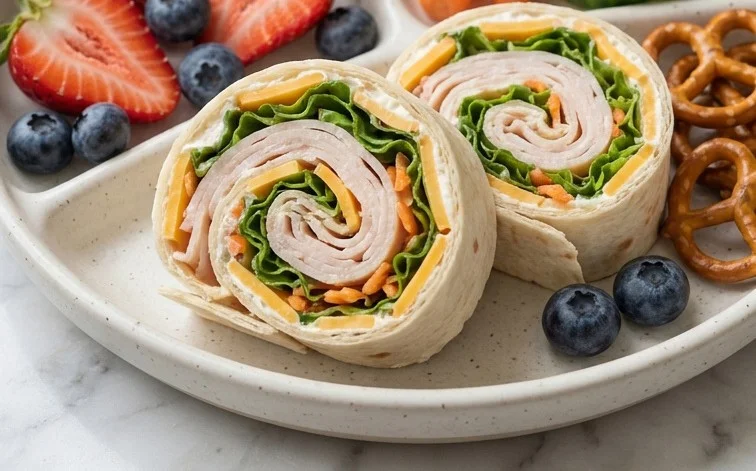
To roll the wraps, fold in the two sides of the tortilla about an inch towards the center to enclose the filling. Then, starting from the bottom edge closest to you, tightly roll the tortilla upwards, keeping the filling tucked in. You want a snug roll to prevent it from unraveling. Once rolled, you can either slice the wraps in half crosswise using a sharp knife or pack them whole. For lunchboxes, I often slice them in half, making them easier for little hands to hold and eat. If you’re packing them for a younger child, you can even wrap them tightly in parchment paper or beeswax wrap and tie with kitchen twine for a neat presentation. These wraps can be made the night before and stored in an airtight container in the refrigerator. They generally hold up well for 2-3 days.
This “Submit a Party” Chicken Wrap recipe is a fantastic way to pack a delicious and satisfying lunch that your kids will be excited to open. It’s a simple yet effective approach to back-to-school lunches, offering a healthy alternative to processed snacks. You can find more ideas and inspiration on how to work with me to create balanced and appealing meals for your family.
Conclusion:
These “Submit a Party” Chicken Wraps are a lifesaver for anyone looking for reliable back to school lunch ideas that kids will actually eat. They come together quickly, use pantry staples, and stay fresh in the lunchbox. The combination of creamy chicken salad, crunchy celery, and tangy relish tucked into a soft tortilla is a winner every time. Plus, the flexibility to add your kids’ favorite cheese or a little diced bell pepper means you can tailor them to even the pickiest eaters. Serve them whole, or slice them in half for little hands. For a different take, try adding a sprinkle of taco seasoning to the chicken mixture for a southwestern flair, or swap the cheddar for Monterey Jack. You can also mix in some finely chopped cilantro for a fresh taste. These wraps are fantastic for lunchboxes, but don’t forget they make a great quick dinner or snack too. They really are a versatile and dependable option for busy families. Let’s make lunchtime a little less stressful and a lot more delicious.
What other fillings work well in these wraps?
Beyond the chicken mixture, you can add other ingredients like shredded carrots for sweetness and crunch, a bit of avocado for creaminess, or even some leftover cooked rice to bulk them up. Be mindful of adding too many wet ingredients, which can make the wrap soggy.
How should I store the chicken wraps for school lunches?
It’s best to assemble the wraps just before packing them or the night before. If packing the night before, keep the filling slightly drier and wrap them tightly in plastic wrap or foil. Add lettuce just before packing to prevent wilting. They generally hold up well for about 2-3 days when stored properly in the refrigerator.
Can I make the chicken mixture ahead of time?
Absolutely! The chicken mixture can be made up to 3 days in advance and stored in an airtight container in the refrigerator. This makes assembling the wraps on school mornings much faster. Just give it a stir before filling the tortillas.
Back to School: School Lunches Your Kids Will Actually Eat
Easy and kid-approved lunch ideas to make back-to-school mornings a breeze.
Ingredients
-
Peanut butter
-
Whole wheat bread
-
Jelly
-
Sliced turkey
-
Cheddar cheese
-
Crackers
-
Carrot sticks
-
Apple slices
-
Yogurt cups
Instructions
-
Step 1
Prepare peanut butter and jelly sandwiches on whole wheat bread. -
Step 2
Assemble turkey and cheddar cheese roll-ups. -
Step 3
Portion out crackers into a snack bag. -
Step 4
Include a side of carrot sticks and apple slices. -
Step 5
Add a yogurt cup for a creamy treat. -
Step 6
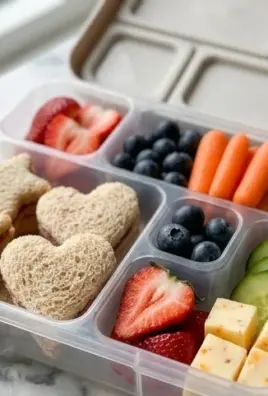
Arrange all items neatly in a lunchbox.
Important Information
Nutrition Facts (Per Serving)
It is important to consider this information as approximate and not to use it as definitive health advice.
Allergy Information
Please check ingredients for potential allergens and consult a health professional if in doubt.
Leave a Comment