

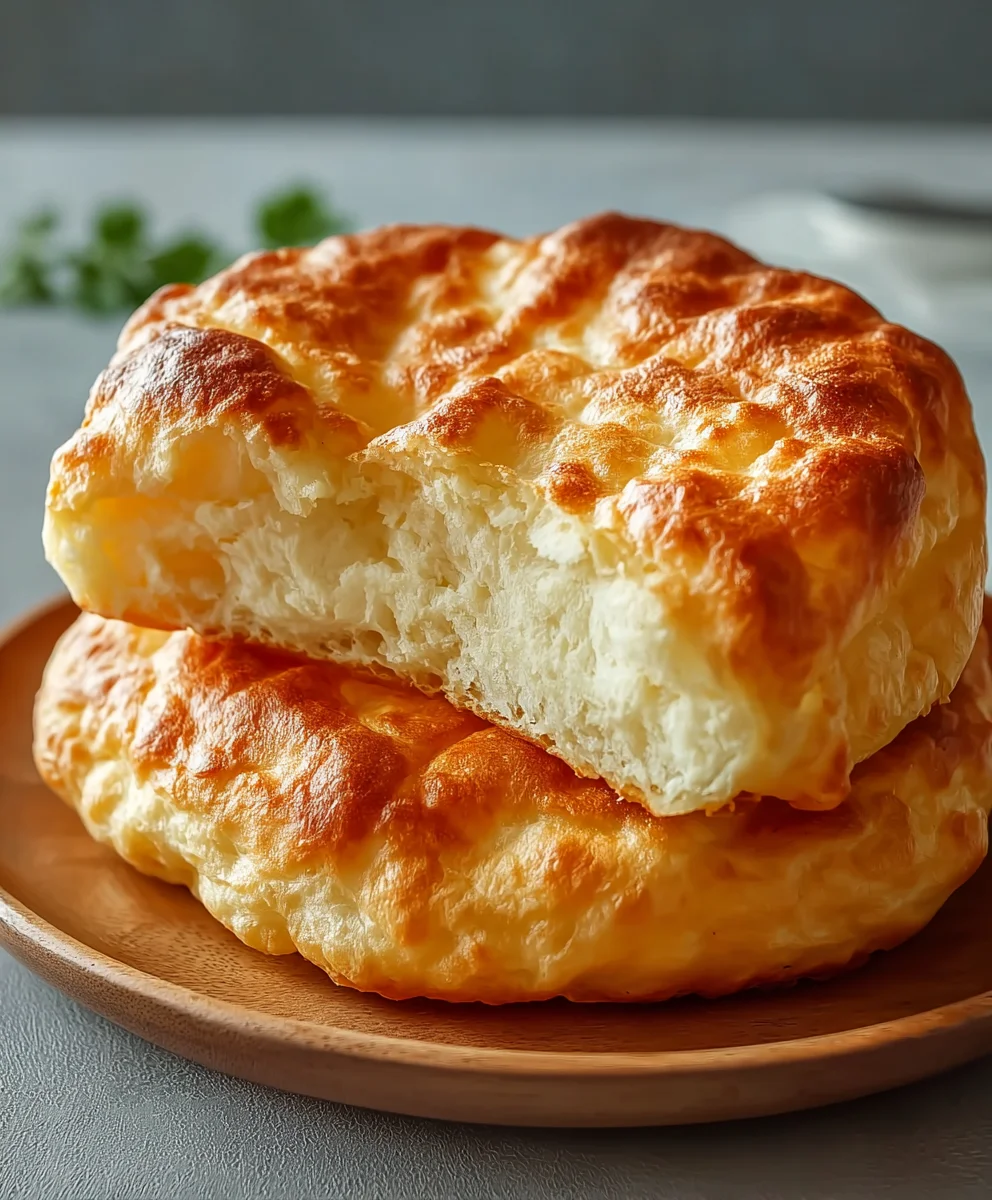
No Knead Crusty Rolls are the kind of baked goods that dreams are made of. Imagin extracte a warm, golden crust that cracks with a satisfying sound as you gently press it, giving way to a pillowy soft, airy interior that practically melts in your mouth. Who doesn’t love the aroma of freshly baked bread filling their kitchen? It’s an instant mood booster and a promise of pure comfort. What truly sets these No Knead Crusty Rolls apart is their remarkable simplicity. You don’t need hours of strenuous kneading or special equipment. This recipe is designed for busy home bakers who crave artisanal quality without the fuss. The magic happens through a slow fermentation process, allowing the dough to develop incredible flavor and that signature chewy, crackly exterior. Get ready to impress yourself and your loved ones with this foolproof method for achieving bakery-worthy rolls right in your own oven.
Why You’ll Love This Recipe:
- Effortless preparation – minimal active time required.
- Incredible texture – crispy crust meets tender crum extractb.
- Versatile – perfect for sandwiches, side dishes, or simply slathered with butter.
- Satisfying results – impressive bread without the intimidation factor.
Let’s get started on your journey to perfect No Knead Crusty Rolls!

Ingredients:
- 4 cups all-purpose flour, plus more for dusting
- 1 ½ teaspoons instant yeast
- 1 ½ teaspoons salt
- 1 ½ cups lukewarm water (about 105-115°F)
Preparing the Dough
The beauty of these No Knead Crusty Rolls lies in its simplicity. There’s no intensive kneading required, making it perfect for bakers of all levels, even those who might consider themselves less experienced. This method relies on time and a good rise to develop the gluten structure, resulting in a wonderfully airy interior and that coveted crust.
First, in a large mixing bowl, whisk together the 4 cups of all-purpose flour, 1 ½ teaspoons of instant yeast, and 1 ½ teaspoons of salt. Ensure the dry ingredients are thoroughly combined. This even distribution is key to a consistent rise and flavor throughout your rolls. Instant yeast is preferred here as it doesn’t require proofing in water beforehand; it can be mixed directly with the dry ingredients.
Next, pour in the 1 ½ cups of lukewarm water. Using lukewarm water is important. Water that is too hot can kill the yeast, while water that is too cold will not activate it properly. The ideal temperature is one you can comfortably hold your finger in for a few seconds.
Now, using a wooden spoon or a spatula, mix the wet and dry ingredients until just combined. You’re looking for a shaggy, wet dough. It will seem quite sticky and probably won’t form a cohesive ball. This is exactly what you want! Resist the urge to add more flour at this stage, as that will make the rolls dense. The stickiness is part of what contributes to the open crum extractb structure after baking.
Cover the bowl tightly with plastic wrap or a damp kitchen towel. Place the bowl in a warm spot in your kitchen. This could be on top of a slightly warm (but not hot) oven, near a sunny window, or even just in a corner that tends to stay warmer than the rest of the room. Let the dough rise for at least 12 to 18 hours. Yes, that’s a long time, but it’s crucial for flavor development and that characteristic texture. You’ll know it’s ready when it has at least doubled in size and is covered in small bubbles.
Shaping the Rolls
Once your dough has had its long, leisurely rise, it’s time to get it ready for baking. Generously flour a clean work surface. You’ll need a good amount of flour here because the dough is still quite wet. Gently scrape the dough out of the bowl onto the floured surface. You can use a bench scraper or your hands, but try not to deflate it too much.
Using floured hands, gently pat and fold the dough a few times. Think of it as tucking it in. You’re not kneading, just lightly shaping it into a rough ball or rectangle. The goal is to create some surface tension without developing the gluten further. The dough will still feel sticky, and that’s okay.
Now, divide the dough into 8 equal portions. You can do this by eye, or for precision, use a kitchen scnon-alcoholic ale. For each portion, gently shape it into a ball. Again, use floured hands and try to create a relatively smooth surface on each roll. Don’t overwork them.
Arrange the shaped rolls on a piece of parchment paper, leaving a little space between them as they will expand during their final proof and baking. You can also place them on a lightly floured baking sheet if you prefer.
Final Proof and Baking
Cover the shaped rolls loosely with plastic wrap or a clean kitchen towel and let them rest for another 30 to 60 minutes. This final proof allows them to relax and puff up slightly before hitting the heat. They won’t necessarily double in size again, but you should see them look a bit puffier and less dense.
While the rolls are having their final proof, preheat your oven to 450°F (230°C). If you have a baking stone or steel, place it in the oven during preheating. For extra crustiness, you can also place an empty oven-safe pan on the bottom rack.
Once the oven is fully preheated and the rolls have finished their final proof, it’s time to bake. Carefully transfer the parchment paper with the rolls onto the preheated baking stone or steel, or directly onto the oven rack if you don’t have one. If you’re using the pan method for steam, carefully pour about 1 cup of hot water into the empty pan on the bottom rack just as you place the rolls in the oven. Close the oven door immediately to trap the steam.
Bake for 20 to 25 minutes, or until the rolls are deeply golden brown and sound hollow when tapped on the bottom. The steam created in the initial minutes of baking is essential for developing that wonderfully crisp crust. If you find the tops are browning too quickly, you can loosely tent them with foil.
Once baked, remove the rolls from the oven and transfer them to a wire rack to cool completely. This is the hardest part – waiting! Letting them cool allows the interior to set properly and prevents them from becoming gummy. The irresistible aroma will fill your kitchen as they cool, promising a delightful eating experience. Enjoy these No Knead Crusty Rolls warm with butter, or as the perfect accompaniment to soups and stews.
Conclusion:
And there you have it! You’ve successfully created your very own batch of No Knead Crusty Rolls. This recipe proves that you don’t need hours of kneading or fancy equipment to achieve that delightful crusty exterior and wonderfully soft, airy interior. The magic truly lies in the long, slow fermentation, allowing the dough to develop incredible flavor and texture with minimal effort on your part. These rolls are incredibly versatile and make a fantastic addition to any meal.
For serving, I love these warm, fresh out of the oven, simply buttered. They are also perfect alongside hearty soups, stews, or pasta dishes. Don’t hesitate to get creative with them for sandwiches – the sturdy crust holds up beautifully! If you’re feeling adventurous, consider adding some herbs like rosemary or thyme directly into the dough for an extra layer of flavor, or perhaps some grated cheese for a savory twist.
I truly hope you enjoy making and devouring these No Knead Crusty Rolls as much as I do. Embrace the simplicity and the incredibly rewarding results. Happy baking!
Frequently Asked Questions:
Q: Can I make these No Knead Crusty Rolls ahead of time?
A: Absolutely! The dough can be refrigerated for up to 72 hours after the initial bulk fermentation. This slow, cold fermentation will actually deepen the flavor even further. When you’re ready to bake, simply bring the dough to room temperature for about an hour, shape, and proceed with the baking instructions. Baked rolls can be stored at room temperature in a bread bag or airtight container for a couple of days, or frozen for longer storage.
Q: My rolls didn’t get as crusty as I’d hoped. What did I do wrong?
A: Achieving a truly crusty exterior often relies on steam in the oven. Ensure your oven is fully preheated, and consider adding a steam pan. You can do this by placing an empty metal baking pan on the bottom rack while your oven preheats. Once you put your rolls in, carefully pour about a cup of hot water into the steam pan and quickly close the oven door. Remove the steam pan after about 15-20 minutes of baking. Also, make sure you’re baking at a sufficiently high temperature.
Easy No Knead Crusty Rolls
Simple and delicious no-knead crusty rolls perfect for any baker, boasting an airy interior and a wonderfully crisp crust.
Ingredients
-
4 cups all-purpose flour, plus more for dusting
-
1 ½ teaspoons instant yeast
-
1 ½ teaspoons salt
-
1 ½ cups lukewarm water (about 105-115°F)
Instructions
-
Step 1
In a large mixing bowl, whisk together the all-purpose flour, instant yeast, and salt. Ensure the dry ingredients are thoroughly combined. -
Step 2
Pour in the lukewarm water and mix with a wooden spoon or spatula until just combined, forming a shaggy, wet dough. Resist adding more flour. -
Step 3
Cover the bowl tightly and let the dough rise in a warm spot for at least 12 to 18 hours, or until doubled in size and bubbly. -
Step 4
Generously flour a clean work surface. Gently scrape the dough out and lightly shape it into a rough ball or rectangle without deflating it. Divide into 8 equal portions and gently shape each into a ball. -
Step 5
Arrange the shaped rolls on parchment paper, cover loosely, and let rest for 30 to 60 minutes for a final proof. -
Step 6
Preheat your oven to 450°F (230°C). If using a baking stone/steel and steam method, place the pan for water during preheating. -
Step 7
Transfer the rolls to the preheated oven. If using the steam method, carefully add hot water to the pan and close the oven door immediately. -
Step 8
Bake for 20 to 25 minutes, or until deeply golden brown and hollow when tapped. Cool completely on a wire rack before serving.
Important Information
Nutrition Facts (Per Serving)
It is important to consider this information as approximate and not to use it as definitive health advice.
Allergy Information
Please check ingredients for potential allergens and consult a health professional if in doubt.


Leave a Comment