
Coquito is a creamy, coconut-based drink that I love to make during the holidays. It’s a popular Puerto Rican beverage, and its rich flavor makes it a perfect treat for celebrations or even just a cozy evening at home. Making it from scratch is surprisingly easy, and the results are so much better than anything store-bought. The blend of coconut and spices is truly comforting. Ingredients: 1 can (13.5 ounces) full-fat coconut milk 1 can (15 ounces) sweetened condensed milk 1 can (12 ounces) evaporated milk 1/2 cup coconut cream (from the top of a chilled can of coconut milk) 1 teaspoon vanilla extract 1/2 teaspoon ground cinnamon 1/4 teaspoon ground nutmeg Pinch of ground cloves (optional, but recommended for extra warmth) Preparing Your Ingredients Before you begin mixing, it’s helpful to have all your ingredients measured out and ready to go. This makes the process much smoother. Ensure your spices are fresh for the best flavor. If you want a stronger cinnamon flavor, you can also add a cinnamon stick to the mixture while it chills, and remove it before serving. For the coconut cream, simply open a can of full-fat coconut milk that has been refrigerated overnight. The cream will solidify at the top, and you can scoop it out. Reserve the liquid for another use. Blending the Coquito The key to a smooth and creamy coquito is a good blender. I usually use a high-powered blender, but a standard one will work just fine. The goal is to emulsify all the ingredients into a velvety consistency. Pour all the prepared ingredients into your blender: the coconut milk, sweetened condensed milk, evaporated milk, and the reserved coconut cream. Add the vanilla extract, ground cinnamon, ground nutmeg, and the pinch of ground cloves if you are using them. Secure the lid tightly. Start blending on a low speed, gradually increasing to high. Blend for about 1 to 2 minutes, or until the mixture is completely smooth and well combined. You shouldn’t see any separation of the liquids. Give it a taste at this point. If you prefer it sweeter, you can add a tablespoon of sugar or more condensed milk. If you like it more spiced, add a tiny bit more cinnamon or nutmeg. Blend again for a few seconds to incorporate any additions. Chilling the Coquito For the best flavor and texture, coquito needs to chill thoroughly. This allows the flavors to meld together and the drink to thicken. Pour the blended coquito into airtight bottles or a pitcher. Glass bottles look especially nice if you plan to gift them. Place the bottles in the refrigerator and chill for at least 4 hours, but overnight is even better. The longer it chills, the more the flavors develop and the creamier it becomes. Some people even like to freeze small portions for a slushy-like treat. Storing Your Coquito Once chilled, your coquito is ready to serve. It will keep well in the refrigerator for about 1 to 2 weeks. Always make sure your bottles or containers are sealed tightly to maintain freshness. Give it a good shake before each serving, as the ingredients can separate slightly over time. This is normal for a homemade beverage. Serving Your Coquito This creamy, coconutty drink is typically served cold. Small glasses or shot glasses are perfect for serving, as it’s quite rich. Garnish each serving with a sprinkle of ground cinnamon or a pinch of nutmeg right before you hand it out. You can also add a small cinnamon stick to the glass for visual appeal. It’s a wonderful non-alcoholic option for holiday gatherings, parties, or any occasion where you want a festive and comforting beverage. It pairs wonderfully with holiday cookies or a slice of tres leches cake.
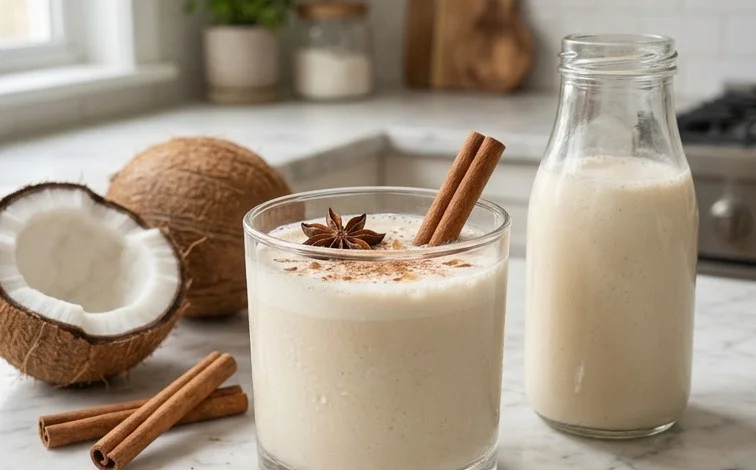
Coquito Recipe
Coquito is a creamy, coconut-based drink that I love to make during the holidays. It’s a popular Puerto Rican beverage, and its rich flavor makes it a perfect treat for celebrations or even just a cozy evening at home. Making it from scratch is surprisingly easy, and the results are so much better than anything store-bought. The blend of coconut and spices is truly comforting.
Ingredients:
- 1 can (13.5 ounces) full-fat coconut milk
- 1 can (15 ounces) sweetened condensed milk
- 1 can (12 ounces) evaporated milk
- 1/2 cup coconut cream (from the top of a chilled can of coconut milk)
- 1 teaspoon vanilla extract
- 1/2 teaspoon ground cinnamon
- 1/4 teaspoon ground nutmeg
- Pinch of ground cloves (optional, but recommended for extra warmth)
Preparing Your Ingredients
Before you begin mixing, it’s helpful to have all your ingredients measured out and ready to go. This makes the process much smoother. Ensure your spices are fresh for the best flavor. If you want a stronger cinnamon flavor, you can also add a cinnamon stick to the mixture while it chills, and remove it before serving. For the coconut cream, simply open a can of full-fat coconut milk that has been refrigerated overnight. The cream will solidify at the top, and you can scoop it out. Reserve the liquid for another use.
Blending the Coquito
The key to a smooth and creamy coquito is a good blender. I usually use a high-powered blender, but a standard one will work just fine. The goal is to emulsify all the ingredients into a smooth, homogeneous liquid.
Step 1: Combine the Liquids
Pour the full-fat coconut milk, sweetened condensed milk, and evaporated milk into your blender. It’s best to add these first, as they form the base of the drink. Make sure you are using full-fat coconut milk; the light version won’t give you the rich, creamy texture that makes coquito so special.
Step 2: Add the Coconut Cream and Vanilla
Next, add the scooped-out coconut cream to the blender. This adds another layer of coconut richness and helps thicken the drink. Follow this with the vanilla extract. Vanilla is a classic pairing with coconut and adds a lovely depth of flavor.
Step 3: Incorporate the Spices
Now it’s time for the spices. Add the ground cinnamon, ground nutmeg, and the pinch of ground cloves if you are using them. These spices are what give coquito its characteristic warmth and holiday aroma. Be careful not to overdo the cloves, as they can be quite potent. A little goes a long way to add complexity without overpowering the other flavors.
Step 4: Blend Until Smooth
Secure the lid on your blender and blend on high speed for about 30-60 seconds, or until the mixture is completely smooth and creamy. You shouldn’t see any streaks of coconut milk or spices. It should look like a thick, rich shake. You might need to stop and scrape down the sides of the blender a couple of times to ensure everything is incorporated. If your blender has a “smoothie” setting, that usually works perfectly.
Step 5: Chill Thoroughly
This is a critical step. Pour the blended coquito into an airtight container or bottle. For the best flavor and texture, it needs to chill in the refrigerator for at least 4 hours, but ideally overnight. This allows the flavors to meld together beautifully. The coquito will also thicken further as it chills. Before serving, give it a good shake or stir to redistribute any ingredients that may have settled.
Serving and Storage
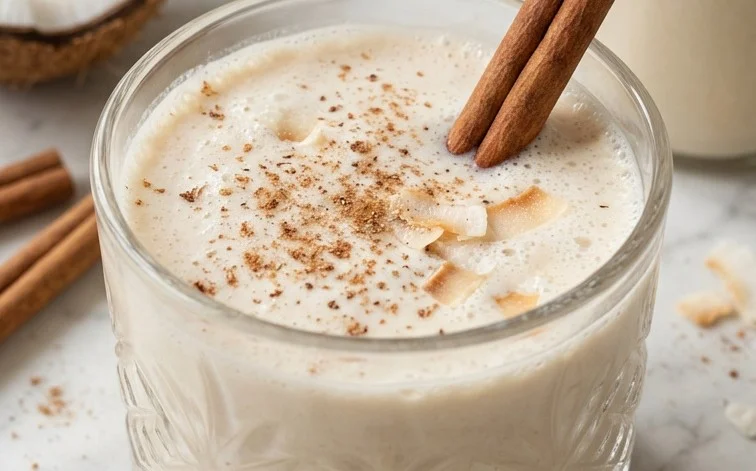
When you’re ready to serve, give the coquito a final shake or stir. I like to pour it into small glasses, perhaps with a dusting of cinnamon on top. It’s delicious served cold, straight from the refrigerator. Coquito is best enjoyed within about one to two weeks when stored properly in the refrigerator in an airtight container. Make sure to keep it cold to maintain its freshness and creamy consistency.
This coquito recipe is a simple yet delicious way to enjoy a classic holiday treat. The aroma alone as it chills is enough to get you into the festive spirit. Enjoy making and sharing this wonderful drink!
Conclusion:
Making coquito from scratch is a rewarding experience, resulting in a rich, creamy, and spiced coconut drink that’s perfect for any celebration or cozy gathering. The blend of coconut milk, condensed milk, and warming spices creates a comforting beverage that truly embodies the holiday spirit. It’s wonderful to have a homemade option that tastes so much better than store-bought versions. Serving it chilled in small glasses with a dusting of cinnamon is a festive touch that guests always appreciate. Remember to chill it thoroughly for the best flavor development. This Coquito recipe is a fantastic non-alcoholic treat that everyone can enjoy.
Frequently Asked Questions:
Can I make coquito ahead of time?
Absolutely! Coquito is best when made at least a few hours, or ideally overnight, in advance. This chilling time allows the flavors to meld together beautifully and the texture to thicken. You can store it in airtight containers in the refrigerator for up to two weeks. Just give it a good shake before serving.
How do I get the coconut cream?
To get the coconut cream, simply place a can of full-fat coconut milk in your refrigerator overnight. The solid cream will separate from the liquid and rise to the top. Carefully scoop out the solidified cream to use in your coquito. The remaining liquid can be used in smoothies or other recipes.
Can I adjust the spices in my coquito?
Yes, you can! The spice levels are a matter of personal preference. If you love cinnamon, feel free to add a bit more, or even add a cinnamon stick to infuse while chilling. Nutmeg and cloves add warmth, so adjust them to your liking. Start with the amounts in the recipe and then tweak it on your next batch if you want a stronger or milder spice profile.
Coquito Recipe
A creamy and festive Puerto Rican holiday drink, typically made with coconut milk and apple juice. This version is a delicious non-alcoholic alternative-free alternative.
Ingredients
-
1 (15 ounce) can cream of coconut
-
1 (13.5 ounce) can full-fat coconut milk
-
1 (12 ounce) can evaporated milk
-
1 teaspoon vanilla extract
-
1/2 teaspoon ground cinnamon
-
1/4 teaspoon ground nutmeg
-
Pinch of ground cloves
Instructions
-
Step 1
In a blender, combine the cream of coconut, full-fat coconut milk, and evaporated milk. -
Step 2
Add the vanilla extract, ground cinnamon, ground nutmeg, and pinch of ground cloves to the blender. -
Step 3
Blend on high speed until smooth and well combined, about 1-2 minutes. -
Step 4
Pour the mixture into airtight bottles or jars. -
Step 5
Refrigerate for at least 2 hours to allow flavors to meld and the coquito to chill thoroughly. -
Step 6
Shake well before serving. Garnish with a sprinkle of cinnamon.
Important Information
Nutrition Facts (Per Serving)
It is important to consider this information as approximate and not to use it as definitive health advice.
Allergy Information
Please check ingredients for potential allergens and consult a health professional if in doubt.

Leave a Comment