
Chocolate Crinkle Cookie Recipe These chocolate crinkle cookies are the quintessential holiday treat for a reason. Their deep chocolate flavor, crackly powdered sugar exterior, and chewy interior make them a delight to bake and even more of a delight to eat. The distinctive crinkled look comes from the dough chilling and then being rolled in powdered sugar before baking, which causes the cookies to puff and then collapse, creating that signature fractured surface. I love making these when I want a classic chocolate cookie that’s a little bit special. Ingredients: 2¼ cups all-purpose flour 2½ teaspoons baking powder ½ teaspoon kosher salt 1 cup unsweetened Dutch-processed cocoa powder 1¼ cups granulated sugar ½ half cup brown sugar ½ cup vegetable oil or canola oil 4 large eggs 1 teaspoon vanilla extract ⅔ cup powdered sugar Making the Cookie Dough First, we need to get our dry ingredients ready. In a medium bowl, whisk together the all-purpose flour, baking powder, and kosher salt. Whisking them thoroughly ensures that the baking powder and salt are evenly distributed throughout the flour, which will help the cookies bake evenly. Set this bowl aside for now. In a larger bowl, cream together the granulated sugar and the brown sugar. The brown sugar adds a lovely chewiness and a hint of molasses flavor to the cookies, which complements the rich cocoa. You can use either light or dark brown sugar here; dark brown sugar will give a slightly deeper flavor. Next, we’ll incorporate the wet ingredients into the creamed sugar mixture. Add the vegetable oil, eggs one at a time, and vanilla extract. Beat well after each egg to ensure it’s fully incorporated. This creates a smooth, emulsified base for your cookie dough. Now it’s time to combine the wet and dry ingredients. Gradually add the flour mixture to the wet ingredients, mixing on low speed or by hand until just combined. Be careful not to overmix, as this can lead to tough cookies. The dough will be soft and sticky at this point. Stir in the cocoa powder until evenly distributed. This is where the deep chocolate color and flavor come from. Make sure all the cocoa powder is incorporated for the best chocolatey taste. Chilling the Dough Now, cover the bowl with plastic wrap and refrigerate the dough for at least 2 hours, or preferably overnight. Chilling is a critical step for chocolate crinkle cookies. It firms up the dough, making it easier to handle and roll, and it helps develop the flavor. It also ensures the cookies spread less and hold their shape better during baking. Shaping and Baking the Cookies Preheat your oven to 350°F (175°C) and line baking sheets with parchment paper. Scoop about 1 tablespoon of chilled dough and roll it into a ball between your palms. Then, roll each ball generously in powdered sugar, ensuring it’s fully coated. Place the coated balls about 2 inches apart on the prepared baking sheets. As the cookies bake, the powdered sugar coating will crackle, creating that signature crinkled appearance. Bake for 10-12 minutes, or until the edges are set and the centers are still slightly soft. They will continue to cook slightly on the baking sheet after you remove them from the oven. Let the cookies cool on the baking sheets for a few minutes before transferring them to a wire rack to cool completely. This prevents them from breaking. Enjoying Your Chocolate Crinkles These chocolate crinkle cookies are best enjoyed within a few days of baking. Store them in an airtight container at room temperature. The contrast of the crackly, sweet exterior with the rich, chewy chocolate interior is what makes this chocolate crinkle cookie recipe so beloved. They are perfect for sharing at holiday gatherings, cookie exchanges, or just as a special homemade treat any time of year. They really are a classic for a reason.
Chocolate Crinkle Cookie Recipe
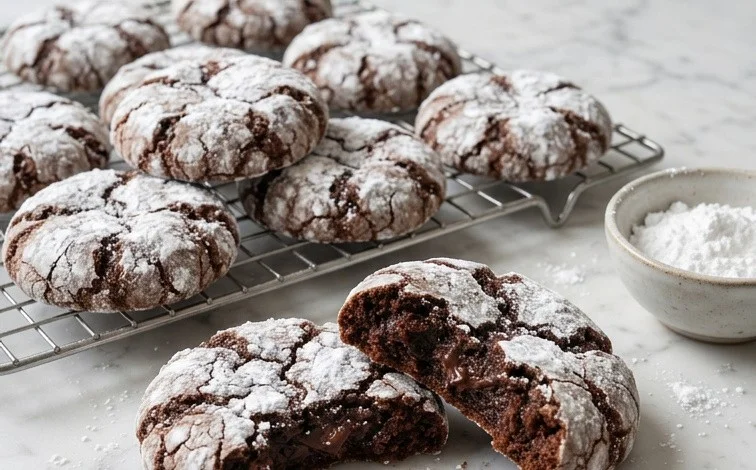
These chocolate crinkle cookies are the quintessential holiday treat for a reason. Their deep chocolate flavor, crackly powdered sugar exterior, and chewy interior make them a delight to bake and even more of a delight to eat. The distinctive crinkled look comes from the dough chilling and then being rolled in powdered sugar before baking, which causes the cookies to puff and then collapse, creating that signature fractured surface. I love making these when I want a classic chocolate cookie that’s a little bit special.
Ingredients:
- 2¼ cups all-purpose flour
- 2½ teaspoons baking powder
- ½ teaspoon kosher salt
- 1 cup unsweetened Dutch-processed cocoa powder
- 1¼ cups granulated sugar
- ½ cup brown sugar
- ½ cup vegetable oil or canola oil
- 4 large eggs
- 1 teaspoon vanilla extract
- ⅔ cup powdered sugar
Making the Cookie Dough
First, we need to get our dry ingredients ready. In a medium bowl, whisk together the all-purpose flour, baking powder, and kosher salt. Whisking them thoroughly ensures that the baking powder and salt are evenly distributed throughout the flour, which will help the cookies bake evenly. Set this bowl aside for now. In a larger bowl, cream together the granulated sugar and the brown sugar. The brown sugar adds a lovely chewiness and a hint of molasses flavor to the cookies, which complements the rich cocoa. You can use either light or dark brown sugar here; dark brown sugar will give a slightly deeper flavor.
Next, we’ll incorporate the wet ingredients. Add the vegetable oil or canola oil to the sugars and mix until well combined. Then, beat in the large eggs, one at a time, making sure each egg is fully incorporated before adding the next. This helps create a smooth and emulsified base for our dough. Finally, stir in the vanilla extract. Vanilla is key for enhancing the chocolate flavor; it’s like a flavor amplifier.
Now it’s time to combine the wet and dry ingredients. Gradually add the dry ingredient mixture to the wet ingredient mixture, mixing on low speed or by hand until just combined. Be careful not to overmix the dough at this stage. Overmixing can develop the gluten in the flour too much, resulting in tougher cookies. You want to mix just until you no longer see streaks of flour. The dough will be quite soft and sticky at this point, almost like a thick cake batter, and this is exactly what we want.
Chilling and Shaping the Cookies
This is a really important step for achieving that crinkled texture. Cover the bowl with plastic wrap and refrigerate the dough for at least 2 hours, or preferably longer, even overnight. Chilling the dough firm it up considerably, making it much easier to handle and scoop. It also allows the flavors to meld together beautifully. When you’re ready to bake, preheat your oven to 350°F (175°C). Line baking sheets with parchment paper. This prevents the cookies from sticking and makes cleanup a breeze.
Once the dough is chilled, place the ⅔ cup of powdered sugar in a shallow bowl. Scoop rounded tablespoons of the chilled dough and roll each portion into a smooth ball between your palms. The dough should be firm enough to handle now. After rolling the dough into a ball, generously roll each ball in the powdered sugar, making sure it’s completely coated. This coating is what creates the signature crackled appearance during baking. Place the coated dough balls about 2 inches apart on your prepared baking sheets. They will spread a bit, so giving them space is important to prevent them from running into each other.
Baking and Cooling
Bake the cookies for 10 to 12 minutes. The cookies are done when the edges are set, but the centers still look slightly soft and moist. They will continue to cook a bit on the baking sheet after they come out of the oven, so pulling them out when they seem a touch underbaked is the secret to that lovely chewy texture. Avoid overbaking, as this will result in dry, cakey cookies.
Let the cookies cool on the baking sheets for about 5 minutes before carefully transferring them to a wire rack to cool completely. As they cool, you’ll notice their crinkles becoming more defined. These cookies are best enjoyed within a few days. You can store them in an airtight container at room temperature. If you want to keep them longer, they freeze beautifully, either baked or as dough balls.
Conclusion:
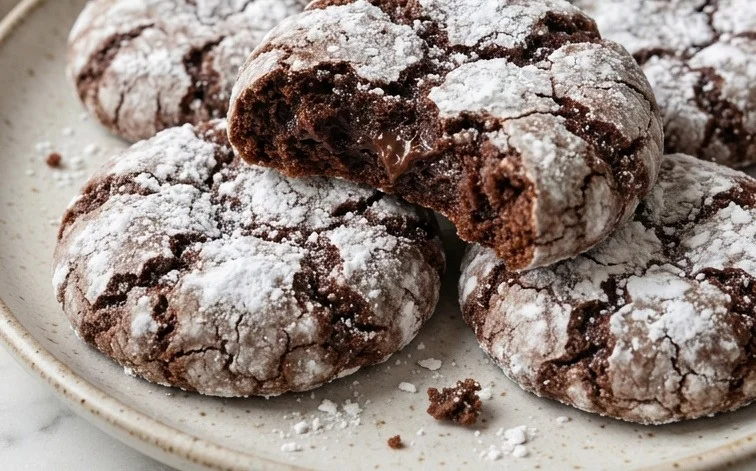
These Chocolate Crinkle Cookies are a truly special treat. The contrast between the crackly, powdered sugar-coated exterior and the rich, fudgy, chewy interior is what makes them so addictive. They look festive and taste amazing, making them a go-to for holidays or any occasion where you want a classic chocolate cookie that feels a little bit more special. Baking them is straightforward, and the chilling step is key to achieving that signature crinkled look. Don’t be afraid to really coat them in powdered sugar – that’s where the magic happens!
Serving Suggestions: These cookies are wonderful on their own with a glass of cold milk. They also pair beautifully with coffee or tea. For an extra festive touch, you can serve them on a holiday platter alongside other festive baked goods.
Variations: While the classic chocolate flavor is hard to beat, you could try adding a pinch of espresso powder to the dough to deepen the chocolate flavor even further. For a hint of mint, add a teaspoon of peppermint extract along with the vanilla. If you’re feeling adventurous, a sprinkle of flaky sea salt on top right after baking can be a delightful contrast.
Storage: Store cooled cookies in an airtight container at room temperature for up to 5 days. They tend to stay chewy and delicious for a good while.
Frequently Asked Questions:
Why are my chocolate crinkle cookies not cracking?
This usually happens if the dough is too dry, if you don’t roll the balls generously enough in powdered sugar, or if they are overbaked. Ensure your dough is soft before chilling and that the powdered sugar coating is thick and even. Don’t overbake; pull them out when the edges are set but the center is still soft.
Can I make chocolate crinkle cookies without chilling the dough?
While you can technically bake the dough without chilling, it’s highly recommended. Chilling the dough firms it up, making it much easier to roll into balls and preventing them from spreading too much in the oven. This firming also helps develop the flavor and is essential for that characteristic crinkled appearance.
How do I get the crinkly top?
The crinkles come from the contrast between the chilled dough (which causes the cookie to puff up in the oven) and the outer coating of powdered sugar (which creates the cracks as it spreads). Make sure to chill the dough sufficiently, roll the dough balls well, and coat them thoroughly with powdered sugar before baking. Baking them until the centers are still slightly soft is also important.
Chocolate Crinkle Cookie Recipe
Classic chocolate crinkle cookies with a rich cocoa flavor and characteristic cracked appearance.
Ingredients
-
2¼ cups all-purpose flour
-
2½ teaspoons baking powder
-
½ teaspoon kosher salt
-
1 cup unsweetened Dutch-processed cocoa powder
-
1¼ cups granulated sugar
-
½ cup brown sugar
-
½ cup vegetable oil or canola oil
-
4 large eggs
-
1 teaspoon vanilla extract
-
⅔ cup powdered sugar
Instructions
-
Step 1
In a medium bowl, whisk together the all-purpose flour, baking powder, and kosher salt. Set aside. -
Step 2
In a large bowl, combine the unsweetened Dutch-processed cocoa powder, granulated sugar, and brown sugar. Stir to combine. -
Step 3
Add the vegetable oil or canola oil, large eggs, and vanilla extract to the dry ingredients. Mix until well combined and smooth. -
Step 4
Gradually add the dry ingredients to the wet ingredients, mixing until a stiff dough forms. Chill the dough for at least 1 hour. -
Step 5
Preheat your oven to 350°F (175°C). Line baking sheets with parchment paper. Roll dough into 1-inch balls. -
Step 6
Roll each dough ball generously in the powdered sugar to coat. Place balls 2 inches apart on the prepared baking sheets. -
Step 7
Bake for 9 to 11 minutes, or until the edges are set and the centers are still slightly soft. The tops will crack. -
Step 8
Let cookies cool on the baking sheets for a few minutes before transferring them to a wire rack to cool completely.
Important Information
Nutrition Facts (Per Serving)
It is important to consider this information as approximate and not to use it as definitive health advice.
Allergy Information
Please check ingredients for potential allergens and consult a health professional if in doubt.


Leave a Comment