

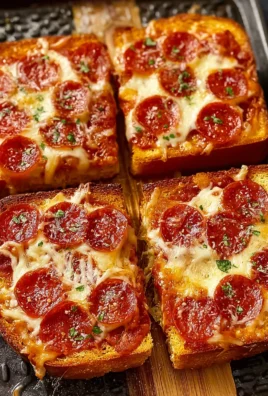
Easy Baked pizza Wraps are about to become your new weeknight hero, your ultimate lunchbox solution, and your go-to party appetizer! If you’ve ever dreamt of sinking your teeth into the irresistible flavors of a classic pizza, but without the fuss of dough rising or complex assembly, then I believe you’ve stumbled upon a culinary revelation. While traditional pizza boasts a rich history dating back centuries, our modern take on those beloved flavors comes in a brilliantly convenient package. I often think of it as the ultimate evolution for busy individuals and families who crave that cheesy, savory goodness in minutes. People absolutely adore this dish because it combines the crispy, golden perfection of a baked exterior with a warm, gooey, customizable pizza filling. It’s incredibly versatile, allowing everyone to personalize their wrap with their favorite toppings, making it a fantastic option for even the pickiest eaters. Not only are these Easy Baked pizza Wraps incredibly delicious, but they are also wonderfully convenient, minimizing cleanup and maximizing flavor. Get ready to transform simple ingredients into an extraordinary meal that everyone will beg for!

Ingredients:
For the Basic Savory Baked Pizza Wraps:
This is my go-to foundation for when I’m craving that pizza flavor in a convenient, hand-held package. These core components will get you started before we dive into the exciting variations!
- Large Flour Tortillas: 8-10 count, typically 10-12 inches in diameter. These are the versatile “crusts” that make our wraps so easy to assemble and hold all that delicious filling. I always look for a brand that’s soft and pliable to prevent tearing during rolling.
- Pizza Sauce: 1 cup. Grab your favorite jarred variety or whip up a quick homemade batch if you have a secret recipe! The sauce forms the essential flavor base, tying all our ingredients together with that classic pizza taste.
- Shredded Mozzarella Cheese: 2 cups. For that undeniably gooey, stretchy, and satisfying pizza experience. Low-moisture, part-skim mozzarella is usually my preference for its excellent melt and less water content, which prevents soggy wraps.
- Olive Oil: 2 tablespoons. I love to brush a little on the outside of each wrap. It’s key for achieving that beautiful golden-brown color and wonderfully crispy exterior when baked. Extra virgin olive oil adds a lovely subtle flavor.
- Italian Seasoning: 1 teaspoon. A classic blend of herbs like oregano, basil, thyme, and rosemary that elevates the savory profile. Don’t skip this; it’s a small detail that makes a big difference!
- Garlic Powder: ½ teaspoon. Just a touch adds a foundational savory depth that pairs perfectly with the pizza sauce and cheese.
- Optional for serving: Extra pizza sauce or marinara for dipping. Because sometimes, you just need a little extra dip!
For the Variations (As Shared in My Kitchen Notes and Experiments!):
One of the best things about these easy baked pizza wraps is how incredibly customizable they are. I’ve had so much fun experimenting with different fillings, and I wanted to share some of my absolute favorites that I’ve perfected over time. Each one offers a unique flavor profile, transforming a simple wrap into something truly special.
Breakfast Version:
I tried a breakfast version with scrambled eggs, cheese, and crumbled bacon inside.
- Scrambled Eggs: 4-6 large eggs, lightly seasoned and cooked just until set. I often prepare these right before assembly so they’re warm and fluffy.
- Cheese: ½ cup. While mozzarella works, I find a sharp cheddar or a Monterey Jack blend really shines here, adding a rich, breakfast-y tang.
- Crumbled Bacon: ½ cup, crispy and crumbled into small pieces. Pre-cooked bacon bits work in a pinch, but freshly cooked and crumbled bacon is truly superior.
Dessert Version:
I made a dessert version with Nutella, sliced strawberries, and banana, brushed with cinnamon sugar instead of oil.
- Nutella: ½ cup, or adjust to your sweet preference. This creamy, dreamy hazelnut spread forms the luscious base of our dessert wrap.
- Sliced Strawberries: 1 cup, fresh and thinly sliced. The tartness of the strawberries beautifully balances the sweetness of the Nutella.
- Banana: 1 medium, thinly sliced. Soft and naturally sweet, bananas are a classic complement to Nutella and strawberries.
- Cinnamon Sugar: 2 tablespoons (a mix of 1 tablespoon granulated sugar and 1 tablespoon ground cinnamon). This aromatic topping replaces the olive oil for our dessert wraps, giving them a sweet, spiced, and slightly crisp exterior.
Hawaiian Version:
For a taste of Hawaii, I used ham, pineapple, and mozzarella with a touch of barbecue sauce mixed into the pizza sauce.
- Ham: 1 cup, diced or shredded. I usually opt for a good quality deli ham, but leftover holiday ham works wonders too!
- Pineapple: ½ cup, crushed or finely diced, well-drained. This is crucial! Too much liquid will make your wraps soggy. I usually press it between paper towels to remove excess moisture.
- Mozzarella: 1 cup, extra shredded mozzarella. You can never have too much cheese in a Hawaiian pizza, and the same goes for these wraps!
- Barbecue Sauce: 2 tablespoons, to be mixed directly into your pizza sauce for a sweet and tangy twist that perfectly captures that Hawaiian pizza vibe.
Greek-Inspired Version:
Last month I experimented with a Greek-inspired version using feta, olives, and spinach that was absolutely delicious.
- Feta: ½ cup, crumbled. Its salty, tangy notes are the star of this Greek-inspired creation.
- Olives: ½ cup, Kalamata or black olives, sliced. The briny flavor of olives adds a wonderful counterpoint to the other ingredients.
- Spinach: 1 cup, fresh baby spinach. You can lightly wilt it beforehand, or add it fresh as it will cook down nicely inside the wrap.
Equipment You’ll Need:
Having the right tools always makes cooking easier and more enjoyable. For these Easy Baked Pizza Wraps, you won’t need anything fancy, just a few kitchen basics:
- Baking Sheets: At least one, but two are ideal if you’re making a full batch.
- Parchment Paper or Silicone Baking Mats: To prevent sticking and make cleanup a breeze.
- Small Mixing Bowls: For sauces, seasonings, and preparing your variation fillings.
- Measuring Cups and Spoons: For accurate ingredient proportions.
- Pastry Brush: Essential for evenly applying olive oil or cinnamon sugar.
- Spatula or Tongs: For carefully transferring the wraps to and from the baking sheet.
- Cutting Board and Knife: For prepping any fresh ingredients.
Preparation Steps:
Let’s get those hands dirty (in the best way possible!) and start assembling our delicious wraps. I’ve broken it down into clear steps, so you’ll be rolling like a pro in no time.
Prepping Your Workspace:
- Preheat Your Oven: First things first, get your oven ready! Preheat it to a nice and hot 400°F (200°C). This ensures a quick bake and a beautifully crispy exterior.
- Prepare Baking Sheets: Line one or two large baking sheets with parchment paper or silicone baking mats. This is a game-changer for easy cleanup and prevents any cheese from sticking to the pan.
- Arrange Ingredients: Lay out all your chosen ingredients within easy reach. For the basic savory wraps, have your tortillas, pizza sauce, shredded mozzarella, olive oil, Italian seasoning, and garlic powder ready. If you’re tackling a variation, have those specific ingredients prepped and ready to go as well. I find having everything organized makes the assembly process so much smoother and more enjoyable.
- Mix Seasonings: In a small bowl, whisk together the 2 tablespoons of olive oil with the 1 teaspoon of Italian seasoning and ½ teaspoon of garlic powder. This seasoned oil will be brushed on the outside of our savory wraps for extra flavor and crispness. For the dessert wraps, remember we’ll be using cinnamon sugar instead!
Assembling the Basic Savory Wraps:
This is where the magic happens! Follow these steps carefully to build a sturdy, flavorful wrap that bakes perfectly.
- Lay Out Tortillas: Take one large flour tortilla and lay it flat on a clean work surface. I like to work one at a time to keep things neat and ensure each wrap gets equal attention.
- Spread the Sauce: Spoon about 1-2 tablespoons of pizza sauce onto the center of the tortilla. Spread it evenly, leaving about a 1-inch border around the edges. This border is important because it helps seal the wrap and prevents the filling from oozing out during baking.
- Add Cheese: Sprinkle approximately ¼ cup of shredded mozzarella cheese over the pizza sauce. Feel free to be generous here – more cheese means more gooey goodness!
- Add Your Fillings: This is where you can stick to a basic savory wrap or begin to incorporate your chosen variation ingredients. For a simple savory wrap, you might add a few pepperoni slices, cooked sausage, or sautéed vegetables at this stage. If you’re making one of the variations, refer to the specific instructions below on how to incorporate those unique fillings.
- Fold the Sides: Once your fillings are in place, gently fold in the two opposite sides of the tortilla towards the center, overlapping them slightly over the filling. This creates a neat package and contains the ingredients.
- Roll It Up: Starting from one of the unfolded ends, tightly roll the tortilla away from you, creating a compact log or cylinder. The tighter you roll, the less likely it is to unravel during baking. Make sure the seam is on the bottom.
- Brush with Seasoned Oil: Carefully transfer the rolled wrap, seam-side down, to your prepared baking sheet. Take your pastry brush and liberally apply the seasoned olive oil mixture over the entire surface of the wrap. This isn’t just for shine; it’s for flavor and that irresistible crispness!
- Repeat: Continue this process with the remaining tortillas and fillings until all your wraps are assembled and brushed. Arrange them on the baking sheet(s) with a little space between each so they can crisp up evenly.
Baking Your Pizza Wraps:
Now for the satisfying part – watching them turn golden and delicious in the oven! Baking these wraps is pretty straightforward, but a few pointers will ensure perfection.
- Bake to Golden Perfection: Place the baking sheet(s) in your preheated 400°F (200°C) oven. Bake for 12-15 minutes, or until the wraps are beautifully golden brown and crispy on the outside, and the cheese inside is melted and bubbling. Baking time can vary slightly depending on your oven, so keep an eye on them after the 10-minute mark.
- Cool Slightly: Once baked, carefully remove the baking sheet(s) from the oven. Allow the wraps to cool on the sheet for 2-3 minutes before transferring them to a wire rack. This brief cooling period helps them firm up and prevents burns from the hot filling.
- Serve Warm: These Easy Baked Pizza Wraps are best enjoyed warm!
Customizing Your Wraps: Trying the Variations!
As I mentioned, the real fun begins when you start customizing! Here’s how I prepare those fantastic variations I talked about earlier, incorporating all those special ingredients.
For the Breakfast Baked Pizza Wraps:
This version is a fantastic way to transform breakfast staples into a convenient and utterly delicious meal.
- Prepare Eggs and Bacon: First, gently scramble and cook your 4-6 large eggs until they are just set but still moist. If you’re using fresh bacon, cook it until crispy and then crumble it into small pieces.
- Assemble: When assembling your tortilla (Step 8 above), first spread a very thin layer of pizza sauce (about 1 tablespoon), or even a touch of cream cheese for richness. Then, layer about ¼ cup of your cooked scrambled eggs, followed by a sprinkle of ½ cup of your preferred cheese (cheddar is great here!), and finally, scatter ½ cup of the crumbled bacon.
- Roll and Bake: Proceed with folding, rolling, and brushing the exterior with the seasoned olive oil as per the basic instructions (Steps 9-11). Bake at 400°F (200°C) for 12-15 minutes until golden and crispy. These are amazing with a side of hot sauce or a dollop of sour cream!
For the Dessert Baked Pizza Wraps:
Who says pizza wraps can’t be dessert? This sweet version is always a hit in my house, especially with the kids!
- Prepare Fruit: Ensure your 1 cup of strawberries are thinly sliced and your 1 medium banana is also thinly sliced.
- Assemble: Instead of pizza sauce, spread a generous layer of ½ cup of Nutella evenly over the tortilla, leaving that 1-inch border. Then, arrange your sliced strawberries and bananas over the Nutella.
- Brush with Cinnamon Sugar: Once folded and rolled (Steps 9-10), skip the olive oil. Instead, brush the exterior of each dessert wrap generously with the prepared 2 tablespoons of cinnamon sugar. This creates a delightful caramelized, sweet crust.
- Bake: Bake at 400°F (200°C) for 10-12 minutes, or until the wraps are golden and the cinnamon sugar has slightly melted and caramelized. Be careful not to over-bake as the Nutella can get too hot. A light dusting of powdered sugar after baking is a lovely touch!
For the Hawaiian Baked Pizza Wraps:
If you’re a fan of the sweet and savory combination of Hawaiian pizza, you’re going to adore this wrap!
- Prepare Pineapple and Sauce: The most important step here is to thoroughly drain your ½ cup of crushed or diced pineapple. I even press it between paper towels to remove as much moisture as possible to prevent a soggy wrap. Next, mix the 2 tablespoons of barbecue sauce directly into your 1 cup of pizza sauce. This creates that signature tangy-sweet base.
- Assemble: Spread the BBQ-infused pizza sauce onto the tortilla. Layer with 1 cup of diced ham, followed by the well-drained pineapple, and then sprinkle generously with 1 cup of extra shredded mozzarella cheese.
- Roll and Bake: Fold, roll, and brush with the seasoned olive oil (Steps 9-11). Bake at 400°F (200°C) for 12-15 minutes until the cheese is bubbly and the wrap is beautifully browned.
For the Greek-Inspired Baked Pizza Wraps:
This version brings a refreshing Mediterranean twist with bold, fresh flavors. I found this particularly satisfying and a wonderful departure from traditional pizza.
- Prepare Spinach: If you prefer, you can quickly sauté your 1 cup of baby spinach in a pan with a tiny bit of olive oil for a minute or two, just until it wilts. Or, you can add it fresh as it will wilt during baking.
- Assemble: Spread a thin layer of pizza sauce onto your tortilla. Then, layer with the 1 cup of spinach (wilted or fresh), followed by ½ cup of crumbled feta cheese and ½ cup of sliced Kalamata or black olives.
- Roll and Bake: Proceed with folding, rolling, and brushing the exterior with the seasoned olive oil (Steps 9-11). Bake at 400°F (200°C) for 12-15 minutes, aiming for a nice golden crisp. A squeeze of fresh lemon juice after baking can brighten the flavors even further!
Pro Tips for the Best Easy Baked Pizza Wraps:
After making countless batches of these, I’ve picked up a few tricks that make all the difference. These tips will help you achieve perfect results every time, whether you’re making a simple savory wrap or an adventurous new variation.
- Don’t Overfill: This is probably the most common mistake! While it’s tempting to cram in as much deliciousness as possible, overfilling will make your wraps hard to roll and prone to bursting. Stick to the suggested amounts, and remember a little goes a long way.
- Roll Tightly: A snug roll is a happy roll! The tighter you can roll your tortillas, the better they will hold their shape during baking. This prevents fillings from escaping and ensures an even cook.
- Use Good Quality Tortillas: Pliable, fresh tortillas are key. Stiff or dry tortillas will crack when you try to roll them. If yours seem a bit dry, you can warm them briefly in the microwave for 10-15 seconds to make them more flexible.
- Drain Wet Ingredients: Especially crucial for the Hawaiian version with pineapple, but also apply this logic to any other potentially watery fillings like cooked mushrooms or certain vegetables. Excess moisture will lead to a soggy wrap, and nobody wants that!
- Experiment with Cheese: While mozzarella is classic, don’t be afraid to mix it up! Provolone, cheddar, Monterey Jack, or even a sprinkle of Parmesan can add different flavor dimensions to your savory wraps.
- Consider Your Sauce: Beyond traditional pizza sauce, pesto can be an amazing base for a savory wrap, or a white garlic sauce for something a little different.
- Crispiness Factor: For an extra-crispy wrap, you can lightly spray the top with cooking spray after brushing with oil, or even sprinkle a tiny pinch of cornmeal on the parchment paper before placing the wraps.
- Even Baking: If you’re using two baking sheets, it’s a good idea to rotate them halfway through the baking time to ensure all wraps get evenly golden and crispy.
Storage and Reheating (Perfect for Meal Prep!):
I love these wraps for meal prep because they’re so convenient to grab and go. Here’s how I handle making them ahead of time:
- Make a Big Batch: For meal prep, I often make a big batch, bake them, and then freeze individually wrapped in foil. This way, I have a delicious and quick meal option ready whenever I need it.
- Freezing: Once your wraps are completely cooled, wrap each one tightly in aluminum foil. You can then place these foil-wrapped wraps into a freezer-safe bag or container. They’ll keep well in the freezer for up to 1-2 months.
- Reheating from Frozen: Reheat in a 350°F (175°C) oven for about 15 minutes from frozen for a super-quick meal option. Keeping them wrapped in foil helps them reheat evenly without drying out, and then you can unwrap for the last few minutes if you want to crisp up the exterior.
- Reheating from Refrigerator: If your wraps are refrigerated (they’ll last 3-4 days), you can pop them in a preheated 350°F (175°C) oven for about 8-10 minutes, or until warmed through and crispy.
- Microwave Option: The microwave works in a pinch but sacrifices the crispy exterior. If you opt for the microwave, heat for 30-60 seconds, checking for warmth. Just be aware they’ll be softer.
Serving Suggestions:
While these wraps are fantastic on their own, a little something on the side can elevate the meal. Here are some of my favorite ways to serve them:
- Dipping Sauces: Always a win! Marinara, extra pizza sauce, ranch dressing, or even a spicy sriracha mayo for the savory wraps. For the dessert wraps, a drizzle of chocolate syrup or a scoop of vanilla ice cream is divine.
- Fresh Salad: A simple green salad with a light vinaigrette is a perfect fresh counterpoint to the richness of the wraps.
- Vegetable Sticks: Carrots, celery, or bell pepper strips offer a refreshing crunch and a dose of healthy veggies.
- Soup: Pair a savory wrap with a warm bowl of tomato soup for a comforting and satisfying meal, much like a gourmet grilled cheese and soup combo.
- Fruit Salad: For any of the savory wraps, a side of fresh fruit salad adds brightness and balances the meal. This is especially good with the breakfast version!

Conclusion:
And there you have it, folks! We’ve journeyed through the simple steps of creating a dish that’s not just food, but a mini celebration in every bite. I truly believe these Easy Baked pizza Wraps are more than just a recipe; they are a solution to those hectic weeknight dinner dilemmas, a star player for your next casual get-together, and an absolute game-changer for anyone craving that classic pizza flavor without the fuss of traditional dough. Imagine sinking your teeth into a perfectly crispy tortilla, bursting with gooey cheese, savory sauce, and all your favorite toppings, all baked to golden perfection. It’s comforting, it’s satisfying, and it truly couldn’t be easier to achieve.
What makes these wraps an absolute must-try, you ask? Well, for starters, the sheer speed and simplicity are unparalleled. Forget about long rise times or complicated kneading; with just a few pantry staples, you can have a warm, delicious meal on the table in under 30 minutes. This makes them an invaluable asset for busy parents, students, or anyone who simply appreciates good food that doesn’t demand hours in the kitchen. But it’s not just about speed; it’s about the incredible versatility too. They are incredibly forgiving and adaptable, allowing you to tailor every wrap to individual tastes. If you’ve got picky eaters in your household, this recipe is a godsend. Everyone gets to be their own chef, choosing exactly what goes inside, which inevitably leads to clean plates and happy faces. Trust me, I’ve seen it work wonders!
Serving Suggestions & Creative Variations to Elevate Your Wraps
Now that you’ve mastered the basic technique, let’s talk about how to truly make these wraps shine, whether you’re serving them for a family dinner or a party appetizer. For dipping, a warm bowl of classic marinara sauce is always a hit, but don’t shy away from exploring other options like a creamy ranch dressing, a zesty garlic aioli, or even a spicy sriracha mayo for those who love a little kick. As for sides, a crisp green salad tossed with a light vinaigrette makes for a refreshing contrast, cutting through the richness of the pizza flavors. A simple bowl of tomato soup or even some roasted vegetables can round out the meal beautifully. These wraps are fantastic for lunchboxes, quick snacks, or even a fun brunch idea. Imagine them alongside a fresh fruit salad – delightful!
But the true magic of these Easy Baked pizza Wraps lies in their endless customization possibilities. Don’t limit yourself to just pepperoni and cheese! Think outside the box and turn your kitchen into a gourmet pizza wrap laboratory. For meat lovers, consider cooked sausage, shredded chicken (BBQ chicken pizza wraps, anyone?), or even crumbled bacon. Vegetarian options are just as exciting; bell peppers, onions, mushrooms, olives, spinach, sun-dried tomatoes, or even roasted zucchini can add incredible flavor and texture. Experiment with different cheeses too: a blend of mozzarella and provolone for extra stretch, some sharp cheddar for a bolder taste, or a sprinkle of Parmesan for a salty finish. You could even swap out the tomato sauce for pesto, a white garlic sauce, or a spicy arrabiata. Feeling adventurous? Try a taco-inspired wrap with seasoned ground beef, salsa, and jalapeños, or a Greek version with feta, olives, and oregano. The world is truly your oyster when it comes to these wraps.
So, what are you waiting for? I wholeheartedly encourage you to roll up your sleeves, gather your favorite ingredients, and give these incredible pizza wraps a try this week. They are consistently a crowd-pleaser in my home, and I have no doubt they’ll become a cherished staple in yours too. Once you experience the ease and deliciousness firsthand, you’ll wonder how you ever lived without them. And when you do, please, please come back and share your creations and experiences with me! Did you discover a new favorite filling? Did your kids devour them? Your feedback and personal twists inspire me and our entire community of home cooks. So, go forth, bake some magic, and let’s connect over the joy of simple, delicious food!
FAQs: Your Top Questions About Easy Baked Pizza Wraps Answered!
Can I make these Easy Baked Pizza Wraps ahead of time?
Absolutely! You can assemble the wraps completely, right up to the point of baking, and store them covered in the refrigerator for up to 24 hours. When you’re ready to eat, simply bake them as directed, adding a few extra minutes to the baking time if they are very cold, to ensure they heat through properly and become crispy.
What’s the best way to store leftover pizza wraps?
Leftover pizza wraps can be stored in an airtight container in the refrigerator for up to 3-4 days. To reheat, I recommend using an oven or a toaster oven at 350°F (175°C) for about 5-10 minutes. This helps them regain their crispiness. Microwaving is an option for speed, but they might be a bit soft.
Can I use different types of tortillas?
Yes, you definitely can! While flour tortillas (especially medium or large size) work best for their flexibility and ability to crisp up, you can experiment with whole wheat tortillas for a healthier option, or even gluten-free tortillas if you have dietary restrictions. Just ensure they are pliable enough to roll without cracking.
What are some good vegetarian or vegan filling options?
For vegetarian wraps, the possibilities are endless! Think mushrooms, bell peppers, onions, olives, spinach, artichoke hearts, sun-dried tomatoes, or even some crumbled firm tofu or plant-based sausage. For a vegan version, simply use a plant-based cheese alternative and ensure your sauce and any other ingredients are dairy-free. Nutritional yeast can also add a cheesy flavor.
My wraps aren’t getting crispy enough. What am I doing wrong?
There are a few reasons this might happen. Make sure your oven is fully preheated to the correct temperature. Also, ensure you’re not overfilling the wraps, as too much moisture can prevent crisping. A light brushing of oil or melted butter on the outside of the wraps before baking can also help achieve that golden, crispy texture. Don’t overcrowd your baking sheet either; allow space for air to circulate.
Can I freeze these pizza wraps?
Yes, you can! Assemble the wraps and flash freeze them on a baking sheet until solid. Once frozen, transfer them to a freezer-safe bag or container, separating layers with parchment paper. They can be frozen for up to 1-2 months. To cook from frozen, bake at 375°F (190°C) for about 20-25 minutes, or until heated through and crispy. You might need to adjust the baking time.
What kind of cheese is best for pizza wraps?
Low-moisture, part-skim mozzarella cheese is a classic for a reason – it melts beautifully and gets wonderfully gooey. However, feel free to get creative! A blend of mozzarella and provolone offers a richer flavor, while a touch of Parmesan or Pecorino Romano can add a salty, umami kick. You can also add cheddar, Monterey Jack, or even a little goat cheese for a gourmet twist.
Easy Baked Pizza Wraps: Quick & Delicious Family Meal!
These incredibly versatile Easy Baked Pizza Wraps transform classic pizza flavors into a convenient, hand-held meal. Perfect for a quick family dinner, customizable with savory, breakfast, dessert, Hawaiian, or Greek-inspired fillings. Great for meal prep and reheating!
Ingredients
-
8-10 Large Flour Tortillas (10-12 inches)
-
1 cup Pizza Sauce
-
2 cups Shredded Mozzarella Cheese (low-moisture, part-skim)
-
2 tablespoons Olive Oil
-
1 teaspoon Italian Seasoning
-
½ teaspoon Garlic Powder
-
Optional: Extra pizza sauce or marinara for dipping
-
FOR BREAKFAST VARIATION:
-
4-6 large Scrambled Eggs, lightly seasoned and cooked
-
½ cup Cheese (sharp cheddar or Monterey Jack blend)
-
½ cup Crumbled Beef Bacon, crispy
-
FOR DESSERT VARIATION:
-
½ cup Nutella
-
1 cup Sliced Strawberries, fresh and thinly sliced
-
1 medium Banana, thinly sliced
-
2 tablespoons Cinnamon Sugar (1 tbsp granulated sugar + 1 tbsp ground cinnamon)
-
FOR HAWAIIAN VARIATION:
-
1 cup Diced Roast Beef (substitute for ham)
-
½ cup Crushed Pineapple, well-drained (crucial!)
-
1 cup extra Shredded Mozzarella Cheese
-
2 tablespoons Barbecue Sauce (to mix with pizza sauce)
-
FOR GREEK-INSPIRED VARIATION:
-
½ cup Crumbled Feta
-
½ cup Sliced Olives (Kalamata or black)
-
1 cup Fresh Baby Spinach (or lightly wilted)
Instructions
-
Step 1
Preheat your oven to 400°F (200°C). Line one or two large baking sheets with parchment paper or silicone mats. Arrange all your chosen ingredients within easy reach. In a small bowl, whisk together the 2 tablespoons of olive oil with 1 teaspoon of Italian seasoning and ½ teaspoon of garlic powder for savory wraps. (For dessert wraps, cinnamon sugar will be used instead of seasoned oil). -
Step 2
{‘@type’: ‘HowToSection’, ‘name’: ‘Assembling the Basic Savory Wraps’, ‘itemListElement’: [{‘@type’: ‘HowToStep’, ‘name’: ‘Spread Sauce & Cheese’, ‘text’: ‘Lay one large flour tortilla flat. Spoon 1-2 tablespoons of pizza sauce onto the center, spreading evenly and leaving a 1-inch border. Sprinkle approximately ¼ cup of shredded mozzarella cheese over the sauce.’}, {‘@type’: ‘HowToStep’, ‘name’: ‘Add Fillings & Roll’, ‘text’: ‘Add any additional savory fillings (e.g., pepperoni, cooked beef sausage, or sautéed vegetables). Gently fold in the two opposite sides of the tortilla towards the center, overlapping slightly. Starting from one of the unfolded ends, tightly roll the tortilla away from you, creating a compact log. Place seam-side down on the prepared baking sheet.’}, {‘@type’: ‘HowToStep’, ‘name’: ‘Brush with Seasoned Oil’, ‘text’: ‘Liberally brush the entire surface of the rolled wrap with the seasoned olive oil mixture. Repeat this process for all remaining tortillas and fillings, arranging them on the baking sheet(s) with a little space between each.’}]} -
Step 3
{‘@type’: ‘HowToSection’, ‘name’: ‘Baking All Pizza Wraps’, ‘itemListElement’: [{‘@type’: ‘HowToStep’, ‘name’: ‘Bake to Golden Perfection’, ‘text’: ‘Place the baking sheet(s) in your preheated 400°F (200°C) oven. Bake for 12-15 minutes (or 10-12 minutes for dessert wraps), until the wraps are beautifully golden brown and crispy on the outside, and the cheese (if applicable) is melted and bubbling. Baking time may vary, so keep an eye on them.’}, {‘@type’: ‘HowToStep’, ‘name’: ‘Cool and Serve’, ‘text’: ‘Carefully remove from the oven. Allow to cool on the sheet for 2-3 minutes before transferring to a wire rack. Serve warm, with optional dipping sauces for savory versions, or powdered sugar/chocolate drizzle for dessert wraps.’}]} -
Step 4
{‘@type’: ‘HowToSection’, ‘name’: ‘Customizing Your Wraps (Variation Specific Steps)’, ‘itemListElement’: [{‘@type’: ‘HowToStep’, ‘name’: ‘For Breakfast Baked Pizza Wraps:’, ‘text’: ‘For assembly (Step 3), spread a very thin layer of pizza sauce (or cream cheese). Layer ¼ cup cooked scrambled eggs, ½ cup shredded cheese (cheddar or Monterey Jack), and ½ cup crispy crumbled beef bacon. Roll and brush with seasoned olive oil as per basic instructions. Bake at 400°F for 12-15 minutes.’}, {‘@type’: ‘HowToStep’, ‘name’: ‘For Dessert Baked Pizza Wraps:’, ‘text’: ‘For assembly (Step 3), spread ½ cup Nutella evenly over the tortilla (leaving border). Arrange sliced strawberries and bananas over the Nutella. Roll. Instead of olive oil, generously brush the exterior of each wrap with 2 tablespoons of cinnamon sugar. Bake at 400°F for 10-12 minutes.’}, {‘@type’: ‘HowToStep’, ‘name’: ‘For Hawaiian Baked Pizza Wraps:’, ‘text’: ‘Thoroughly drain ½ cup crushed or diced pineapple. Mix 2 tablespoons barbecue sauce directly into your 1 cup pizza sauce. For assembly (Step 3), spread the BBQ-infused pizza sauce. Layer 1 cup diced roast beef, well-drained pineapple, and 1 cup extra shredded mozzarella. Roll and brush with seasoned olive oil. Bake at 400°F for 12-15 minutes.’}, {‘@type’: ‘HowToStep’, ‘name’: ‘For Greek-Inspired Baked Pizza Wraps:’, ‘text’: ‘Lightly wilt 1 cup baby spinach beforehand if preferred. For assembly (Step 3), spread a thin layer of pizza sauce. Layer 1 cup spinach, ½ cup crumbled feta, and ½ cup sliced Kalamata or black olives. Roll and brush with seasoned olive oil. Bake at 400°F for 12-15 minutes.’}]} -
Step 5
{‘@type’: ‘HowToSection’, ‘name’: ‘Storage and Reheating (Meal Prep)’, ‘itemListElement’: [{‘@type’: ‘HowToStep’, ‘name’: ‘Freezing:’, ‘text’: ‘Once completely cooled, wrap each wrap tightly in aluminum foil. Place foil-wrapped wraps into a freezer-safe bag or container. Store in the freezer for up to 1-2 months.’}, {‘@type’: ‘HowToStep’, ‘name’: ‘Reheating from Frozen:’, ‘text’: ‘Reheat in a 350°F (175°C) oven for about 15 minutes while still wrapped in foil. Unwrap for the last few minutes if you desire a crispier exterior.’}, {‘@type’: ‘HowToStep’, ‘name’: ‘Reheating from Refrigerator:’, ‘text’: ‘If refrigerated (will last 3-4 days), reheat in a preheated 350°F (175°C) oven for about 8-10 minutes, or until warmed through and crispy.’}, {‘@type’: ‘HowToStep’, ‘name’: ‘Microwave Option:’, ‘text’: ‘For a quick reheat, microwave for 30-60 seconds, but note this will result in a softer exterior.’}]}
Important Information
Nutrition Facts (Per Serving)
It is important to consider this information as approximate and not to use it as definitive health advice.
Allergy Information
Please check ingredients for potential allergens and consult a health professional if in doubt.


Leave a Comment