
Making bubbles is a timeless joy, but traditional bubbles pop so quickly. These unpoppable bubbles are a bit different. They’re tougher, more resilient, and can even be gently poked or passed between hands without instantly bursting. This recipe uses simple household ingredients to create a truly magical bubble solution that will entertain kids and adults alike for extended play. It’s a fantastic activity for a sunny afternoon or a party, and the results are surprisingly satisfying. The secret lies in combining dish soap, sugar, and water in just the right way to create a thicker, more durable bubble film.
Ingredients:
- Dish Soap
- Sugar
- Water
Tools:
- Straw
- Clean Counter or Table
Creating Your Super Bubble Solution
This process is more about careful mixing than actual cooking. The key is to get the ratios right and allow the ingredients time to meld. We’re aiming for a solution that is thicker and more viscous than regular bubble mix, which is what gives these bubbles their amazing durability. Don’t be tempted to rush any of the steps, especially the resting period.
Step 1: The Base Mix
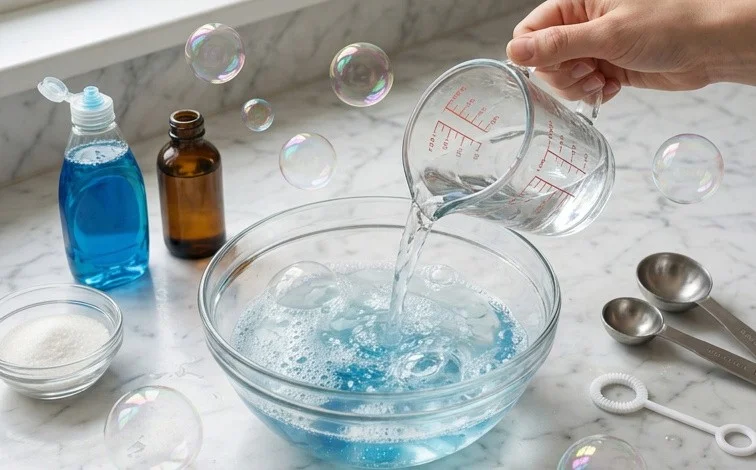
Start by gathering your ingredients. You’ll need a clean container, like a jar or bowl, to mix your solution in. Begin with a base of water. A good starting point is 2 cups of water. You can adjust this later if needed, but this is a reliable amount to get you going. Next, add your dish soap. The dish soap is what creates the film that forms the bubble. For 2 cups of water, I recommend using about 1/2 cup of dish soap. Use a good quality dish soap that you know makes decent bubbles on its own for the best results.
How To Make DIY Magic Unpoppable Bubbles
Making bubbles is a timeless joy, but traditional bubbles pop so quickly. These unpoppable bubbles are a bit different. They’re tougher, more resilient, and can even be gently poked or passed between hands without instantly bursting. This recipe uses simple household ingredients to create a truly magical bubble solution that will entertain kids and adults alike for extended play. It’s a fantastic activity for a sunny afternoon or a party, and the results are surprisingly satisfying.
Ingredients:
- Dish Soap
- Sugar
- Water
Tools:
- Straw
- Clean Counter or Table
Creating Your Super Bubble Solution
This process is more about careful mixing than actual cooking. The key is to get the ratios right and allow the ingredients time to meld. We’re aiming for a solution that is thicker and more viscous than regular bubble mix, which is what gives these bubbles their amazing durability. Don’t be tempted to rush any of the steps, especially the resting period.
Step 1: The Base Mix
Start by gathering your ingredients. You’ll need a clean container, like a jar or bowl, to mix your solution in. Begin with a base of water. A good starting point is 2 cups of water. You can adjust this later if needed, but this is a reliable amount to get you going. Next, add your dish soap. The dish soap is what creates the film that forms the bubble. For 2 cups of water, I recommend using about 1/2 cup of dish soap. Use a good quality dish soap that you know makes decent bubbles; some brands work better than others. Avoid any dish soaps that claim to be “ultra grease-cutting” as they can sometimes be too harsh and affect the bubble film negatively. Pour the dish soap into the water.
Step 2: Adding the Sweetener
Now comes the secret ingredient for unpoppable bubbles: sugar. The sugar helps to thicken the bubble solution and strengthen the bubble film. Without the sugar, the bubbles would be too fragile. Measure out about 2 tablespoons of granulated sugar. Pour the sugar directly into the water and dish soap mixture. You’ll notice that the sugar doesn’t dissolve immediately, and that’s perfectly fine.
Step 3: Gentle Dissolution
This is a critical step for success. You need to get the sugar to dissolve into the water and soap mixture. The best way to do this is by stirring gently. Avoid vigorous whisking or shaking, as this introduces too much air into the solution, which can lead to smaller, less stable bubbles. Use a spoon or a straw and stir slowly and steadily. Continue stirring until the sugar is as dissolved as possible. It’s okay if there are a few tiny sugar crystals left at the bottom, but the majority should be incorporated. The mixture will start to look a little cloudy, and that’s normal.
Step 4: The All-Important Rest
This is arguably the most important step for achieving unpoppable bubbles. Once you’ve stirred the sugar in as much as you can, cover your container. You can use plastic wrap and a rubber band, or a lid if you’re using a jar. Let the mixture sit undisturbed for at least 4 hours, but preferably overnight. This resting period allows the ingredients to fully meld and the excess air bubbles to dissipate. The longer it rests, the better the solution will become. You’ll notice the mixture will thicken slightly after resting. This is the magic happening!
Step 5: Bubble Time!
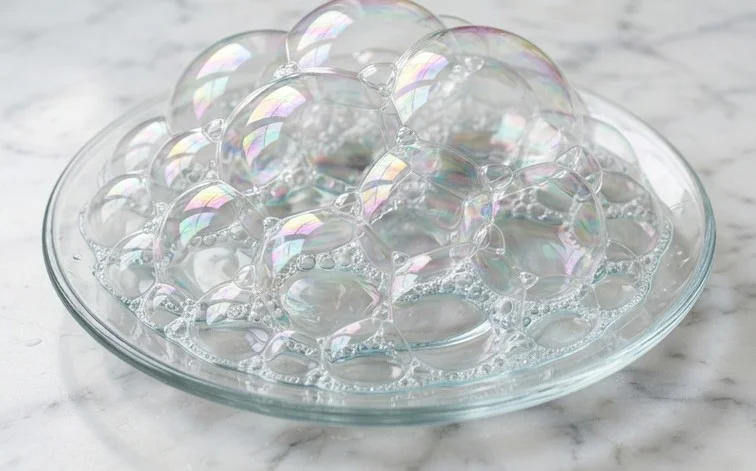
After the resting period, your unpoppable bubble solution is ready. Gently stir the mixture one last time. You’ll notice it’s thicker and silkier than regular bubble solution. Dip your straw into the solution, making sure to get a good coating of the liquid on the end. Hold the straw up and gently blow. You should see large, resilient bubbles form. These bubbles won’t pop on the slightest touch. You can often gently poke them with a fingertip, or even try to pass them between your hands without them bursting. The trick is to be gentle. If you blow too hard, you’ll still pop them, but they are much more forgiving than standard bubbles.
For the best results, try to blow your bubbles in a humid environment. Dry air causes bubbles to evaporate and pop faster. On a warm, slightly humid day, these bubbles can last for quite some time. You can store the leftover solution in a sealed container at room temperature for a few days. If it seems to have thickened too much over time, you can add a tiny splash of water to loosen it up. Experiment with different dish soaps to see if you can find one that creates even more durable bubbles. Enjoy your super-powered bubble fun!
Conclusion:
Making your own unpoppable bubbles is a wonderfully simple yet incredibly rewarding activity. The satisfaction of seeing these durable bubbles float and withstand gentle touches is a joy for all ages. This DIY magic bubble solution is perfect for backyard fun, birthday parties, or just a quiet afternoon activity that sparks imagination. It’s a testament to how simple ingredients can create something truly special. Experimenting with the ratios slightly can even lead to even more spectacular results.
Serving Suggestions: While these bubbles are best enjoyed outdoors on a calm day, they can also be used for indoor decorations or as part of a science demonstration. Try blowing them in a bathtub for a contained, splashy experience.
Variations: For added fun, consider adding a few drops of food coloring to your solution, though this may slightly affect bubble durability. You could also try different types of dish soap to see how it impacts the bubble strength.
Frequently Asked Questions:
Why are my bubbles still popping?
Ensure you are using a good quality dish soap known for its lathering properties. The resting period is also critical; allow the mixture to sit undisturbed for at least 12-24 hours. Stirring too vigorously can also introduce air bubbles that weaken the solution.
Can I make the bubbles last longer?
The key to long-lasting, unpoppable bubbles is the right balance of soap, water, and sugar, along with adequate resting time. Allowing the mixture to fully hydrate and the sugar to dissolve completely creates a more viscous and elastic bubble film. For even more resilience, some makers find that letting the solution rest for a full 24 hours is beneficial.
What makes these bubbles ‘unpoppable’?
These DIY magic bubbles are more resilient than standard ones due to the addition of sugar, which helps to slow down the evaporation of water from the bubble film, making it more elastic and less prone to immediate popping. The specific ratio of ingredients creates a thicker film capable of withstanding gentle contact.
DIY Magic Unpoppable Bubbles
Create super-strong, unpoppable bubbles with this simple DIY recipe using common household ingredients.
Ingredients
-
{‘@type’: ‘Ingredient’, ‘name’: ‘Dish Soap’, ‘amount’: ‘1/2 cup’}
-
{‘@type’: ‘Ingredient’, ‘name’: ‘Sugar’, ‘amount’: ‘1 tablespoon’}
-
{‘@type’: ‘Ingredient’, ‘name’: ‘Water’, ‘amount’: ‘1 cup’}
-
{‘@type’: ‘Ingredient’, ‘name’: ‘Corn Syrup’, ‘amount’: ‘1/2 cup’, ‘comment’: ‘Substitution for non-alcoholic alternative-based glycerin’}
-
{‘@type’: ‘Ingredient’, ‘name’: ‘Glycerin’, ‘amount’: ‘1/4 cup’, ‘comment’: ‘For extra strength’}
Instructions
-
Step 1
In a clean bowl, combine 1 cup of water and 1 tablespoon of sugar. -
Step 2
Stir the sugar and water mixture thoroughly until the sugar is completely dissolved. This may take a minute or two. -
Step 3
Add 1/2 cup of dish soap to the sugar water. Gently stir to combine, being careful not to create too many suds. -
Step 4
Slowly incorporate 1/2 cup of corn syrup and 1/4 cup of glycerin into the mixture. Stir gently until well blended. -
Step 5
Allow the bubble solution to sit for at least 30 minutes to allow the ingredients to meld. This helps create stronger bubbles. -
Step 6
Pour the bubble solution into a shallow dish or container. Use a straw or a bubble wand to create your magic unpoppable bubbles.
Important Information
Nutrition Facts (Per Serving)
It is important to consider this information as approximate and not to use it as definitive health advice.
Allergy Information
Please check ingredients for potential allergens and consult a health professional if in doubt.
Leave a Comment