
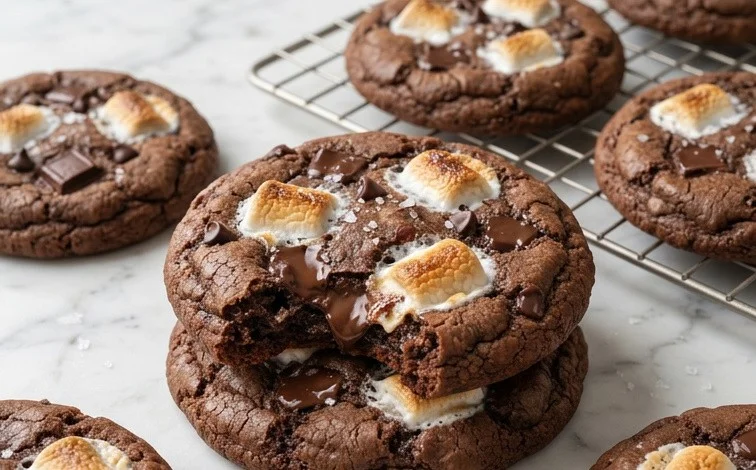
Hot Chocolate Cookies are pure comfort in every bite, tasting exactly like a warm mug of hot chocolate but in a chewy, decadent cookie form. They’re packed with rich cocoa flavor, studded with melty chocolate chips, and have delightful pockets of gooey marshmallow. Making them is surprisingly straightforward, and the aroma that fills your kitchen while they bake is an added bonus. They’re perfect for a cozy afternoon, a holiday treat, or just whenever you need a chocolate fix. This recipe is designed for home bakers who appreciate straightforward instructions and a truly satisfying result. The combination of deep cocoa notes from both cocoa powder and hot cocoa mix provides an authentic chocolate experience, while the marshmallows add that signature gooey texture reminiscent of your favorite hot beverage. We’ll guide you through each step to ensure your cookies come out perfectly chewy and incredibly chocolatey, just like the real thing, but in cookie form.
Ingredients:
- 1/2 cup butter (softened)
- 1/4 cup sugar
- 1/4 cup brown sugar
- 1 egg
- 2 tablespoons milk
- 1 teaspoon vanilla
- 1 1/8 cups flour ((1 cup + 2 tablespoons))
- 1/3 cup powdered hot cocoa mix
- 1/3 cup unsweetened cocoa powder*
- 1/2 teaspoon baking soda
- 1/4 teaspoon salt
- 1/2 cup marshmallow bits (plus extra for topping)
- 1/2 cup semi-sweet chocolate chips (plus extra for topping)
Making the Cookie Dough
First things first, we need to get our oven preheated and our baking sheets ready. Preheat your oven to 350 degrees Fahrenheit (175 degrees Celsius). Line two baking sheets with parchment paper. This prevents sticking and makes cleanup a breeze. If you don’t have parchment paper, you can lightly grease your baking sheets, but parchment paper is highly recommended for the best results. In a large mixing bowl, cream together the softened butter, granulated sugar, and brown sugar. You can use an electric mixer for this, which makes it much easier to get a light and fluffy texture. Beat them together until the mixture is pale yellow and looks fluffy, about 2-3 minutes. This creaming step incorporates air, which is key for the cookie’s texture. Next, beat in the egg until well combined, then stir in the milk and vanilla extract until just incorporated. Don’t overmix at this stage. In a separate medium bowl, whisk together the flour, powdered hot cocoa mix, unsweetened cocoa powder, baking soda, and salt. Whisking the dry ingredients helps distribute the leavening agents and cocoa evenly, preventing pockets of bitterness or baking soda. Gradually add the dry ingredients to the wet ingredients, mixing on low speed or by hand until just combined. It’s important not to overmix the dough once the flour is added, as this can lead to tough cookies. Finally, gently fold in the marshmallow bits and semi-sweet chocolate chips. Reserve a few extra marshmallow bits and chocolate chips to press onto the tops of the cookies before baking for an even more appealing look and an extra burst of chocolate and marshmallow.
Hot Chocolate Cookies
These cookies are pure comfort in every bite, tasting exactly like a warm mug of hot chocolate but in a chewy, decadent cookie form. They’re packed with rich cocoa flavor, studded with melty chocolate chips, and have delightful pockets of gooey marshmallow. Making them is surprisingly straightforward, and the aroma that fills your kitchen while they bake is an added bonus. They’re perfect for a cozy afternoon, a holiday treat, or just whenever you need a chocolate fix.
Ingredients:
- 1/2 cup butter (softened)
- 1/4 cup sugar
- 1/4 cup brown sugar
- 1 egg
- 2 tablespoons milk
- 1 teaspoon vanilla
- 1 1/8 cups flour ((1 cup + 2 tablespoons))
- 1/3 cup powdered hot cocoa mix
- 1/3 cup unsweetened cocoa powder*
- 1/2 teaspoon baking soda
- 1/4 teaspoon salt
- 1/2 cup marshmallow bits (plus extra for topping)
- 1/2 cup semi-sweet chocolate chips (plus extra for topping)
Making the Cookie Dough
First things first, we need to get our oven preheated and our baking sheets ready. Preheat your oven to 350 degrees Fahrenheit (175 degrees Celsius). Line two baking sheets with parchment paper. This prevents sticking and makes cleanup a breeze. If you don’t have parchment paper, you can lightly grease your baking sheets, but parchment paper is highly recommended for the best results.
In a large mixing bowl, cream together the softened butter, granulated sugar, and brown sugar. You can use an electric mixer for this, which makes it much easier to get a light and fluffy texture. Beat them together until the mixture is pale yellow and looks well combined, about 2-3 minutes. Make sure your butter is truly softened, not melted. If it’s too cold, it won’t cream properly, and if it’s melted, your cookies might spread too much.
Next, we’ll add the wet ingredients. Crack in the egg and add the milk and vanilla extract. Mix these in until everything is just combined. Don’t overmix at this stage. You want everything to be incorporated without developing the gluten in the flour too much, which can lead to tough cookies.
Combining the Dry Ingredients
In a separate medium-sized bowl, whisk together the flour, powdered hot cocoa mix, unsweetened cocoa powder, baking soda, and salt. Whisking these dry ingredients together thoroughly before adding them to the wet ingredients ensures that the leavening agents (baking soda) and salt are evenly distributed. This helps your cookies rise evenly and prevents pockets of saltiness or baking soda flavor. The combination of powdered hot cocoa mix and unsweetened cocoa powder provides a deep, complex chocolate flavor.
Gradually add the dry ingredients to the wet ingredients. Mix on low speed or by hand until just combined. Be careful not to overmix the dough once the flour is added. Mix only until you no longer see streaks of flour. Overmixing can result in dense, tough cookies. The dough will be thick and sticky.
Adding the Goodies and Baking
Now for the best part – adding in the chocolate chips and marshmallow bits! Gently fold in the 1/2 cup of marshmallow bits and 1/2 cup of semi-sweet chocolate chips. You can use a spatula or a wooden spoon for this. Again, you want to mix until they are evenly distributed throughout the dough, but avoid overmixing. Save a few extra chocolate chips and marshmallow bits to press onto the tops of the cookies before baking, for that extra visual appeal and chocolatey goodness.
Drop rounded tablespoons of dough onto the prepared baking sheets, leaving about 2 inches between each cookie to allow for spreading. You can use a cookie scoop for uniform size. If you like, gently press a few extra chocolate chips and marshmallow bits onto the tops of the dough balls. This gives them a lovely finished look. You can also gently flatten the tops of the dough balls slightly with the palm of your hand if you prefer a flatter cookie, though they will spread on their own.
Bake for 9 to 12 minutes, or until the edges are set and lightly golden brown, and the centers still look slightly soft. The baking time can vary depending on your oven, so keep an eye on them. It’s better to underbake them slightly for a chewier cookie than to overbake them, which can make them dry and crumbly. The marshmallows will puff up and may even melt slightly, which is exactly what we want.
Cooling and Enjoying
Once baked, remove the baking sheets from the oven and let the cookies cool on the sheets for about 5 minutes. This allows them to firm up enough to be moved without falling apart. After 5 minutes, carefully transfer the cookies to a wire rack to cool completely. This is important because if you leave them on the hot baking sheet, they will continue to cook from the residual heat, potentially making them overdone. The wire rack allows air to circulate around the cookies, ensuring they cool evenly and maintain their chewy texture.
These hot chocolate cookies are best enjoyed warm, fresh from the oven, with a glass of cold milk or, of course, a steaming mug of hot chocolate. They also store well in an airtight container at room temperature for up to 3-4 days. If you plan on storing them for longer, you can freeze them. Once completely cooled, place them in a freezer-safe bag or container. They should keep well for up to 2-3 months. To reheat, you can briefly warm them in a low oven or microwave.
Conclusion:
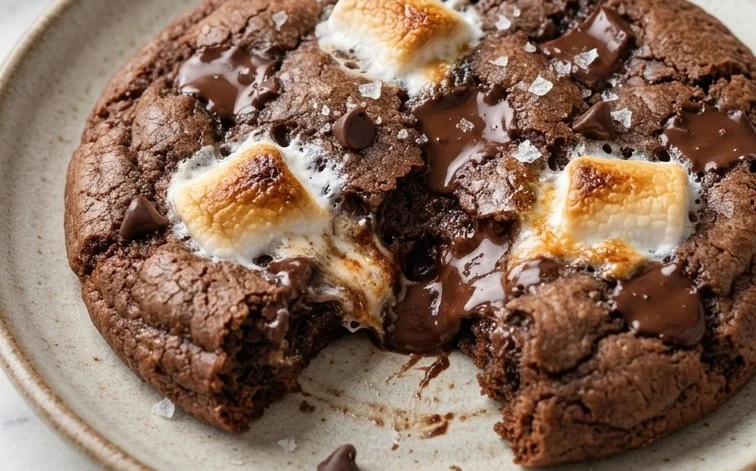
These Hot Chocolate Cookies truly capture the essence of a warm mug of hot chocolate in cookie form. They are wonderfully chewy, intensely chocolatey, and studded with melty chocolate chips and gooey marshmallows, making them a perfect treat for any occasion. Whether you’re looking for a comforting dessert after dinner, a special addition to your holiday baking spread, or just a way to satisfy a sweet craving, these cookies deliver. The rich cocoa flavor paired with the sweet marshmallows and chocolate chips is a winning combination that always pleases. Serve them warm with a glass of milk for the ultimate experience, or let them cool completely for a delightful on-the-go snack. They also pair beautifully with a cup of actual hot chocolate for double the comfort!
Variations and Serving Suggestions:
For a little extra flair, consider adding a pinch of cinnamon to the dry ingredients for a subtle warmth, or a dash of espresso powder to deepen the chocolate flavor. You can also swap the semi-sweet chocolate chips for dark chocolate chips or even white chocolate chips for a different taste profile. If you can’t find marshmallow bits, mini marshmallows can work, but be aware they might melt a bit more. These cookies are best enjoyed within a few days of baking. Store them in an airtight container at room temperature to maintain their chewy texture. For longer storage, they freeze well, either baked or as dough balls. Simply thaw at room temperature or bake from frozen, adding a few extra minutes to the baking time.
Frequently Asked Questions:
Can I make these cookies ahead of time?
Yes, you can definitely make the cookie dough ahead of time. Once the dough is made, you can cover it tightly and refrigerate it for up to 3 days. The flavors will meld even further, resulting in a more intense chocolate taste. When you’re ready to bake, scoop and bake as directed, you might need to add a minute or two to the baking time since the dough will be cold.
What if I don’t have powdered hot cocoa mix?
If you don’t have powdered hot cocoa mix, you can substitute it with an additional 3 tablespoons of unsweetened cocoa powder. You might want to add an extra tablespoon or two of sugar to compensate for the sweetness lost from the hot cocoa mix. Taste the dough before adding the chocolate chips and marshmallows and adjust sweetness if needed. However, the powdered hot cocoa mix contributes to the unique flavor and texture of these Hot Chocolate Cookies, so using it is recommended for the best results.
Hot Chocolate Cookies
Decadent cookies packed with chocolate flavor and melty marshmallows, reminiscent of a warm mug of hot chocolate.
Ingredients
-
1/2 cup butter, softened
-
1/4 cup granulated sugar
-
1/4 cup packed brown sugar
-
1 large egg
-
2 tablespoons milk
-
1 teaspoon vanilla extract
-
1 1/8 cups all-purpose flour
-
1/3 cup powdered hot cocoa mix
-
1/3 cup unsweetened cocoa powder
-
1/2 teaspoon baking soda
-
1/4 teaspoon salt
-
1/2 cup marshmallow bits
-
1/2 cup semi-sweet chocolate chips
Instructions
-
Step 1
Preheat oven to 350°F (175°C). Line baking sheets with parchment paper. -
Step 2
In a large bowl, cream together the softened butter, granulated sugar, and brown sugar until light and fluffy. -
Step 3
Beat in the egg, milk, and vanilla extract until well combined. -
Step 4
In a separate medium bowl, whisk together the flour, powdered hot cocoa mix, unsweetened cocoa powder, baking soda, and salt. -
Step 5
Gradually add the dry ingredients to the wet ingredients, mixing until just combined. Do not overmix. -
Step 6
Stir in the marshmallow bits and semi-sweet chocolate chips. -
Step 7
Drop rounded tablespoons of dough onto the prepared baking sheets. Press a few extra marshmallow bits and chocolate chips onto the tops of the cookies, if desired. -
Step 8
Bake for 10-12 minutes, or until the edges are set and the centers are still slightly soft. -
Step 9
Let the cookies cool on the baking sheets for a few minutes before transferring them to a wire rack to cool completely.
Important Information
Nutrition Facts (Per Serving)
It is important to consider this information as approximate and not to use it as definitive health advice.
Allergy Information
Please check ingredients for potential allergens and consult a health professional if in doubt.



Leave a Comment