
Homemade eggnog is a comforting classic for a reason, especially when the weather turns cold. There’s something incredibly satisfying about a creamy, spiced eggnog that just screams cozy. Making your own means you’re in charge of the sugar and spice levels, and the fresh, pure flavor beats anything from a store any day. This Homemade Eggnog Recipe focuses on using simple, good-quality ingredients to achieve a rich and smooth drink. We’re talking a luxurious texture that’s perfect for sipping by a warm fire or serving up at holiday parties. The trick to a silky, non-eggy taste is tempering the egg yolks just right with warm dairy. Get ready to enjoy a truly special treat.
Ingredients:
- 2 cups whole milk or 2%
- 1 cup heavy cream
- ½ teaspoon ground nutmeg
- ¼ teaspoon ground cinnamon
- pinch of ground cloves
- 6 egg yolks (room temperature)
- ½ cup sugar
- ½ teaspoon vanilla extract
- whipped cream (optional)
- extra ground cinnamon or nutmeg (optional)
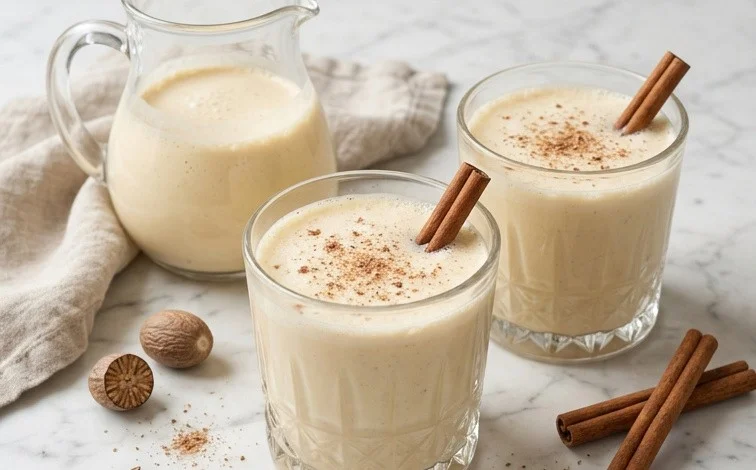
Homemade Eggnog Recipe
There’s something incredibly comforting about a creamy, spiced eggnog during the cooler months. Making it at home means you can control the sweetness and spice, and the fresh flavor is miles beyond anything from a carton. This recipe uses simple, good-quality ingredients to create a rich and satisfying drink that’s perfect for sipping by the fire or serving at holiday gatherings. The key is using room temperature egg yolks, which emulsify much better into the base, creating a smoother, more luxurious texture without any trace of a eggy taste.
Ingredients:
- 2 cups whole milk or 2%
- 1 cup heavy cream
- ½ teaspoon ground nutmeg
- ¼ teaspoon ground cinnamon
- pinch of ground cloves
- 6 egg yolks (room temperature)
- ½ cup sugar
- ½ teaspoon vanilla extract
- whipped cream (optional)
- extra ground cinnamon or nutmeg (optional)
Cooking Instructions
Preparing the Base
First, let’s get our spices ready. In a medium saucepan, combine the whole milk, heavy cream, ground nutmeg, ground cinnamon, and the pinch of ground cloves. This is where the warm, comforting flavors of eggnog really start to build. Place the saucepan over medium heat. You want to gently warm the milk and cream, but not boil it. Stir occasionally to prevent any skin from forming on top. The goal is to get it nice and hot, just steaming, so it’s ready to temper the egg yolks. This usually takes about 5-7 minutes. Once it’s steaming and fragrant, remove it from the heat.
Tempering the Egg Yolks
While the milk mixture is warming, let’s focus on the egg yolks. In a separate medium bowl, whisk together the 6 room-temperature egg yolks and the ½ cup of sugar. Whisk vigorously until the mixture becomes pale yellow and slightly thickened. This process, called tempering, is essential for creating a smooth custard base and preventing the eggs from scrambling when they hit the hot milk. It takes a bit of effort, but it’s worth it for the texture. Now, for the crucial step: slowly add about half a cup of the warm milk mixture to the egg yolk and sugar mixture while whisking constantly. This gradually raises the temperature of the egg yolks without cooking them. Once thoroughly combined, carefully pour this tempered egg mixture back into the saucepan with the remaining warm milk mixture.
Cooking the Custard
Return the saucepan to medium-low heat. Now, you need to cook the custard gently, stirring constantly with a wooden spoon or heatproof spatula. You’ll feel the mixture begin to thicken. This is a slow process, and patience is key. You don’t want to rush it or let it get too hot, or you risk scrambling the eggs. Keep stirring, scraping the bottom and sides of the pan, until the custard is thick enough to coat the back of your spoon, meaning when you draw a finger through the custard on the spoon, the line holds without the custard immediately running back together. This typically takes about 8-10 minutes. It’s important not to let it boil, as this will curdle the eggnog. If you have a thermometer, the custard should reach about 160-170°F (71-77°C).
Cooling and Finishing
Once the custard has thickened to your liking, remove the saucepan from the heat immediately. Stir in the ½ teaspoon of vanilla extract. This adds a lovely depth of flavor. To ensure a perfectly smooth texture and remove any potential bits of cooked egg or spices, strain the eggnog through a fine-mesh sieve into a clean bowl. This is a simple step that makes a big difference. Then, cover the surface of the eggnog directly with plastic wrap to prevent a skin from forming. Refrigerate the eggnog for at least 2-4 hours, or preferably overnight, to allow the flavors to meld and the eggnog to chill thoroughly. The chilling process is just as important as the cooking for developing the best taste and texture.
Serving Your Homemade Eggnog
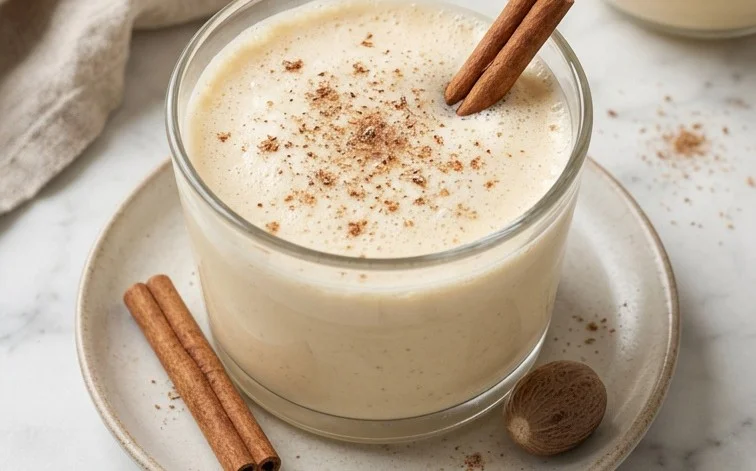
When you’re ready to serve, give the chilled eggnog a good stir. It will have thickened considerably. Ladle the eggnog into glasses. For an extra special touch, top each serving with a dollop of freshly whipped cream and a dusting of extra ground cinnamon or nutmeg, if desired. This homemade eggnog is a wonderfully rich and festive drink that’s perfect for celebrating. You can store any leftover eggnog in an airtight container in the refrigerator for up to 3 days. However, it’s best enjoyed fresh. The quality of your milk and cream will directly impact the richness of your final eggnog, so opt for the best you can find. Remember that using room temperature egg yolks is a critical step for achieving a silky smooth consistency, so don’t skip this! Enjoy the delightful taste of homemade tradition.
Conclusion:
This Homemade Eggnog Recipe is a wonderful way to bring some extra cheer to your holidays or any chilly evening. It’s simple to make and tastes so much better than store-bought. The fresh, warm spices and creamy texture make it a real treat. You can adjust the sweetness and spice to your liking, making it truly your own. Serve it warm or chilled, with a dollop of whipped cream and a sprinkle of cinnamon or nutmeg. It’s a fantastic drink for gatherings or for a quiet moment of indulgence.
Frequently Asked Questions:
Can I make this eggnog ahead of time?
Yes, you can make the eggnog base a day or two in advance. Store it covered in the refrigerator. Give it a good stir before serving, and you can warm it gently if you prefer it warm, or serve it chilled.
How do I get the creamiest texture?
Using room temperature egg yolks is key, as they emulsify better into the warm liquid without scrambling. Also, making sure your milk and cream mixture is hot enough (steaming but not boiling) when you temper the eggs helps create a smooth base. Don’t skip the occasional stirring while warming the dairy to prevent skin formation.
Can I make this recipe vegan?
While this specific recipe uses dairy and eggs, you could adapt it by using full-fat coconut milk or other plant-based milks and creams, and replacing the egg yolks with a cornstarch slurry for thickening. However, the traditional texture and flavor will be different.
Homemade Eggnog Recipe
A classic, creamy, and flavorful homemade eggnog recipe perfect for the holidays. Easily made with simple ingredients for a delightful festive beverage.
Ingredients
-
2 cups whole milk or 2%
-
1 cup heavy cream
-
6 egg yolks (room temperature)
-
½ cup sugar
-
½ teaspoon ground nutmeg
-
¼ teaspoon ground cinnamon
-
pinch of ground cloves
-
½ teaspoon vanilla extract
Instructions
-
Step 1
In a medium saucepan, whisk together the egg yolks and sugar until well combined and pale yellow. -
Step 2
Gradually whisk in the milk and heavy cream until smooth. -
Step 3
Cook over medium-low heat, stirring constantly with a wooden spoon, until the mixture thickens slightly and coats the back of the spoon (about 10-15 minutes). Do not boil. -
Step 4
Remove from heat and stir in the ground nutmeg, ground cinnamon, ground cloves, and vanilla extract. -
Step 5
Strain the eggnog through a fine-mesh sieve into a clean bowl or pitcher. -
Step 6
Chill in the refrigerator for at least 2 hours before serving. Serve cold, optionally topped with whipped cream and a sprinkle of extra cinnamon or nutmeg.
Important Information
Nutrition Facts (Per Serving)
It is important to consider this information as approximate and not to use it as definitive health advice.
Allergy Information
Please check ingredients for potential allergens and consult a health professional if in doubt.



Leave a Comment