
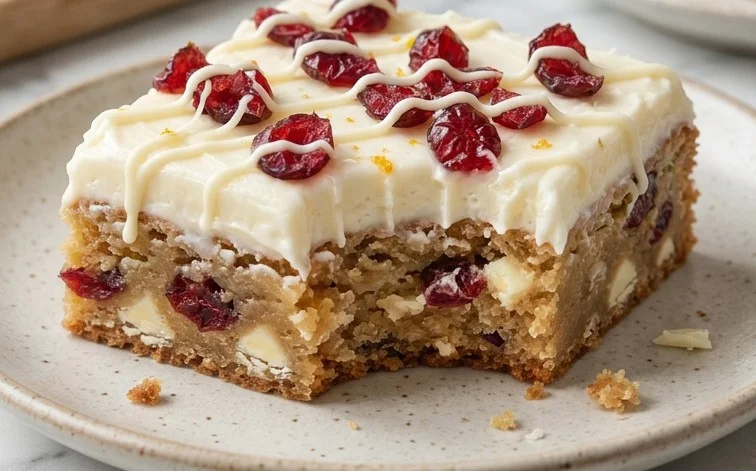
Cranberry Bliss Bars are a treat that balances a tender, chewy cookie base with a creamy, sweet topping and a hint of tartness from dried cranberries. These bars are wonderfully satisfying and bring to mind cozy baking days, even when it’s not the holiday season. The texture is a delightful contrast: soft and yielding on the bottom, with a smooth, rich layer on top. My version uses a combination of unsweetened apple sauce and egg whites for moisture in the base, keeping them wonderfully tender without being heavy. The cream cheese frosting, enriched with melted white chocolate, is where the real bliss comes in. It’s smooth, slightly tangy, and perfectly complements the sweet and tart elements throughout. People love these Cranberry Bliss Bars because they offer a familiar comfort food feeling with a special festive flair, making them a hit for gatherings or just a personal indulgence. The golden-brown cookie bottom, dotted with pops of red cranberries and white chocolate chips, makes them as pretty as they are delicious. They are a truly delightful way to enjoy the comforting flavors of cranberry and white chocolate.
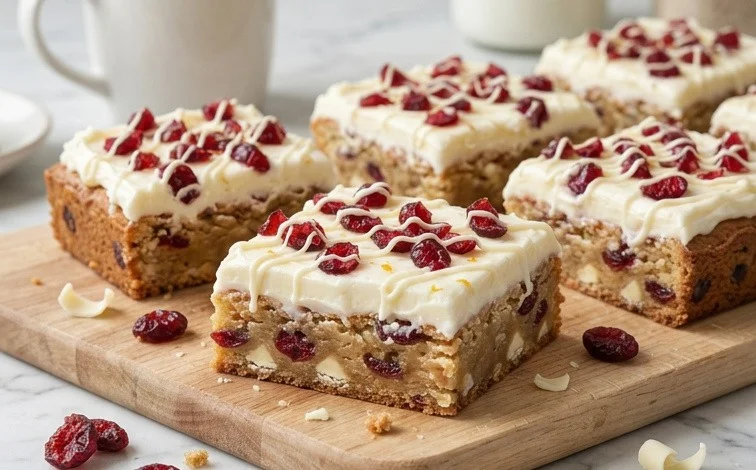
Cranberry Bliss Bars
These Cranberry Bliss Bars are my go-to when I need a sweet treat that’s festive and wonderfully satisfying. They have a delightful chewiness from the cookie base, a creamy, tangy frosting, and just the right amount of tartness from the cranberries. They remind me of holiday baking, but honestly, they’re perfect any time of year.
Ingredients:
- 2 cups all purpose flour (Gold Medal)
- 1/2 tsp baking soda
- 1/4 tsp salt
- 1/8 teaspoon ground cinnamon
- 2/3 cup granulated sugar
- 2/3 cup brown sugar (unpacked)
- 1/4 cup melted unsalted butter
- 2 large egg whites
- 1/4 cup unsweetened apple sauce
- 2 tsp vanilla extract
- 2/3 cup white chocolate chips or chopped white chocolate
- 1/3 cup dried cranberries (chopped)
- 8 oz 1/3 less fat cream cheese (softened)
- 1/2 cup powdered sugar
- 2 ounces white baking chocolate (melted)
Making the Bars:
Step 1: Prepare the Base Mixture
First things first, let’s get our oven ready. Preheat it to 350 degrees Fahrenheit (175 degrees Celsius). While the oven is warming up, you’ll want to prepare an 8×8 inch baking pan. I like to line mine with parchment paper, leaving some overhang on the sides. This makes lifting the bars out so much easier later on, and it also means less mess for cleanup. In a medium bowl, whisk together the dry ingredients: 2 cups of all-purpose flour, half a teaspoon of baking soda, a quarter teaspoon of salt, and just an eighth of a teaspoon of ground cinnamon. Giving these a good whisk ensures that the leavening agents and salt are evenly distributed, which is key for consistent texture.
Step 2: Combine Wet and Dry for the Base
Now, in a separate larger bowl, we’re going to cream together the sugars and the butter. You’ll need 2/3 cup of granulated sugar and 2/3 cup of packed brown sugar. Add in the 1/4 cup of melted unsalted butter. Beat these together until they’re well combined. It doesn’t need to be perfectly fluffy, just thoroughly mixed. Next, you’ll add the wet ingredients that bind everything: 2 large egg whites, 1/4 cup of unsweetened apple sauce, and 2 teaspoons of vanilla extract. Beat these in until the mixture is smooth. Gradually add the dry ingredient mixture to the wet ingredients, mixing on low speed or by hand until just combined. Be careful not to overmix here; we want a tender bar, and overmixing can develop the gluten too much, leading to a tougher texture. Finally, fold in the 2/3 cup of white chocolate chips or chopped white chocolate and the 1/3 cup of chopped dried cranberries. The white chocolate adds sweetness and creaminess, while the cranberries provide that signature tartness.
Step 3: Bake the Bar Base
Spread this delicious mixture evenly into your prepared 8×8 inch baking pan. Press it down gently with a spatula or the back of a spoon to create a compact, even layer. You want it to bake into a solid, chewy base. Pop the pan into your preheated oven and bake for about 20 to 25 minutes. You’ll know it’s ready when the edges are lightly golden brown and the center is set. It shouldn’t be jiggly. Once baked, remove the pan from the oven and let it cool completely in the pan on a wire rack. This is a really important step for frosting. If you try to frost a warm base, the frosting will melt and slide right off, creating a sticky mess.
Step 4: Make the Cream Cheese Frosting
While the base is cooling, let’s get the frosting ready. In a clean bowl, beat the 8 ounces of softened 1/3 less fat cream cheese until it’s smooth and creamy. Make sure it’s truly softened to room temperature; this makes it much easier to get a smooth frosting without lumps. Add 1/2 cup of powdered sugar to the cream cheese and beat until well combined and fluffy. If you prefer a sweeter frosting, you can add a tablespoon or two more of powdered sugar, but taste as you go. Then, stir in the 2 ounces of melted white baking chocolate. You’ll want to melt this gently, either in a double boiler or in the microwave in short bursts, stirring frequently, until smooth. Stirring the melted white chocolate into the cream cheese mixture will give the frosting a lovely flavor and a slightly firmer set once it cools. Ensure the melted chocolate isn’t too hot when you add it, or it could affect the cream cheese texture.
Step 5: Assemble and Chill
Once the bar base is completely cool—and I mean truly cool to the touch—you can spread the cream cheese frosting evenly over the top. Use an offset spatula or a regular butter knife to get a smooth, even layer. Don’t be tempted to frost it while it’s still warm, or the frosting will become a soupy mess. After the frosting is spread, you need to let the bars chill. Place the pan in the refrigerator for at least 1 hour, or until the frosting is firm. This allows the frosting to set properly and makes the bars much easier to cut into clean pieces. Once chilled, use the parchment paper overhang to lift the entire block out of the pan. Place it on a cutting board and cut into squares. I usually get about 16 bars out of an 8×8 pan, but you can cut them bigger or smaller depending on your preference.
Store any leftover Cranberry Bliss Bars in an airtight container in the refrigerator. They’re best enjoyed within a few days. The combination of the chewy bar and the rich, tangy frosting is truly something special. Enjoy!
Conclusion:
These Cranberry Bliss Bars truly live up to their name, offering a delightful balance of sweet, tart, and creamy flavors with a satisfyingly chewy cookie base. They’re a wonderful treat that feels special enough for holidays but is simple enough for any occasion. The combination of white chocolate and cranberries is a classic for a reason, and this bar format makes them incredibly easy to serve and share. Whether you’re bringing them to a potluck, making them for a family gathering, or just craving a comforting homemade dessert, these bars are sure to be a hit. Serve them chilled or at room temperature – both ways are fantastic. You can even add a sprinkle of chopped white chocolate or extra dried cranberries on top just before the frosting sets for an extra touch of elegance and flavor. They store well, making them a great make-ahead dessert. I hope you give these Cranberry Bliss Bars a try; they’re a recipe I return to again and again.
Frequently Asked Questions:
Can I use fresh cranberries instead of dried?
Fresh cranberries are much more tart and will release more liquid as they bake, which can affect the texture of the bar base. For the best results and to maintain the intended flavor balance and texture, it’s best to stick with dried cranberries. If you do want to try fresh, you would need to chop them finely and perhaps toss them with a little sugar before adding, but expect a different outcome.
How should I store Cranberry Bliss Bars?
Once cooled completely, store the Cranberry Bliss Bars in an airtight container. They can be kept at room temperature for up to 3 days, or in the refrigerator for up to a week. If refrigerated, let them come to room temperature for about 15-20 minutes before serving for the best texture.
Cranberry Bliss Bars
Deliciously sweet and tart bars with a creamy white chocolate topping.
Ingredients
-
2 cups all purpose flour (Gold Medal)
-
1/2 tsp baking soda
-
1/4 tsp salt
-
1/8 teaspoon ground cinnamon
-
2/3 cup granulated sugar
-
2/3 cup brown sugar (unpacked)
-
1/4 cup melted unsalted butter
-
2 large egg whites
-
1/4 cup unsweetened apple sauce
-
2 tsp vanilla extract
-
2/3 cup white chocolate chips or chopped white chocolate
-
1/3 cup dried cranberries (chopped)
-
8 oz 1/3 less fat cream cheese (softened)
-
1/2 cup powdered sugar
-
2 ounces white baking chocolate (melted)
Instructions
-
Step 1
Preheat oven to 350°F (175°C). Grease and flour a 9×13 inch baking pan. -
Step 2
In a large bowl, whisk together flour, baking soda, salt, and cinnamon. -
Step 3
In a separate bowl, cream together granulated sugar, brown sugar, and melted butter. Beat in egg whites, apple sauce, and vanilla extract until well combined. -
Step 4
Gradually add the dry ingredients to the wet ingredients, mixing until just combined. Stir in white chocolate chips and dried cranberries. -
Step 5
Spread batter evenly into the prepared baking pan. Bake for 20-25 minutes, or until a toothpick inserted into the center comes out clean. -
Step 6
While the bars are baking, prepare the topping. In a medium bowl, beat softened cream cheese until smooth. Gradually beat in powdered sugar until combined. Stir in melted white baking chocolate. -
Step 7
Remove bars from oven and immediately spread cream cheese topping evenly over the warm bars. Let cool completely before cutting into bars.
Important Information
Nutrition Facts (Per Serving)
It is important to consider this information as approximate and not to use it as definitive health advice.
Allergy Information
Please check ingredients for potential allergens and consult a health professional if in doubt.



Leave a Comment