
Chocolate crinkle cookie recipes are a holiday classic for a reason. Their deep chocolate flavor, chewy interior, and crackled powdered sugar coating make them irresistible. I love making these when the weather turns cooler, and the house fills with the scent of warm chocolate. The magic of these cookies is in that beautiful contrast between the dark, fudgy dough and the snowy white exterior. They look so festive and are surprisingly easy to make. The key to their signature look is the way the dough spreads and cracks as it bakes, revealing that stunning marbled effect. This chocolate crinkle cookie recipe delivers that perfect balance of rich cocoa and sweet sugar, with a texture that’s both dense and tender. You get a fantastic bakery-style cookie right from your own kitchen, making them a joy to share with friends and family during any special occasion or simply as an afternoon treat. Get ready for a delightful baking experience.
Chocolate Crinkle Cookie Recipe
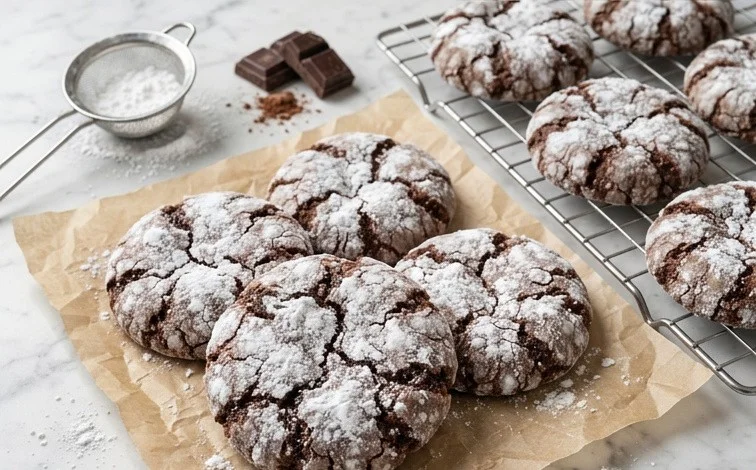
Chocolate crinkle cookies are a holiday classic for a reason. Their deep chocolate flavor, chewy interior, and crackled powdered sugar coating make them irresistible. I love making these when the weather turns cooler, and the house fills with the scent of warm chocolate. The magic of these cookies is in that beautiful contrast between the dark, fudgy dough and the snowy white exterior. They look so festive and are surprisingly easy to make. The key to their signature look is the way the dough spreads and cracks as it bakes, revealing that stunning marbled effect.
Ingredients:
- 2¼ cups all-purpose flour
- 2½ teaspoons baking powder
- ½ teaspoon kosher salt
- 1 cup uns unsweetened Dutch-processed cocoa powder
- 1¼ cups granulated sugar
- ½ cup brown sugar
- ½ cup vegetable oil or canola oil
- 4 large eggs
- 1 teaspoon vanilla extract
- ⅔ cup powdered sugar (for rolling)
Making the Dough
This recipe starts with combining all your dry ingredients. In a large bowl, whisk together the all-purpose flour, baking powder, and kosher salt. Make sure these are thoroughly combined to ensure even distribution of the leavening agent and salt. Next, sift in the Dutch-processed cocoa powder. Sifting is important here to prevent any lumps and to achieve a smoother, richer chocolate flavor. Whisk everything together until it’s a uniform, dark brown color.
In a separate, larger bowl, you’ll cream together your sugars and wet ingredients. Add the granulated sugar and brown sugar to this bowl. The brown sugar adds a lovely depth of moisture and a slightly caramel note to the cookies. Pour in the vegetable oil or canola oil. This oil base contributes to the wonderfully chewy texture of the finished cookie. Now, crack in your four large eggs one at a time, beating well after each addition. Finally, stir in the vanilla extract. Ensure everything is well incorporated and you have a smooth, glossy mixture.
Now comes the fun part: combining the wet and dry ingredients. Gradually add the dry ingredient mixture to the wet ingredient mixture, mixing until just combined. Be careful not to overmix the dough at this stage, as overmixing can develop the gluten in the flour too much, leading to tougher cookies. You want a thick, fudgy dough. It will be quite sticky, and that’s perfectly normal. This dough is best chilled before shaping, which makes it much easier to handle. Cover the bowl tightly with plastic wrap and refrigerate for at least 2 to 3 hours, or even overnight. Chilling solidifies the fats in the dough, making it less sticky and easier to roll into balls.
Shaping and Baking
Preheat your oven to 350°F (175°C). Line baking sheets with parchment paper. This is essential to prevent sticking and makes for easy cleanup.
Once the dough is well-chilled and firm, it’s time to shape the cookies. Place the ⅔ cup of powdered sugar in a shallow bowl. Scoop out portions of the chilled dough using a tablespoon or a small cookie scoop (about 1 to 1.5 inches in diameter). Roll each portion of dough between your palms to form smooth balls. The dough will still be somewhat sticky, but much more manageable after chilling.
After forming a ball, generously roll each dough ball in the powdered sugar, ensuring it’s completely coated. This coating is what will give you those beautiful crinkled lines as the cookies bake. Place the coated dough balls about 2 inches apart on your prepared baking sheets. They will spread as they bake, so give them enough room.
Bake for 10 to 12 minutes. You’re looking for the edges to be set but the centers to still look slightly soft. They will continue to cook on the baking sheet after you remove them from the oven. Overbaking will result in dry, cakey cookies, so keep a close eye on them.
Let the cookies cool on the baking sheets for about 5 minutes before carefully transferring them to a wire rack to cool completely. As they cool, you’ll notice the crinkled pattern becoming more pronounced.
Tips for Perfect Crinkles
- Cocoa Powder Quality: Using a good quality Dutch-processed cocoa powder makes a significant difference in the depth and richness of the chocolate flavor. Dutch-processed cocoa has been treated with an alkaline solution, which neutralizes its acidity and results in a darker color and smoother taste.
- Chilling is Key: Don’t skip the chilling step! It’s crucial for making the sticky dough easier to handle and for achieving the perfect texture. If you’re short on time, even 30 minutes in the freezer can help.
- Don’t Overbake: This is probably the most important tip. Chocolate crinkle cookies should be chewy and fudgy in the center. They will look slightly underdone when you take them out of the oven, but they will set up as they cool. If you bake them until the centers are firm, they will be dry.
- Powdered Sugar Coating: Ensure the dough balls are well-coated in powdered sugar before baking. You can even give them a second roll in powdered sugar just before they go into the oven for an extra snowy look, though one good coating is usually sufficient.
- Storage: Once completely cooled, store these cookies in an airtight container at room temperature for up to 3-4 days. They also freeze beautifully, either baked or as dough balls before baking.
These chocolate crinkle cookies are a delightful treat that brings joy with every bite. Enjoy!
Conclusion:
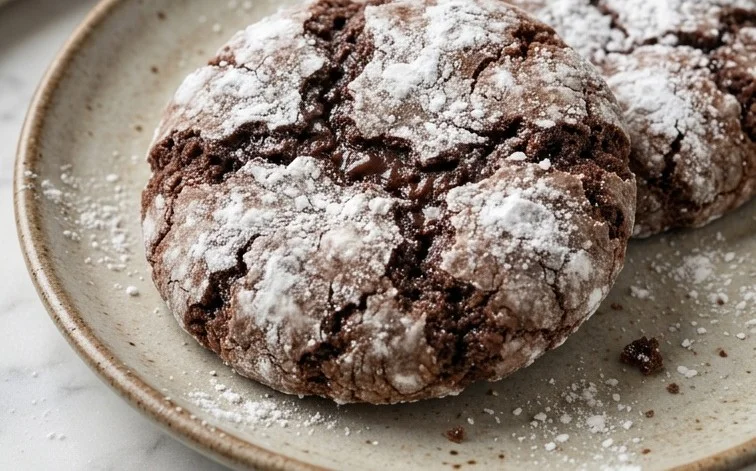
These chocolate crinkle cookies truly are a delightful treat. The combination of the intense chocolate flavor from the Dutch-processed cocoa and the beautiful, cracked exterior dusted with powdered sugar makes them stand out. They are wonderfully chewy in the center with slightly crisp edges, offering a satisfying texture in every bite. This recipe is straightforward enough for bakers of all levels, proving that impressive-looking cookies don’t have to be complicated. Imagine presenting a platter of these to guests – they’re always a hit! For serving, they pair wonderfully with a cold glass of milk, hot coffee, or even a cup of tea. If you want to add a little something extra, consider a tiny pinch of espresso powder in the dough to deepen the chocolate flavor even further, or try rolling them in colored sugar for a festive twist on the classic. Don’t be afraid to experiment slightly while staying true to the core elements of the chocolate crinkle cookie. Embrace the baking process and enjoy the delicious results. You’ll find yourself returning to this recipe again and again.
Frequently Asked Questions:
Why are my chocolate crinkle cookies not cracking?
The cracking is caused by the dough expanding rapidly in the oven and the powdered sugar coating setting quickly. Ensure your oven is properly preheated to the correct temperature. Also, be sure to roll the cookie dough balls generously in powdered sugar, creating a thick enough layer for the cracks to appear through. Using a well-balanced recipe with the right leavening agents is also key.
Can I make the dough ahead of time?
Yes, you can make the dough for these chocolate crinkle cookies a day in advance. Once the dough is made and chilled, it can be stored in an airtight container in the refrigerator for up to 24 hours. Allow it to soften slightly at room temperature for about 15-20 minutes before rolling into balls and baking for the best results and texture.
What kind of cocoa powder should I use?
This recipe calls for Dutch-processed cocoa powder. This type of cocoa has been treated with an alkalizing agent, which reduces its acidity and gives it a smoother, less bitter flavor and a darker color compared to natural cocoa powder. Using Dutch-processed cocoa contributes to the deep chocolate flavor and dark appearance characteristic of great chocolate crinkle cookies.
Chocolate Crinkle Cookie Recipe
Rich, fudgy chocolate crinkle cookies coated in powdered sugar for a festive appearance. These cookies are soft, chewy, and intensely chocolatey.
Ingredients
-
2¼ cups all-purpose flour
-
2½ teaspoons baking powder
-
½ teaspoon kosher salt
-
1 cup unsweetened Dutch-processed cocoa powder
-
1¼ cups granulated sugar
-
½ cup brown sugar
-
½ cup vegetable oil or canola oil
-
4 large eggs
-
1 teaspoon vanilla extract
-
⅔ cup powdered sugar
Instructions
-
Step 1
In a medium bowl, whisk together the flour, baking powder, and salt. -
Step 2
In a large bowl, beat together the granulated sugar, brown sugar, and vegetable oil until well combined. -
Step 3
Beat in the eggs one at a time, then stir in the vanilla extract. -
Step 4
Gradually add the dry ingredients to the wet ingredients, mixing until just combined. Stir in the cocoa powder. The dough will be thick and sticky. -
Step 5
Cover the dough and chill in the refrigerator for at least 2 hours, or until firm enough to roll. -
Step 6
Preheat your oven to 350°F (175°C). Line baking sheets with parchment paper. -
Step 7
Roll the chilled dough into 1-inch balls. Roll each ball generously in powdered sugar, ensuring it is fully coated. -
Step 8
Place the coated balls about 2 inches apart on the prepared baking sheets. -
Step 9
Bake for 9-11 minutes, or until the edges are set and the centers are still slightly soft. Do not overbake. -
Step 10
Let the cookies cool on the baking sheets for a few minutes before transferring them to a wire rack to cool completely.
Important Information
Nutrition Facts (Per Serving)
It is important to consider this information as approximate and not to use it as definitive health advice.
Allergy Information
Please check ingredients for potential allergens and consult a health professional if in doubt.



Leave a Comment