

Cheesy Snack Pockets are more than just a quick bite; they are a delightful culinary experience that promises a burst of flavor in every golden, crispy bite. Imagine breaking open a perfectly baked pocket to reveal a warm, molten core of rich, savory cheese, perhaps mingled with your favorite herbs or a hint of spice. It’s this irresistible combination of a flaky or soft crust cradling a gooey, satisfying filling that makes these pockets universally adored by people of all ages.
The Enduring Appeal of Handheld Delights
Throughout history, the concept of encasing delicious fillings within dough has transcended cultures and centuries. From Italian calzones and British pasties to Latin American empanadas and Indian samosas, each culture has perfected its own version of a handheld, hearty treat, embodying comfort and convenience. Our modern take on Cheesy Snack Pockets taps into this ancient and beloved tradition, offering a simple yet incredibly rewarding way to enjoy a substantial snack or a light meal that truly hits the spot.
People absolutely adore this dish not just for its incredible taste and delightful texture, but also for its remarkable versatility and ease of preparation. Whether you need a quick after-school treat for the kids, a savory appetizer for guests, or a convenient lunchbox filler, these pockets are an absolute game-changer. Get ready to create some truly unforgettable moments with this recipe.
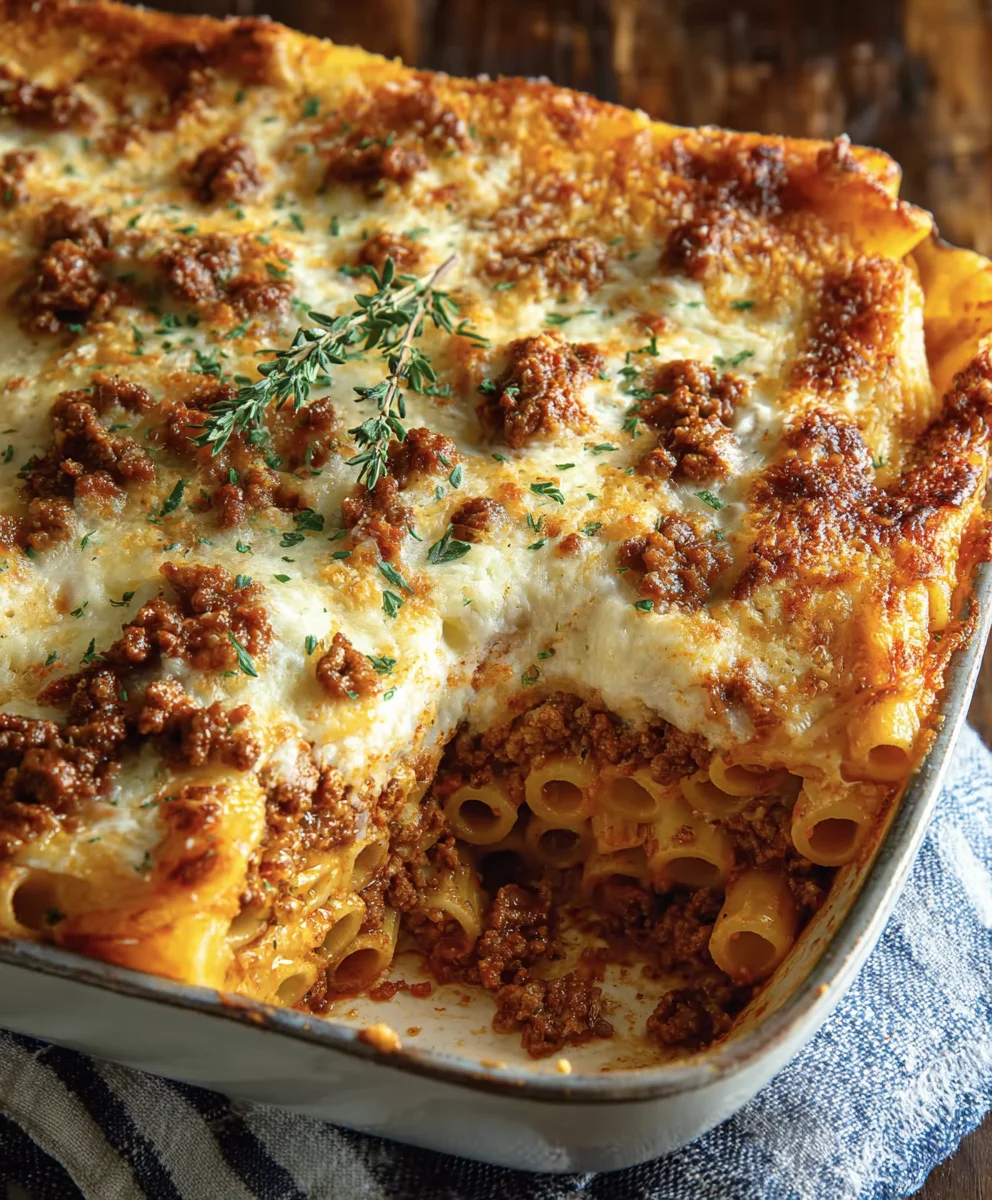
Ingredients:
Get ready to create some truly amazing Cheesy Snack Pockets that will become an instant favorite! Here’s everything you’ll need to gather:
- For the Soft & Fluffy Dough:
- 3 cups (approximately 360g) all-purpose flour, plus extra for dusting
- 1 packet (2 ¼ teaspoons or 7g) active dry yeast
- 1 teaspoon granulated sugar
- 1 teaspoon salt
- 1 cup (240ml) warm water (between 105°F and 115°F / 40°C and 46°C)
- 2 tablespoons olive oil, plus extra for greasing the bowl
- For the Irresistible Cheesy Filling:
- 2 cups (about 220g) shredded mozzarella cheese
- 1 cup (about 110g) shredded sharp cheddar cheese
- ½ cup (about 55g) shredded Monterey Jack cheese (for extra meltiness!)
- ¼ cup (60ml) pizza sauce or marinara sauce (your favorite brand works great, or a simple homemade one)
- 2 cloves garlic, minced very finely
- ½ teaspoon dried oregano
- ¼ teaspoon red pepper flakes (optional, for a little kick!)
- ¼ cup finely diced cooked ham or pepperoni (optional, but highly recommended for extra flavor and texture)
- 2 tablespoons finely chopped fresh parsley (for freshness and color)
- For the Golden Finish & Topping:
- 1 large egg
- 1 tablespoon water or milk
- 1 tablespoon sesame seeds or poppy seeds (optional, for visual appeal and a nutty crunch)
- 1 teaspoon garlic powder (optional, for extra savory flavor on top)
- 2 tablespoons grated Parmesan cheese (optional, for a savory crust)
Preparing the Dough for Your Cheesy Snack Pockets
Making your own dough is incredibly rewarding, and it truly makes these Cheesy Snack Pockets stand out. Don’t worry, it’s simpler than you might think!
- Activate the Yeast: In a large mixing bowl (or the bowl of a stand mixer fitted with a dough hook), combine the warm water, granulated sugar, and active dry yeast. Give it a gentle stir and let it sit for about 5-10 minutes. You’ll know the yeast is active when it becomes foamy and bubbly on the surface. This bubbling is crucial; it means your yeast is alive and ready to make your dough rise beautifully. If it doesn’t foam, your water might have been too hot or too cold, or your yeast might be old.
- Combine Dry Ingredients: While the yeast is activating, in a separate medium bowl, whisk together the all-purpose flour and salt. This ensures the salt is evenly distributed, which is important for flavor and yeast activity (too much direct contact with salt can inhibit yeast).
- Mix the Dough: Once your yeast mixture is foamy, add the olive oil to it. Then, gradually add the flour mixture, about a cup at a time, mixing with a wooden spoon or on low speed with your stand mixer. Continue adding flour until a shaggy dough forms.
- Knead the Dough: Turn the shaggy dough out onto a lightly floured surface. Knead the dough for 8-10 minutes by hand, or for 6-8 minutes on medium speed with a stand mixer. The goal is to develop the gluten, which gives the dough its structure and elasticity. You’ll know it’s properly kneaded when it becomes smooth, elastic, and no longer sticky to the touch. It should spring back when you gently poke it with your finger. If it’s still too sticky, add a very small amount of flour, a tablespoon at a time, until it reaches the right consistency. Resist the urge to add too much flour, as this can make your pockets tough.
- First Rise: Lightly grease a clean large bowl with a little olive oil. Place the kneaded dough into the bowl, turning it once to coat all sides with oil. Cover the bowl tightly with plastic wrap or a clean kitchen towel. Let the dough rise in a warm, draft-free place for 1 to 1.5 hours, or until it has doubled in size. A slightly warm oven (turned off, with just the light on) or a sunny spot on your countertop works perfectly. Patience here is key; a slow rise develops better flavor in the dough.
Crafting the Irresistible Filling for Cheesy Snack Pockets
The filling is where these Cheesy Snack Pockets truly shine! It’s a harmonious blend of cheeses and savory additions that will make every bite delightful.
- Prepare the Cheeses: In a large bowl, combine the shredded mozzarella, sharp cheddar, and Monterey Jack cheeses. Using a blend of cheeses provides a more complex flavor profile and ensures an incredibly gooey, stretchy melt. Freshly shredded cheese always melts better than pre-shredded, as the latter often contains anti-caking agents.
- Add Flavor Enhancers: To the cheese mixture, add the pizza sauce, minced garlic, dried oregano, and red pepper flakes (if using). The pizza sauce not only adds moisture but also a classic, comforting Italian flavor that pairs wonderfully with the cheese. Minced garlic adds a pungent kick, and oregano brings that earthy, aromatic herb note.
- Incorporate Optional Meats: If you’re using diced cooked ham or pepperoni, now is the time to add them to the bowl. These additions boost the savory factor and provide a satisfying texture contrast to the melted cheese. Ensure they are finely diced so they distribute evenly and don’t create bulky spots that could tear the dough.
- Fresh Herb Boost: Stir in the finely chopped fresh parsley. Parsley adds a pop of fresh, herbaceous flavor and a vibrant green color, making the filling more appealing.
- Mix Thoroughly: Using a spoon or your hands, gently mix all the filling ingredients together until they are well combined. You want the sauce and seasonings to coat the cheese and other components evenly. Don’t overmix; just enough to distribute everything. Set the filling aside while you prepare the dough for assembly.
Assembling Your Delicious Cheesy Snack Pockets
Now comes the fun part – turning your beautiful dough and scrumptious filling into individual, portable Cheesy Snack Pockets! This step requires a bit of care to ensure they’re perfectly sealed.
- Punch Down and Divide Dough: Once the dough has doubled in size, gently punch it down to release the air. Turn the dough out onto a lightly floured surface. Using a sharp knife or a bench scraper, divide the dough into 8 equal pieces. For more uniform pockets, you can weigh each piece (they should be roughly 70-75g each).
- Shape Dough Portions: Take each dough piece and gently roll it into a smooth ball. Then, using a rolling pin, roll each ball into a circle approximately 6-7 inches (15-18 cm) in diameter. Aim for a thickness of about ⅛ inch (3-4 mm). Don’t roll them too thin, or they might tear when filled. If the dough springs back too much, let it rest for a few minutes to relax the gluten, then continue rolling.
- Fill the Pockets: Place about ¼ to ⅓ cup of the cheesy filling onto one half of each dough circle, leaving a ½-inch (1.2 cm) border around the edge. Make sure not to overfill, as this will make sealing difficult and can lead to leaks during baking.
- Moisten Edges: Lightly moisten the edges of the dough circle with a little water using your fingertip or a pastry brush. This acts as a glue and helps to create a strong seal.
- Fold and Seal: Fold the other half of the dough circle over the filling, creating a half-moon shape. Carefully align the edges and gently press down to seal them.
- Crimp the Edges: To ensure a secure seal and add a nice decorative touch, use the tines of a fork to crimp all around the sealed edge of each Cheesy Snack Pocket. This step is important to prevent any of that delicious cheese from oozing out during baking. A tight seal means happy pockets!
- Prepare Baking Sheets: Line two large baking sheets with parchment paper. Carefully transfer the assembled Cheesy Snack Pockets to the prepared baking sheets, leaving about 2 inches of space between each one to allow for expansion during baking.
Baking Your Golden Cheesy Snack Pockets
The moment of truth! Baking these Cheesy Snack Pockets to a beautiful golden brown will fill your kitchen with an aroma that’s simply irresistible.
- Preheat Oven: Preheat your oven to 375°F (190°C). Allowing the oven to fully preheat is crucial for even baking and achieving that perfect golden crust.
- Prepare Egg Wash: In a small bowl, whisk together the large egg with 1 tablespoon of water or milk. This creates our egg wash, which will give the Cheesy Snack Pockets a beautiful golden sheen and help any toppings adhere.
- Apply Egg Wash and Toppings: Gently brush the tops of each Cheesy Snack Pocket with the egg wash. Be thorough but avoid letting excess egg wash drip down the sides. If desired, sprinkle the tops with sesame seeds, poppy seeds, garlic powder, or grated Parmesan cheese. These toppings add an extra layer of flavor and texture that truly elevates the snack pockets.
- Bake to Perfection: Place the baking sheets in the preheated oven. Bake for 18-22 minutes, or until the Cheesy Snack Pockets are puffed, golden brown, and the cheese filling is bubbly and melted. Baking time can vary slightly depending on your oven, so keep an eye on them. If your oven bakes unevenly, rotate the baking sheets halfway through the baking time.
- Cool Slightly: Once baked, carefully remove the baking sheets from the oven. Let the Cheesy Snack Pockets cool on the baking sheets for 5-10 minutes before transferring them to a wire rack. This brief cooling period allows the molten cheese to set slightly, preventing it from oozing out too much when you take the first bite, and makes them easier to handle. Be careful, the filling will be extremely hot!
Serving Suggestions and Customization Tips
Your freshly baked Cheesy Snack Pockets are ready to be devoured! Here are some ideas for serving them up and ways you can customize them to suit your taste or what you have on hand.
- Dipping Delights: These Cheesy Snack Pockets are fantastic on their own, but they’re even better with a delicious dipping sauce! Consider serving them with a side of:
- Warm marinara or pizza sauce (a classic pairing!)
- Ranch dressing for a creamy contrast
- Garlic aioli for an extra savory kick
- A spicy sriracha mayo if you like a little heat
- Perfect Pairing: They make a wonderful addition to a light lunch, a party appetizer spread, or a satisfying after-school snack. Serve them alongside a fresh green salad for a balanced meal, or with a cup of tomato soup for ultimate comfort food.
- Flavor Variations for the Filling: Don’t be afraid to experiment with the filling!
- Spicy Pockets: Add finely diced jalapeños or a pinch more red pepper flakes.
- Veggie Loaded: Sauté finely chopped spinach (squeeze out excess water), mushrooms, bell peppers, or onions and add them to the cheese mixture. Just make sure any veggies are cooked and not too watery.
- Meat Lover’s: Besides ham or pepperoni, try cooked, crumbled sausage, shredded cooked chicken, or even finely ground beef that’s been cooked and seasoned.
- Herb Garden: Experiment with other dried or fresh herbs like basil, thyme, or rosemary, depending on the flavor profile you’re aiming for.
- Gourmet Cheese Blends: Try swapping out some of the cheddar or Monterey Jack for provolone, Fontina, or smoked Gouda for a different cheesy experience.
- Dough Alternatives: While homemade dough is lovely, for a quicker option, you can certainly use store-bought refrigerated crescent roll dough or puff pastry. Just be aware that baking times and handling might differ slightly.
- Make Ahead and Storage:
- Refrigeration: Leftover Cheesy Snack Pockets can be stored in an airtight container in the refrigerator for up to 3-4 days.
- Reheating: Reheat them in a preheated oven at 350°F (175°C) for about 8-10 minutes, or until warmed through and crispy again. You can also microwave them, but they won’t be as crispy.
- Freezing (Unbaked): To freeze unbaked pockets, arrange them in a single layer on a baking sheet and freeze until solid. Then transfer them to a freezer-safe bag or container. When ready to bake, place them on a parchment-lined baking sheet, brush with egg wash, and bake directly from frozen, adding an extra 5-10 minutes to the baking time, or until golden brown and cooked through. This is a fantastic way to have homemade Cheesy Snack Pockets ready at a moment’s notice!
- Freezing (Baked): Baked and cooled pockets can also be frozen in an airtight container for up to 2 months. Reheat as you would refrigerated pockets, but it might take a bit longer.
- Presentation Matters: A sprinkle of fresh parsley or a dusting of grated Parmesan right before serving can really enhance their visual appeal. These Cheesy Snack Pockets are incredibly versatile and are sure to be a crowd-pleaser no matter how you serve them!
<h2>Conclusion:</h2>
<p>Well, my friends, we’ve reached the end of our culinary journey for today, but truly, it’s just the beginning of your delicious adventure! I sincerely hope you’ve enjoyed exploring this fantastic recipe with me. <strong>These Cheesy Snack Pockets are more than just a dish; they’re an experience,</strong> a promise of comfort, and a testament to how simple ingredients can come together to create something truly extraordinary. What makes them an absolute must-try, you ask? It’s that perfect symphony of textures and flavors: the irresistibly golden-brown, crispy exterior that gives way to an explosion of warm, gooey, melted cheese inside. Every bite is a little parcel of pure joy, utterly satisfying and delightfully addictive. They’re incredibly versatile, fitting seamlessly into almost any occasion, from a quick weeknight dinner to a lively game-day spread, or even as the star of an impromptu get-together. I’ve made these countless times, and they never fail to impress, disappear quickly, and earn rave reviews from everyone who tastes them.</p>
<h4>Elevate Your Experience with Perfect Pairings and Creative Twists!</h4>
<p>Now, while these <strong>Cheesy Snack Pockets</strong> are undeniably phenomenal on their own, a little pairing can take them from great to absolutely unforgettable. My personal favorite way to serve them is alongside a rich, warm marinara sauce for dipping – that classic Italian flavor combination is just divine! But don’t stop there; imagine them with a creamy ranch dressing for a tangy counterpoint, a spicy sriracha mayo for a kick, or even a simple garlic aioli. For a heartier meal, they make an excellent accompaniment to a light, fresh garden salad, adding a delightful crunch and richness that perfectly balances the greens. They’re also surprisingly good dipped into a bowl of creamy tomato soup on a chilly evening, turning a simple meal into something truly special.</p>
<h5>Unleash Your Inner Chef: Filling Variations Are Limitless!</h5>
<p>And here’s where the real fun begins: the variations! This recipe is incredibly forgiving and practically begs for your creative input. Feel free to experiment with different cheese combinations. Instead of just mozzarella, try a blend of sharp cheddar and Monterey Jack for a richer flavor, or add a touch of smoked Gouda for an intriguing depth. For a bit of spice, mix in some finely diced jalapeños (fresh or pickled) or a pinch of red pepper flakes. You can also easily transform these pockets by adding cooked ingredients like crumbled bacon, finely chopped pepperoni, sautéed mushrooms, or even a spoonful of cooked, seasoned ground beef or chicken. A sprinkle of fresh herbs like chives or parsley folded into the cheese mixture before baking can add a wonderful freshness. <strong>For a vegetarian spin, finely chopped spinach or sun-dried tomatoes work beautifully.</strong> The beauty of these pockets lies in their adaptability – they truly can be whatever you dream up!</p>
<h4>Your Turn to Create and Share!</h4>
<p>I’m so incredibly excited for you to try this recipe. <strong>I promise you, the process is simple, enjoyable, and the results are incredibly rewarding.</strong> There’s a unique satisfaction that comes from pulling a tray of these golden, bubbling pockets out of the oven, knowing you’ve created something so delicious with your own hands. So, go ahead, gather your ingredients, set aside a little time, and prepare to delight your taste buds and those of your loved ones. Once you’ve whipped up your batch of these sensational snacks, I would absolutely love to hear about your experience! Did you stick to the classic? Did you venture into new filling combinations? What were your favorite dips? <strong>Please don’t hesitate to share your thoughts, your successes, and even your culinary experiments in the comments below.</strong> Your feedback and creativity inspire not just me, but our entire community of food lovers. Happy cooking, and may your kitchen be filled with the wonderful aroma of your very own homemade Cheesy Snack Pockets!</p>
Cheesy Snack Pockets
These homemade Cheesy Snack Pockets are a delightful culinary experience, offering a burst of flavor in every golden, crispy bite. Imagine a warm, molten core of rich, savory cheese, perhaps mingled with beef pepperoni and herbs, encased in a flaky or soft crust. Far superior to frozen alternatives, these customizable pockets are perfect as an easy snack, kid-friendly bite, or appetizer. They taste like they’re from a restaurant but require no real cooking skills to make, with a crispy outside and gooey inside.
Ingredients
-
3 cups (360g) all-purpose flour
-
1 packet (2 ¼ tsp) active dry yeast
-
1 tsp granulated sugar
-
1 tsp salt
-
1 cup (240ml) warm water
-
2 tbsp olive oil
-
2 cups (220g) shredded mozzarella cheese
-
1 cup (110g) shredded sharp cheddar cheese
-
½ cup (55g) shredded Monterey Jack cheese
-
¼ cup (60ml) pizza or marinara sauce
-
2 cloves garlic, minced
-
½ tsp dried oregano
-
¼ tsp red pepper flakes (optional)
-
¼ cup finely diced cooked beef or beef pepperoni (optional)
-
2 tbsp finely chopped fresh parsley
-
1 large egg
-
1 tbsp water or milk
-
1 tbsp sesame seeds, poppy seeds, Italian seasoning, garlic powder, or 2 tbsp grated Parmesan cheese (optional, for topping)
Instructions
-
Step 1
In a large bowl, combine 1 cup warm water, 1 tsp granulated sugar, and 1 packet active dry yeast. Stir gently and let sit 5-10 minutes until foamy. -
Step 2
Add 2 tbsp olive oil to the yeast mixture. Gradually add 3 cups all-purpose flour and 1 tsp salt, mixing until a shaggy dough forms. Turn onto a lightly floured surface and knead for 8-10 minutes (by hand) or 6-8 minutes (stand mixer) until smooth and elastic. -
Step 3
Lightly oil a clean large bowl. Place the kneaded dough in the bowl, turning once to coat. Cover tightly and let rise in a warm, draft-free place for 1 to 1.5 hours, or until doubled in size. -
Step 4
In a large bowl, combine 2 cups shredded mozzarella, 1 cup shredded sharp cheddar, and ½ cup shredded Monterey Jack cheeses. Stir in ¼ cup pizza/marinara sauce, 2 cloves minced garlic, ½ tsp dried oregano, ¼ tsp red pepper flakes (optional), ¼ cup finely diced cooked beef or beef pepperoni (optional), and 2 tbsp finely chopped fresh parsley. Mix thoroughly until well combined. -
Step 5
Punch down the risen dough and turn it onto a lightly floured surface. Divide into 8 equal pieces. Roll each piece into a 6-7 inch (15-18 cm) diameter circle, about ⅛ inch (3-4 mm) thick. Place ¼ to ⅓ cup of filling onto one half of each dough circle, leaving a ½-inch border. Lightly moisten the edges with water, fold the other half over the filling to create a half-moon shape, and press down to seal. Crimp the edges with a fork to ensure a secure seal. -
Step 6
Line two large baking sheets with parchment paper. Carefully transfer the assembled pockets to the prepared baking sheets, leaving about 2 inches of space between each. -
Step 7
Preheat your oven to 375°F (190°C). In a small bowl, whisk 1 large egg with 1 tbsp water or milk for an egg wash. Gently brush the tops of each pocket with the egg wash. If desired, sprinkle with sesame seeds, poppy seeds, Italian seasoning, garlic powder, or grated Parmesan cheese. Bake for 18-22 minutes, or until puffed, golden brown, and the cheese filling is bubbly. -
Step 8
Remove from oven and let cool on the baking sheets for 5-10 minutes before transferring to a wire rack. This allows the molten cheese to set slightly. Serve warm, optionally with a side of warm marinara or pizza sauce for dipping.
Important Information
Nutrition Facts (Per Serving)
It is important to consider this information as approximate and not to use it as definitive health advice.
Allergy Information
Please check ingredients for potential allergens and consult a health professional if in doubt.


Leave a Comment