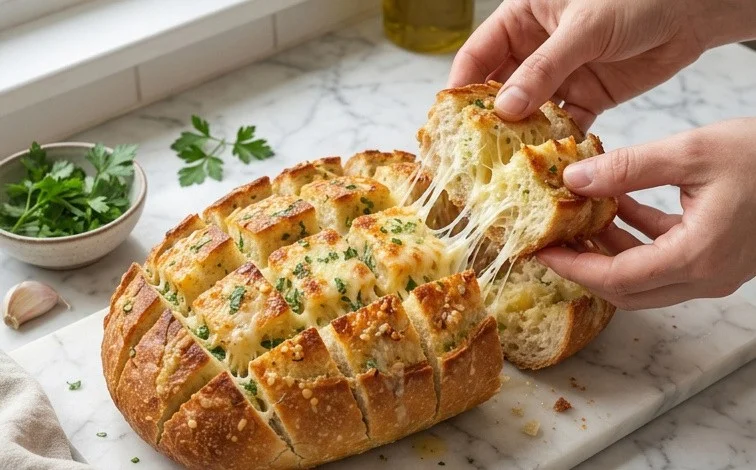
Cheesy Pull-Apart Garlic Bread is the ultimate shareable appetizer, bringing people together with its irresistible aroma and comforting flavors. The joy of this dish comes from its interactive nature; everyone can grab a piece, and the gooey, cheesy center is a delightful surprise in every bite. It’s a fantastic addition to any gathering, whether it’s a relaxed family dinner, a lively game night, or a potluck where you want to bring something truly special. What makes it stand out is the perfect balance of a crisp, toasted exterior against a soft, fluffy inside, all infused with the pungent, savory goodness of garlic butter and melted cheese. This recipe focuses on maximizing flavor by ensuring the garlic butter mixture penetrates every crevice of the bread, promising a consistently delicious experience from the first pull to the last. It’s surprisingly straightforward to prepare, making it a go-to for busy cooks who want impressive results without the fuss. The magic is in the simplicity and the quality of ingredients.
Cheesy Pull-Apart Garlic Bread
The smell of garlic and butter baking is one of the most comforting things in my kitchen. This Cheesy Pull-Apart Garlic Bread is a crowd-pleaser, perfect for sharing with family or friends during a casual meal, a game night, or just because. The crusty bread exterior gives way to a soft, garlicky, and gloriously cheesy interior, making every bite an adventure. It’s incredibly easy to assemble, and the results are always impressive. The key is really getting the garlic butter mixture worked into all the nooks and crannies of the bread.
Ingredients:
- 1 Boule / Loaf Crusty Rustic Bread
- 1 Stick Salted Butter (melted)
- 6 Cloves Garlic (minced)
- 2 Tablespoons Parsley (chopped)
- 1 Cup Mozzarella Cheese (shredded)
- 1 1/2 Cups Cheddar Cheese (shredded)
- 1/4 Cup Parmesan Cheese (grated)
- 1 Bunch Chives (finely chopped)
Preparing the Bread and Garlic Butter
The first step to achieving that perfect pull-apart texture is to prepare your bread. You want a good, sturdy loaf that will hold up to all the deliciousness. A rustic boule or a crusty baguette works beautifully. The goal is to cut into the bread without cutting all the way through, creating pockets for our cheesy garlic mixture. To do this, I like to place the loaf on a cutting board and make cuts about 1 inch apart across the entire loaf, going about three-quarters of the way down. Then, I rotate the loaf 90 degrees and make similar cuts. This creates a grid pattern, ensuring that every piece gets a good coating of butter and cheese.
Next, we’ll make our flavor-packed garlic butter. In a medium bowl, melt your butter. It’s important to use salted butter here, as it adds a nice depth of flavor. Once melted, add the minced garlic. I prefer to mince my garlic rather than use a garlic press for this recipe, as it distributes the flavor more evenly throughout the butter. Then, stir in the chopped fresh parsley. Fresh parsley adds a bright, herby contrast to the rich garlic and butter. If you happen to have dried parsley on hand and are out of fresh, you can use about 2 teaspoons of dried parsley, but fresh is really best for that vibrant color and clean taste. Give it a good stir to combine all the elements.
Assembling the Cheesy Goodness
Now for the best part: filling the bread with that incredible garlic butter and cheese! Carefully pour or spoon the melted garlic butter mixture over the entire loaf, trying to get as much of it as possible into the cuts you made. You might need to gently lift the bread slices to ensure the butter seeps down into all those crevices. Don’t be shy with the butter; it’s what makes the bread tender and flavorful inside.
Once the bread is thoroughly coated in garlic butter, it’s time to add the cheese. In a separate bowl, combine your shredded mozzarella cheese, shredded cheddar cheese, and grated Parmesan cheese. Mixing them together ensures an even distribution of all three cheeses throughout the bread. Mozzarella provides that wonderful stretch and gooeyness, cheddar brings a sharp, tangy flavor, and Parmesan adds a salty, nutty depth. I like to use a mix of cheeses, but feel free to adjust them based on your preferences. You could add some Monterey Jack for extra meltiness or even a little Gruyère for a more sophisticated flavor.
Generously stuff the cheese mixture into all the cuts you made in the bread. Again, don’t be afraid to pack it in. You want cheese oozing out from every angle! After stuffing the cheese, sprinkle any remaining cheese mixture over the top of the loaf. For an extra pop of freshness and color, finely chop your bunch of chives. I like to reserve some of the chives to sprinkle on top just before serving, but a good amount can also be mixed in with the cheese filling for an added layer of flavor. Gently press the chives into the cheese on top. The warmth from the baking bread will help the chives release their delicate oniony aroma.
Baking to Golden Perfection
To bake this masterpiece, preheat your oven to 375 degrees Fahrenheit (190 degrees Celsius). It’s a good idea to place the assembled loaf on a baking sheet. This will catch any cheese or butter that might melt and drip during the baking process, making for easier cleanup. Wrap the entire loaf loosely in aluminum foil. This helps the bread steam slightly and ensures the cheese melts thoroughly before the crust gets too dark.
Bake the bread, wrapped in foil, for about 20 to 25 minutes. This initial baking time allows the butter and garlic to fully penetrate the bread and for the cheese to start melting beautifully. After this period, carefully unwrap the foil. You’ll see the cheese is starting to get wonderfully melty. Leave the foil off and continue to bake for another 10 to 15 minutes, or until the top is golden brown and bubbly, and the bread is heated through. Keep an eye on it, as oven temperatures can vary, and you don’t want the cheese to burn. The goal is a beautiful golden crust and gloriously melted, slightly browned cheese on top.
Serving Your Cheesy Masterpiece
Once it’s out of the oven, let the Cheesy Pull-Apart Garlic Bread rest for just a few minutes on the baking sheet before serving. This allows the cheese to set slightly, making it easier to pull apart. If you reserved some chives, this is the perfect time to sprinkle them over the hot bread for that final touch of freshness and visual appeal. Serve it immediately while it’s warm and gooey. Provide guests with a plate and let them tear off pieces, or use tongs to help them grab a cheesy, garlicky chunk. This bread is fantastic served alongside pasta dishes, soups, salads, or simply as a delicious appetizer on its own. Enjoy the amazing aromas and the incredible taste of this easy, shareable treat!
Conclusion:
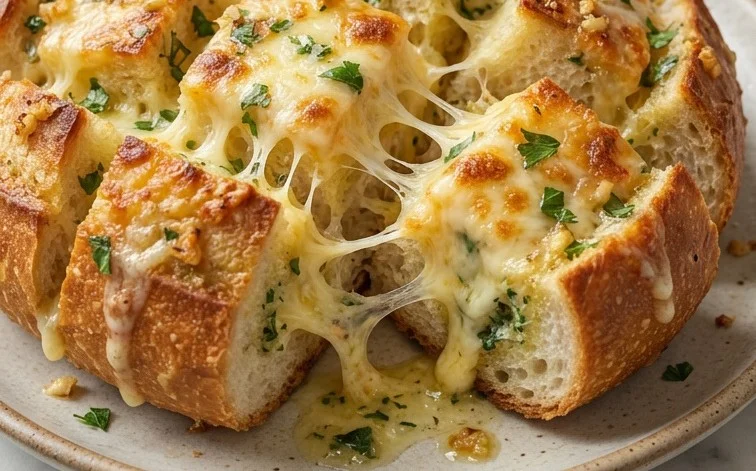
This Cheesy Pull-Apart Garlic Bread truly is a winner. It’s simple to assemble but delivers big on flavor and fun, making it a hit with everyone. The combination of toasted crust, soft bread, rich garlic butter, and gooey melted cheese is something special. It’s more than just a side dish; it’s an experience that encourages sharing and conversation around the table.
Serving this warm, straight from the oven, is when it’s at its absolute best. It pairs wonderfully with pasta dishes, soups, stews, or grilled meats. For a little variation, you could add a pinch of red pepper flakes to the garlic butter for a hint of heat, or mix in some sundried tomatoes for a tangy twist. Experimenting with different cheeses is also a great way to put your own spin on it.
Don’t be intimidated by making your own garlic bread; this pull-apart version is foolproof and incredibly rewarding. I encourage you to give it a try the next time you need a crowd-pleasing starter or a comforting side. You’ll find yourself making it again and again.
Frequently Asked Questions:
Can I make Cheesy Pull-Apart Garlic Bread ahead of time?
You can prepare the bread and garlic butter mixture a few hours in advance. Assemble the bread with the butter and store it, covered, at room temperature. Add the cheese just before baking to ensure it melts perfectly and doesn’t become oily.
What kind of bread is best for this recipe?
A crusty, rustic loaf with a sturdy crust and a soft interior works best. Think boules, ciabattas, or even a good quality baguette. The crust helps hold everything together during baking and slicing.
How do I prevent the garlic butter from burning?
Bake the bread at the temperature specified and keep an eye on it. If the top starts to brown too quickly, you can loosely tent it with aluminum foil for the last few minutes of baking.
Cheesy Pull-Apart Garlic Bread
A delicious and easy pull-apart garlic bread loaded with cheese and fresh herbs, perfect as a side dish or appetizer.
Ingredients
-
1 Boule / Loaf Crusty Rustic Bread
-
1 Stick Salted Butter (melted)
-
6 Cloves Garlic (minced)
-
2 Tablespoons Parsley (chopped)
-
1 Cup Mozzarella Cheese (shredded)
-
1 1/2 Cups Cheddar Cheese (shredded)
-
1/4 Cup Parmesan Cheese (grated)
-
1 Bunch Chives (finely chopped)
Instructions
-
Step 1
Preheat your oven to 375°F (190°C). -
Step 2
Cut the rustic bread into a grid pattern, cutting about three-quarters of the way through the loaf, creating deep pockets for the filling. -
Step 3
In a small bowl, combine the melted butter, minced garlic, chopped parsley, and chopped chives. -
Step 4
Pour the garlic butter mixture evenly into the cuts of the bread, ensuring it gets into all the pockets. Gently push the butter down. -
Step 5
In a separate bowl, mix together the shredded mozzarella cheese, shredded cheddar cheese, and grated Parmesan cheese. Sprinkle the cheese mixture generously over the top of the bread and into the pockets. -
Step 6
Wrap the bread loosely in aluminum foil and bake for 15 minutes. -
Step 7
Unwrap the foil and bake for another 5-10 minutes, or until the cheese is melted, bubbly, and lightly golden brown. -
Step 8
Let cool slightly before serving. Pull apart the cheesy bread pieces and enjoy!
Important Information
Nutrition Facts (Per Serving)
It is important to consider this information as approximate and not to use it as definitive health advice.
Allergy Information
Please check ingredients for potential allergens and consult a health professional if in doubt.



Leave a Comment