
Charcuterie Wreath This Charcuterie Wreath is a stunning and delicious centerpiece that’s surprisingly simple to assemble. It’s perfect for holidays, parties, or just a special gathering with friends and family. I love how it brings together a variety of textures and tastes, from savory meats to briny olives and creamy cheeses. The visual appeal alone is a showstopper, making your guests feel incredibly welcomed. The beauty of this wreath is its adaptability; you can easily swap out ingredients based on what you have or what’s in season. Ingredients: 1 pound Beef Salami, thinly sliced 1 pound Beef Pepperoni, thinly sliced 1/2 pound Beef Prosciutto, thinly sliced 8 ounces Mozzarella Pearls, drained 8 ounces Fontina cheese, cut into bite-sized cubes 8 ounces Havarti cheese, cut into bite-sized cubes 8 ounces Manchego cheese, cut into bite-sized cubes 1 cup Green Olives, pitted and drained 1 cup Black Olives, pitted and drained 1 jar (about 12 ounces) Marinated Artichoke Hearts, drained and halved 1 jar (about 10 ounces) Mini Pickles, drained 1 jar (about 8 ounces) Roasted Red Peppers, drained and cut into strips 1 jar (about 8 ounces) Peperoncini, drained 1 pint Cherry Tomatoes 2 Cucumbers, sliced into rounds Fresh Rosemary sprigs, for garnish (optional) Assembly Instructions This wreath is all about presentation and layering. I like to start with a large platter or a circular cutting board. If you don’t have a large round board, a baking sheet lined with parchment paper works
Charcuterie Wreath
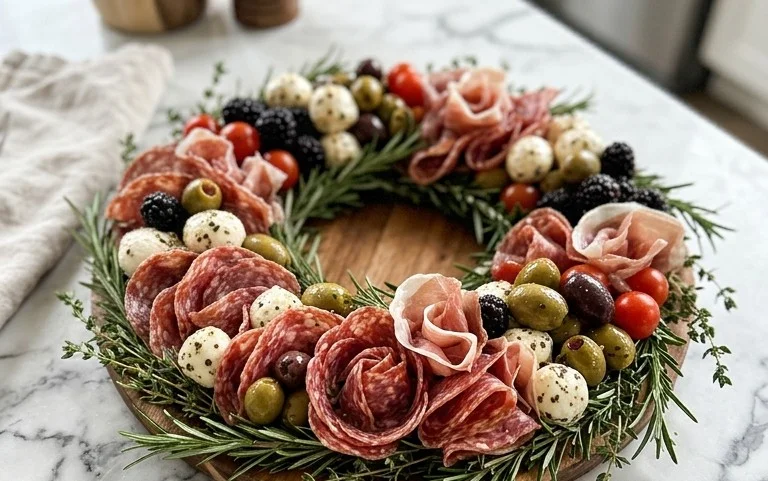
This Charcuterie Wreath is a stunning and delicious centerpiece that’s surprisingly simple to assemble. It’s perfect for holidays, parties, or just a special gathering with friends and family. I love how it brings together a variety of textures and tastes, from savory meats to briny olives and creamy cheeses. The visual appeal alone is a showstopper, making your guests feel incredibly welcomed. The beauty of this wreath is its adaptability; you can easily swap out ingredients based on what you have or what’s in season.
Ingredients:
- 1 pound Beef Salami, thinly sliced
- 1 pound Beef Pepperoni, thinly sliced
- 1/2 pound Beef Prosciutto, thinly sliced
- 8 ounces Mozzarella Pearls, drained
- 8 ounces Fontina cheese, cut into bite-sized cubes
- 8 ounces Havarti cheese, cut into bite-sized cubes
- 8 ounces Manchego cheese, cut into bite-sized cubes
- 1 cup Green Olives, pitted and drained
- 1 cup Black Olives, pitted and drained
- 1 jar (about 12 ounces) Marinated Artichoke Hearts, drained and halved
- 1 jar (about 10 ounces) Mini Pickles, drained
- 1 jar (about 8 ounces) Roasted Red Peppers, drained and cut into strips
- 1 jar (about 8 ounces) Peperoncini, drained
- 1 pint Cherry Tomatoes
- 2 Cucumbers, sliced into rounds
- Fresh Rosemary sprigs, for garnish (optional)
Assembly Instructions
This wreath is all about presentation and layering. I like to start with a large platter or a circular cutting board. If you don’t have a large round board, a baking sheet lined with parchment paper works well, though it’s less formal. The key is to create a circular shape with your ingredients, leaving a space in the center.
Step 1: Laying the Foundation of Meats
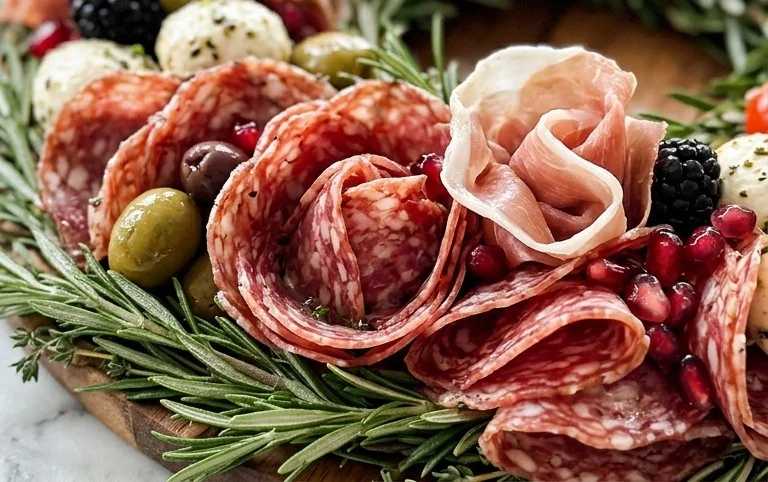
Begin by arranging your thinly sliced meats. I usually start with the Beef Salami and Beef Pepperoni. Take slices and gently fold or roll them. You don’t want them perfectly flat; a little texture makes the wreath look more appealing. Place these folded slices in an overlapping circle around the outer edge of your platter. Continue adding more folded meat slices, working your way inwards, to create a substantial outer ring. Leave a good amount of space in the center – this will be where your cheeses and other items go. Ensure the meat layers are close enough together so they don’t slide around easily.
Step 2: Incorporating the Cheeses
Next, it’s time for the cheeses. I like to distribute the different types of cheese throughout the wreath, rather than grouping them all together. Place the cubed Fontina, Havarti, and Manchego cheeses in various spots within the meat circle and in the central area. You can also add the Mozzarella Pearls; their small, round shape adds a nice contrast. If you have any larger blocks of cheese, you can cut them into interesting shapes, like triangles or batons, for added visual interest. Don’t be afraid to let some cheese cubes peek out from under the meat.
Step 3: Adding the Briny and Tangy Elements
Now we add the “pop” of flavor with olives and marinated items. Scatter the pitted Green Olives and Black Olives around the wreath. Their dark color provides a lovely contrast to the meats and cheeses. Next, add the halved Marinated Artichoke Hearts. These add a lovely tanginess and a different texture. Nestle them in between the meats and cheeses. The Mini Pickles also go in now; place them strategically for both visual appeal and to offer a bite of sharp, vinegary goodness. Their ridged texture is also a nice visual addition.
Step 4: Incorporating Color and Freshness
This step is where we really make the wreath “bloom” with color. Arrange the strips of Roasted Red Peppers. Their bright red hue is beautiful against the other ingredients. Next, add the Peperoncini for a touch of mild heat and a vibrant green color. Place the Cherry Tomatoes around the wreath. Their redness adds sweetness and juiciness. Finally, arrange the sliced Cucumbers. The green of the cucumber rounds provides a fresh, crisp element and helps fill any gaps. Make sure to distribute these items evenly so that each section of the wreath has a good variety.
Step 5: Final Touches and Garnish
Once all your main ingredients are in place, take a step back and look at your wreath. Fill any sparse areas with more of your ingredients, ensuring the circular shape is well-defined. If you have extra slices of meat or cheese, you can add them as a final layer or tuck them in wherever needed. For an optional, but highly recommended, finishing touch, tuck a few sprigs of fresh Rosemary around the wreath. The fragrant aroma and the deep green color of the rosemary add a sophisticated and festive element that really completes the look. Serve immediately or cover loosely with plastic wrap and refrigerate for up to a few hours before serving.
Conclusion:
Putting together this Charcuterie Wreath is a rewarding experience, offering a visually impressive and incredibly tasty centerpiece with minimal fuss. It’s a fantastic way to cater to a crowd because everyone can pick and choose their favorites from the abundance of meats, cheeses, and briny bites. The circular arrangement naturally draws people in, making it more than just a platter—it’s an interactive experience. For serving, think about offering some crackers or a baguette on the side, though the wreath itself is quite substantial. If you want to switch things up, consider adding some seasonal fruits like grapes or figs for a touch of sweetness, or perhaps some spicy mustard or a sweet chili jam for dipping. Some people even add a small bowl of hummus or dip in the center. Don’t be afraid to experiment with different kinds of cheeses or cured meats; the goal is to create a spread that excites you and your guests. This Charcuterie Wreath is a go-to for gatherings, and I encourage you to give it a try for your next party or family dinner.
What are the best cheeses for a Charcuterie Wreath?
A mix of textures and milk types is best. I’ve used Mozzarella Pearls for creaminess, Fontina and Havarti for their melt-in-your-mouth quality, and Manchego for a firmer, nutty bite. You could also add a sharp cheddar, a creamy brie, or a tangy goat cheese.
Can I prepare the Charcuterie Wreath ahead of time?
Yes, you can assemble most of the wreath a few hours in advance. It’s best to add the fresh tomatoes and cucumbers closer to serving time to prevent them from getting soggy. Cover the assembled wreath loosely with plastic wrap and refrigerate. Let it sit at room temperature for about 20-30 minutes before serving to allow the cheeses and meats to reach their best texture and flavor.
How do I make sure the wreath holds its shape?
Start by arranging the sturdier items like cheese cubes and rolled meats around the outer edge first. Then, fill in the gaps with smaller items like olives, cherry tomatoes, and artichoke hearts. You can use rosemary sprigs to tuck into spaces and add both visual appeal and structure. The key is to pack items relatively closely together so they support each other.
Beef Charcuterie Wreath
A festive and savory beef-based charcuterie wreath perfect for appetizers and gatherings, featuring a vibrant arrangement of cured meats, cheeses, and briny accents.
Ingredients
-
2 cups Beef Salami, thinly sliced
-
2 cups Beef Pepperoni, thinly sliced
-
1 cup Beef Prosciutto, thinly sliced
-
1 cup Mozzarella Pearls
-
1 cup Fontina cheese, cubed
-
1 cup Havarti cheese, cubed
-
1 cup Manchego cheese, cubed
-
1/2 cup Green Olives, pitted
-
1/2 cup Black Olives, pitted
-
1/2 cup Marinated Artichoke Hearts, drained
-
1/4 cup Mini Pickles, halved
-
1/4 cup Roasted Red Peppers, sliced
-
1/4 cup Peperoncini, drained
-
1 cup Cherry Tomatoes, halved
-
1/2 cup Cucumbers, thinly sliced
Instructions
-
Step 1
Arrange a large round platter or a cutting board as your base. You can place a small bowl or ramekin in the center to help guide your wreath shape if desired. -
Step 2
Begin by artfully arranging the Beef Salami, Beef Pepperoni, and Beef Prosciutto slices around the outer edge of the platter, overlapping them slightly to create a full and attractive border. -
Step 3
Next, fill the inner circle with the cheeses. Place the Mozzarella Pearls, cubed Fontina, Havarti, and Manchego cheeses, interspersing them for visual appeal. -
Step 4
Incorporate the briny and pickled elements. Scatter the Green Olives, Black Olives, Marinated Artichoke Hearts, and Mini Pickles throughout the cheese and meat sections. -
Step 5
Add pops of color and freshness with the remaining ingredients. Tuck in the Roasted Red Peppers, Peperoncini, Cherry Tomatoes, and thinly sliced Cucumbers. -
Step 6
Continue to adjust and fill any gaps until the entire wreath shape is complete and visually appealing. Serve immediately.
Important Information
Nutrition Facts (Per Serving)
It is important to consider this information as approximate and not to use it as definitive health advice.
Allergy Information
Please check ingredients for potential allergens and consult a health professional if in doubt.



Leave a Comment