
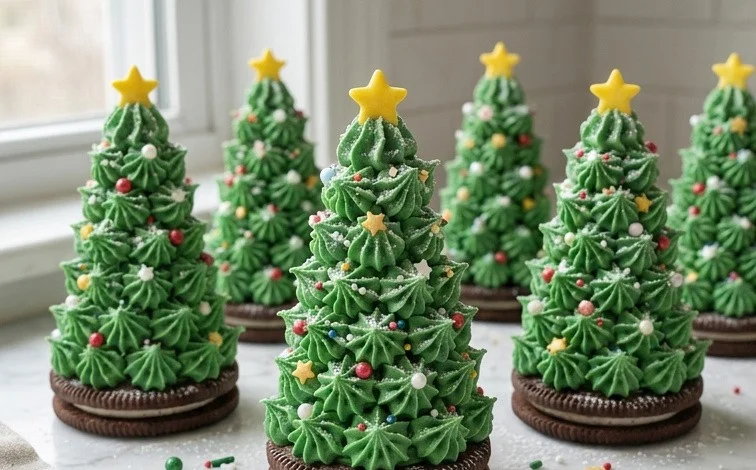
Candy Cookie Cone Christmas Trees are a charming addition to any holiday spread, appearing on my own family’s table every December. These edible trees start with a simple sugar cone, giving us that perfect conical shape right away. We then add a baked cookie dough center for a delightful surprise and a bit of chewiness inside the crisp cone. Using candy melts for coating means a smooth, professional-looking finish that hardens quickly, letting us get to the fun part: decorating with sprinkles and candies. They transform a few basic pantry staples into festive, miniature evergreen trees. This recipe is fantastic because it’s a hands-on activity that kids and adults can enjoy together, and the result is both a beautiful decoration and a delicious treat. They look incredibly festive as a centerpiece on your dessert table or as individual edible gifts.
Candy Cookie Cone Christmas Trees
These candy cookie cone Christmas trees are a fun and festive way to bring some holiday cheer to your kitchen. They’re surprisingly easy to make and look absolutely charming as a centerpiece or as edible gifts. We’ll be using simple ingredients to create these edible evergreen delights, and the process is just as enjoyable as the final result. The cones give us that perfect tree shape, and the candy coatings and sprinkles add all the festive sparkle.
Ingredients:
- 12 sugar cones
- 12 long-size lollipop sticks
- 3 pieces of foil (each one about 10 inches long)
- 12 tablespoons of prepared cookie dough
- 12 tablespoons chocolate chips (semi-sweet or sweet)
- 8 ounces vanilla candy coating ((4 squares of vanilla Almond Bark))
- 8 ounces chocolate candy coating ((4 squares of chocolate Almond Bark))
- 1/2 cup shredded coconut
- 1/2 cup mini M&M candies
- 1/4 cup chocolate chips
- 1/4 cup white morsels
- Colored candy sprinkles.
Preparing the Cookie Dough and Cones
The first step in creating our festive trees is to prepare the cookie dough inserts. You’ll take your 12 tablespoons of prepared cookie dough and divide it into 12 equal portions, about 1 tablespoon each. These will be baked inside our sugar cones to create a little surprise center. Before we bake, we need to get our lollipop sticks ready. Take each of the 12 lollipop sticks and carefully insert one into the center of each sugar cone. Make sure the stick goes in far enough to be stable but not so far that it pokes out the bottom. This stick will be the trunk of our tree and will also help us handle the cones later.
Now, take one portion of cookie dough and gently push it down into the tip of each sugar cone, around the lollipop stick. You want to fill the very tip of the cone. This will create a delicious surprise bite when someone enjoys the tree. Don’t overfill the cones, as the dough will expand a bit when it bakes. Once you have the dough in place in all 12 cones, it’s time to bake them.
Preheat your oven to 350 degrees Fahrenheit (175 degrees Celsius). This is a standard baking temperature that works well for most cookie doughs. Carefully place the filled sugar cones onto a baking sheet. You might want to use a baking sheet with edges to prevent anything from rolling off. Bake for about 10-12 minutes, or until the cookie dough is golden brown and cooked through. Keep a close eye on them, as the sugar cones can brown quickly. Once they are baked, remove them from the oven and let them cool completely on the baking sheet. It’s important that they are fully cooled before moving on to the decorating phase; a warm cone can make the candy coatings melt too soon.
Melting and Coloring the Candy Coatings
While our cookie cone “trunks” are cooling, we can prepare our candy coatings, which will form the “foliage” of our trees. You’ll need two separate bowls for melting the vanilla and chocolate candy coatings. You can melt these using a microwave or a double boiler.
To melt in the microwave, place 4 squares of vanilla candy coating (about 8 ounces) in one microwave-safe bowl and 4 squares of chocolate candy coating (about 8 ounces) in another. Microwave on 50% power for 30-second intervals, stirring well after each interval, until completely smooth and melted. Be patient; it’s better to melt slowly than to overheat and scorch the candy coating. Stirring is key to achieving a smooth consistency.
Once melted, you can leave the vanilla coating white, or you can add a touch of green food coloring (if you have it, though not listed in the provided ingredients) to make it look more like a traditional evergreen tree. For this recipe, we’ll use the white as is, or tint it a light green if you prefer a classic look. The chocolate coating will be left as is for a different tree option or for detailing.
Assembling the Candy Cookie Cone Christmas Trees
Now for the fun part: decorating! Take your cooled cookie cones. You’ll want to work one tree at a time to ensure the candy coating stays workable. Dip the wide opening of a sugar cone into the melted vanilla candy coating, allowing excess to drip off. You want a good, even coating that will resemble the branches of a tree. If the coating seems too thick, you can stir in a tiny bit of vegetable oil (not listed but a common pantry item for thinning candy melts if absolutely necessary, otherwise skip this tip and just work with the thickness).
After coating the cone, gently twirl it to distribute the candy coating evenly. Then, let the excess drip back into the bowl. You can use the foil to create a stand for your trees if you don’t have a way to prop them up. Take a piece of foil, crumple it into a loose mound, and insert the lollipop stick of the coated cone into the foil so it stands upright. This allows the coating to drip without touching a surface and helps it set evenly.
Decorating Your Edible Evergreens
While the candy coating is still wet, it’s time to add your festive embellishments. This is where you can get really creative! For the white coating, you can roll the wet coating in shredded coconut to give it a snowy effect, or leave it plain for a smooth finish.
Next, sprinkle on your mini M&M candies to resemble ornaments. You can place them randomly or create patterns. For the chocolate-coated trees, you can use the 1/4 cup of additional chocolate chips and 1/4 cup of white morsels. You can melt these separately and drizzle them over the chocolate coating to create a striped effect, or use them as “snow” or accents.
Finally, for the pièce de résistance, use your colored candy sprinkles. These add a pop of color and sparkle, making your trees truly festive. You can also use the remaining vanilla or chocolate coating to pipe on little details like garland or stars if you have piping bags and tips, but simple sprinkles work beautifully too. Ensure all your decorations are applied while the candy coating is still wet so they adhere properly. You can also use some of the melted chocolate to “glue” on larger candies if needed.
Finishing and Displaying Your Trees
Once you’ve decorated all 12 trees, you need to let the candy coating set completely. This usually takes about 15-30 minutes at room temperature, or you can speed up the process by placing them in the refrigerator for about 10 minutes. Be careful not to leave them in the fridge for too long, as this can sometimes cause condensation on the candy coating.
After they have set, you can carefully remove them from the foil stands. Arrange your Candy Cookie Cone Christmas Trees on a platter or a festive board. They look wonderful clustered together as a centerpiece for your holiday table. You can even wrap them individually in cellophane bags tied with ribbon to give them as edible gifts to friends, family, or neighbors. They’re a delightful and delicious way to celebrate the season!
Conclusion:
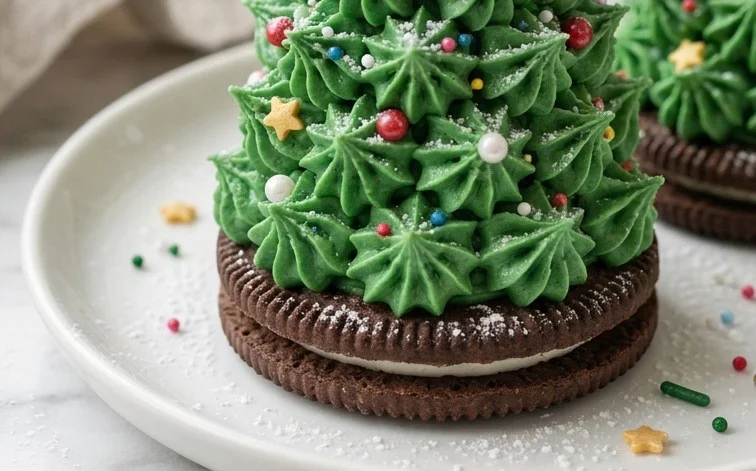
These Candy Cookie Cone Christmas Trees are a festive and fun project that truly brings the holiday spirit into your kitchen. They are a wonderful way to get creative with simple ingredients, resulting in an impressive and edible decoration. The combination of the crunchy cone, the soft cookie center, and the sweet candy coating makes them a treat that everyone will love. They’re perfect for holiday parties, cookie exchanges, or even just as a special after-school activity during December. Don’t be afraid to get inventive with your decorations! You can use different colored sprinkles, edible glitter, or even small candies to create unique patterns and styles for each tree. The joy is in the making and sharing these sweet little trees.
Frequently Asked Questions:
-
How do I store Candy Cookie Cone Christmas Trees?
Once the candy coating has fully hardened, store the cookie cone trees in an airtight container at room temperature. Avoid direct sunlight or heat, as this can cause the candy coating to melt. They should stay fresh for up to a week.
-
Can I make these ahead of time?
Yes, you can absolutely make these ahead! It’s best to decorate them a day or two before you plan to serve them. Once the candy coating is set, they are quite stable. Store them as directed above until ready to display.
-
What if I don’t have lollipop sticks?
If you don’t have lollipop sticks, you can skip inserting them. The trees will still stand up on their own once the candy coating has hardened, especially if you place them on a flat serving platter or directly onto your dessert table. For individual servings, you could use pretzel rods instead, though they will be edible.
Variations and Serving Ideas:
For a different flavor profile, try using a chocolate cookie dough or even adding a touch of cinnamon to the dough before baking. You could also use different colored candy melts for the coating, like red or green, to create a variety of tree colors. Serve them on a platter arranged like a forest, or individually wrap them as gifts tied with a festive ribbon. They also look great clustered around a small cake or bundt cake for a larger holiday dessert display.
Candy Cookie Cone Christmas Trees
Edible Christmas trees made from sugar cones, cookie dough, and festive candy decorations. A fun and easy holiday treat for all ages.
Ingredients
-
12 sugar cones
-
12 long-size lollipop sticks
-
3 pieces of foil (each one about 10 inches long)
-
12 tablespoons of prepared cookie dough
-
12 tablespoons chocolate chips (semi-sweet or sweet)
-
8 ounces vanilla candy coating ((4 squares of vanilla Almond Bark))
-
8 ounces chocolate candy coating ((4 squares of chocolate Almond Bark))
-
1/2 cup shredded coconut
-
1/2 cup mini M&M candies
-
1/4 cup chocolate chips
-
1/4 cup white morsels
-
Colored candy sprinkles
Instructions
-
Step 1
Preheat oven to 350°F (175°C). Line a baking sheet with parchment paper. -
Step 2
Press about 1 tablespoon of cookie dough into the top of each sugar cone, creating a “tree top.” Press a chocolate chip into the cookie dough to resemble a star. -
Step 3
Bake for 10-12 minutes, or until the cookie dough is golden brown and set. Let cool completely on the baking sheet. -
Step 4
Melt vanilla candy coating according to package directions. Dip the bottom of each cooled cookie cone into the melted coating and place it on a foil-lined surface. Insert a lollipop stick into the melted coating to secure it to the cone. -
Step 5
Melt chocolate candy coating according to package directions. Dip the entire cookie cone in the melted chocolate coating, allowing excess to drip off. -
Step 6
Immediately decorate the chocolate-coated cones with shredded coconut (for snow), mini M&M candies, additional chocolate chips, white morsels, and colored candy sprinkles to resemble Christmas trees. -
Step 7
Allow the candy coating to harden completely before handling or serving.
Important Information
Nutrition Facts (Per Serving)
It is important to consider this information as approximate and not to use it as definitive health advice.
Allergy Information
Please check ingredients for potential allergens and consult a health professional if in doubt.


Leave a Comment