
This Big Frankenstein Rice Krispie Treat is a fun and festive centerpiece for any Halloween gathering. It takes the beloved chewy, crispy base that everyone adores and transforms it into a spooky, green monster. Kids and adults alike will love sinking their teeth into this soft, gooey confection, which offers a satisfying crunch from the cereal. It’s surprisingly simple to assemble, making it a great project for families to do together or a fantastic addition to your party dessert table. We’re using classic Rice Krispies cereal, butter, and marshmallows, dyed a signature green, then decorated to resemble Frankenstein’s famous face. The contrasting textures are what make these treats so appealing – soft, chewy, and crunchy all at once.
Ingredients:
- 3/4 cup unsalted butter
- 1 1/2 10 ounce bags mini marshmallows
- Green food dye
- 1/2 teaspoon pure vanilla extract
- 9 cups Rice Krispies cereal (generic brand works great too)
- 1/2 cup melted chocolate or chocolate frosting (for the hair and mouth)
- Sprinkles (optional, for extra decoration)
- 1 large marshmallow (for the bolts)
- 2 brown M&Ms or Junior Mints (for the eyes)
- 1 pokey stick (or you can use extra melted chocolate)
Getting Started: Preparing Your Workstation
Before you even think about melting butter, it’s essential to get your workspace ready. You’ll need a large bowl for mixing the cereal, a large saucepan for melting the marshmallows, and a greased baking dish or a large platter to form your Frankenstein. I usually use a 9×13 inch baking dish, greased well with butter or non-stick spray, but for a bigger, more free-form Frankenstein, a greased platter works well. Have all your ingredients measured and within reach. This is important because once the marshmallows are melted, you need to work quickly.
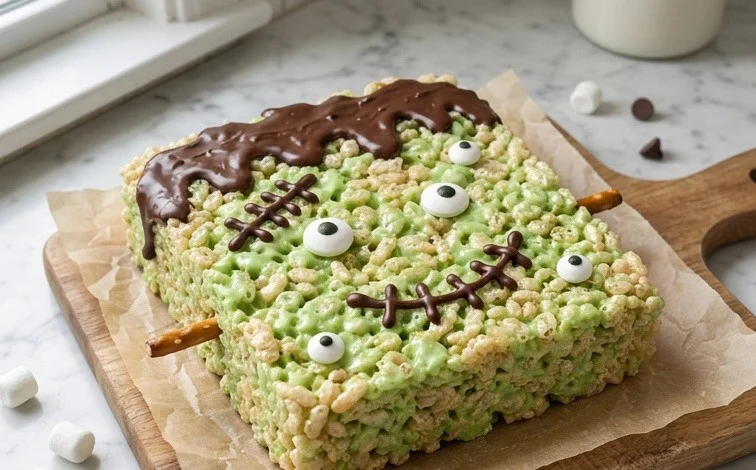
Big Frankenstein Rice Krispie Treat
This recipe is for a showstopper Halloween treat that’s surprisingly simple to make: a Big Frankenstein Rice Krispie Treat. It starts with the classic, chewy, gooey Rice Krispie treat base, which we’ll color a vibrant green to mimic Frankenstein’s iconic skin. Then, we’ll add some simple decorations to bring our monster to life. It’s a fun project to do with kids, or just to make for a Halloween party. The texture is wonderfully soft and yielding, with those delightful crispy bits throughout.
Ingredients:
- 3/4 cup unsalted butter
- 1 1/2 10 ounce bags mini marshmallows
- Green food dye
- 1/2 teaspoon pure vanilla extract
- 9 cups Rice Krispies cereal (generic brand works great too)
- 1/2 cup melted chocolate or chocolate frosting (for the hair and mouth)
- Sprinkles (optional, for extra decoration)
- 1 large marshmallow (for the bolts)
- 2 brown M&Ms or Junior Mints (for the eyes)
- 1 pokey stick (or you can use extra melted chocolate)
Getting Started: Preparing Your Workstation
Before you even think about melting butter, it’s essential to get your workspace ready. You’ll need a large bowl for mixing the cereal, a large saucepan for melting the marshmallows, and a greased baking dish or a large platter to form your Frankenstein. I usually use a 9×13 inch baking dish, greased well with butter or non-stick spray, but for a bigger, more free-form Frankenstein, a greased platter works well. Have all your ingredients measured and within reach. This is important because once the marshmallows are melted, things move quickly, and you don’t want to be fumbling for ingredients.
Making the Frankenstein Base
- Melt the Butter and Marshmallows: In a large saucepan over low heat, melt the 3/4 cup of unsalted butter. Once the butter is fully melted, add the 1 1/2 bags of mini marshmallows. Stir constantly, allowing the marshmallows to melt down into a smooth, gooey mass. This usually takes about 5-8 minutes. It’s important to use low heat to prevent the marshmallows from scorching, which can give your treats an unpleasant burnt flavor. Keep stirring until there are no lumps of marshmallow left.
- Add Color and Flavor: Once the marshmallows are completely melted and smooth, remove the saucepan from the heat. Stir in the 1/2 teaspoon of pure vanilla extract. Now for the fun part – the green! Add green food dye, a few drops at a time, stirring well after each addition until you achieve a vibrant Frankenstein green color. The amount of food dye you need will depend on the brand and how intense you want the color. Don’t be afraid to add a little more if it’s not green enough for your liking. Aim for a bright, noticeable green.
- Combine with Cereal: Pour the 9 cups of Rice Krispies cereal into a very large mixing bowl. It’s important to use a bowl that’s big enough to comfortably mix everything without spilling. Gradually pour the melted marshmallow mixture over the cereal. Using a sturdy spatula or a greased spoon, gently fold and mix until all the cereal is evenly coated with the gooey green marshmallow. Work quickly but gently; you want to coat the cereal without crushing it too much, as that can make the treats dense rather than light and airy.
- Forming Frankenstein: Lightly grease your hands with butter or non-stick spray. Transfer the green cereal mixture into your prepared baking dish or onto the greased platter. If using a baking dish, press the mixture down evenly. If you’re aiming for a more monster-like shape on a platter, you can mold it into a rough head shape. Don’t press too firmly; you want to maintain some of that airy texture. You can make it as big or as small as you like, depending on how many people you’re serving or how dramatic you want your monster to be.
-
Decorating the Monster: This is where your Frankenstein really comes to life!
- The Hair: Melt your 1/2 cup of chocolate or use chocolate frosting. Use a piping bag with a small tip, or a zip-top bag with a corner snipped off, to pipe strands of chocolate for Frankenstein’s hair across the top of his head. If using melted chocolate, let it set slightly before piping if it’s too runny.
- The Mouth: Use more melted chocolate or frosting to create a jagged, stitched mouth.
- The Bolts: Take the large marshmallow. You can either push it onto the sides of the head where the neck would be, or cut it into two segments and attach them to the sides of the head. You can “glue” them on with a little melted chocolate. If the marshmallow is too sticky, you can lightly grease your fingers or the marshmallow.
- The Eyes: Place the two brown M&Ms or Junior Mints where the eyes should be. You can use a tiny bit of melted chocolate to secure them if needed.
- Extra Details (Optional): If you have any extra sprinkles, you can add them for a bit of sparkle, maybe around the bolts or on the hair. For a more rustic look, you can use the pokey stick (or a toothpick) to draw stitches on the face or add other spooky details before the chocolate hardens.
Let the chocolate set completely before cutting or serving. This usually takes about 30 minutes at room temperature, or you can speed it up by placing it in the refrigerator for about 10-15 minutes.
Serving and Storing Your Monster
Once your Frankenstein is fully decorated and the chocolate has set, you can cut it into squares if it’s in a baking dish, or let guests break off pieces from the platter. These treats are best enjoyed fresh, within a day or two of making them. If you need to store them, wrap them tightly in plastic wrap and keep them at room temperature. Avoid refrigerating them if possible, as this can make them hard and lose their chewy texture. Enjoy your monstrously delicious creation!
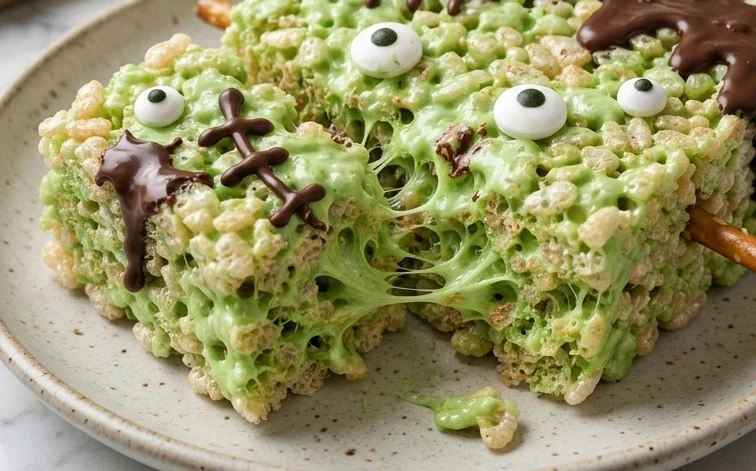
Conclusion:
This Big Frankenstein Rice Krispie Treat is sure to be a hit at your Halloween party. It’s a visually striking dessert that’s also incredibly simple to make, bringing smiles to faces of all ages. The combination of gooey marshmallow, crispy cereal, and fun decorations makes it a memorable treat. Don’t be afraid to get creative with the decorations – you can use different colors of frosting, candies, or even edible markers to give your Frankenstein unique features.
Serving Suggestions:
Serve these treats individually cut or as a large centerpiece. They pair wonderfully with other Halloween-themed snacks and drinks. For an extra spooky touch, dust a little powdered sugar around the serving platter to mimic a misty graveyard.
Variations:
You can easily adapt this recipe by using different colored food dyes to create other monster-themed treats. For a slightly different flavor, try adding a touch of almond extract along with the vanilla. If you don’t have M&Ms for eyes, black frosting piped on can also work.
Frequently Asked Questions:
How do I prevent the Rice Krispie treats from sticking to my hands?
Lightly grease your hands with butter or cooking spray before handling the mixture. You can also use a silicone spatula or the back of a spoon sprayed with non-stick spray to press the mixture into your desired shape.
Can I make the Frankenstein treat ahead of time?
Yes, you can make the green Rice Krispie treat base up to two days in advance. Store it in an airtight container at room temperature. Add the decorations just before serving for the freshest look.
My marshmallow mixture is too sticky, what can I do?
Ensure you are using fresh marshmallows, as older ones can sometimes result in a stickier mixture. Also, make sure you’re adding the cereal immediately after melting the marshmallows and butter. Stirring in the cereal quickly helps absorb some of the stickiness.
Big Frankenstein Rice Krispie Treat
A giant, spooky, and delicious Frankenstein-themed Rice Krispie treat, perfect for Halloween parties or any monster mash-up!
Ingredients
-
3/4 cup unsalted butter
-
1 1/2 10 ounce bags mini marshmallows
-
green food dye
-
1/2 teaspoon pure vanilla extract
-
9 cups rice krispies cereal
-
1/2 cup melted chocolate
-
1 large marshmallow
-
2 brown M&Ms
-
1 pokey stick
Instructions
-
Step 1
Grease a 9×13 inch baking pan. In a large pot, melt the butter over low heat. -
Step 2
Add the mini marshmallows and stir until completely melted. Remove from heat. Stir in the vanilla extract and green food dye until the desired Frankenstein green color is achieved. -
Step 3
Add the 9 cups of Rice Krispies cereal to the marshmallow mixture and stir until well coated. Press the mixture evenly into the prepared baking pan. -
Step 4
Allow to cool slightly. While still warm, use melted chocolate to draw Frankenstein’s hair on the top. Use a pokey stick or extra melted chocolate for bolts on the sides. -
Step 5
Cut a large marshmallow in half for Frankenstein’s eyes. Use melted chocolate to attach the brown M&Ms as pupils to the marshmallow halves. Place the eyes on the treat. -
Step 6
Use melted chocolate to draw a mouth below the eyes. Decorate with sprinkles if desired.
Important Information
Nutrition Facts (Per Serving)
It is important to consider this information as approximate and not to use it as definitive health advice.
Allergy Information
Please check ingredients for potential allergens and consult a health professional if in doubt.



Leave a Comment