
The smell of freshly baked chocolate chip cookies is one of life’s simple pleasures. I’m always on the hunt for that perfect cookie – one that’s slightly crisp around the edges, wonderfully chewy in the middle, and loaded with pockets of melted chocolate. This recipe delivers that bakery-style magic right in your own kitchen. The key is in the precise measurements and a few simple techniques that ensure a consistently delicious result every single time.
Ingredients:
- 3 cups (380 grams) all-purpose flour
- 1 teaspoon baking soda
- 1 teaspoon fine sea salt
- 2 sticks (227 grams) unsalted butter, at cool room temperature (around 67°F)
- 1/2 cup (100 grams) granulated sugar
- 1 1/4 cups (247 grams) lightly packed light brown sugar
- 2 teaspoons vanilla extract
- 2 large eggs, at room temperature
- 2 cups (340 grams) semisweet chocolate chips
Creaming the Butter and Sugars
This is where the magic really begins. Properly creaming the butter and sugars is essential for creating cookies with a tender crumb and good lift. You want your butter to be cool, not warm and melty. If it’s too soft, it will incorporate too much air too quickly, leading to flatter cookies. A good test is that your finger should leave a slight indentation but not sink in easily. In a large mixing bowl, using an electric mixer (stand or hand mixer), beat the softened butter with the granulated sugar and the light brown sugar. Start on a low speed to combine, then increase to medium-high speed and beat for 3-5 minutes until the mixture is light in color and fluffy. This process incorporates air, which gives the cookies their lift. Scrape down the sides of the bowl occasionally to ensure everything is evenly mixed. Don’t rush this step; it’s fundamental for achieving that desirable bakery texture. A creamy, pale yellow mixture is what you’re aiming for.
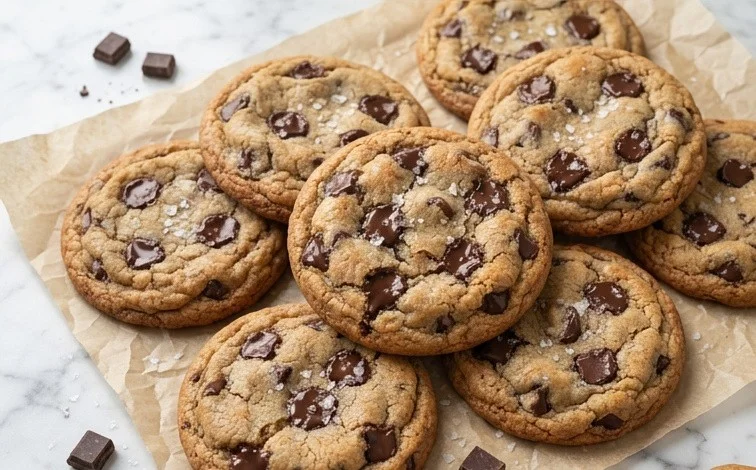
Bakery Style Chocolate Chip Cookies
The smell of freshly baked chocolate chip cookies is one of life’s simple pleasures. I’m always on the hunt for that perfect cookie – one that’s slightly crisp around the edges, wonderfully chewy in the middle, and loaded with pockets of melted chocolate. This recipe delivers that bakery-style magic right in your own kitchen. The key is in the precise measurements and a few simple techniques that ensure a consistently delicious result every single time.
Ingredients:
- 3 cups (380 grams) all-purpose flour
- 1 teaspoon baking soda
- 1 teaspoon fine sea salt
- 2 sticks (227 grams) unsalted butter, at cool room temperature (around 67°F)
- 1/2 cup (100 grams) granulated sugar
- 1 1/4 cups (247 grams) lightly packed light brown sugar
- 2 teaspoons vanilla extract
- 2 large eggs, at room temperature
- 2 cups (340 grams) semisweet chocolate chips
Creaming the Butter and Sugars
This is where the magic really begins. Properly creaming the butter and sugars is essential for creating cookies with a tender crumb and good lift. You want your butter to be cool, not warm and melty. If it’s too soft, it will incorporate too much air too quickly, leading to flatter cookies. A good test is that your finger should leave a slight indentation but not sink in easily. In a large mixing bowl, using an electric mixer (stand or hand mixer), beat the softened butter with the granulated sugar and the light brown sugar. Start on a low speed to combine, then increase to medium-high speed and beat for a good 3 to 5 minutes. You’re looking for a pale, fluffy mixture that’s significantly lighter in color and texture than when you started. This process is crucial for developing the structure of your cookies.
Adding the Wet Ingredients
Once the butter and sugar are beautifully creamed, it’s time to add the eggs and vanilla. Make sure your eggs are at room temperature. Cold eggs can cause the butter mixture to seize up, resulting in a less desirable texture. Add the eggs one at a time, beating well after each addition until fully incorporated. Scrape down the sides of the bowl as needed to ensure everything is getting mixed evenly. Then, mix in the vanilla extract. The aroma alone is wonderful! Again, beat until just combined. Over-mixing at this stage can also toughen the cookies, so be mindful.
Incorporating the Dry Ingredients
In a separate medium bowl, whisk together the all-purpose flour, baking soda, and fine sea salt. Whisking them together evenly distributes the leavening agent (baking soda) and salt, which are vital for flavor and texture. Now, gradually add the dry ingredients to the wet ingredients in the large bowl. It’s best to add them in about three additions, mixing on low speed after each addition until just combined. Stop mixing as soon as you no longer see streaks of dry flour. Don’t overmix here; we want to keep the dough tender.
Folding in the Chocolate Chips
Now for the best part – the chocolate chips! Add the semisweet chocolate chips to the dough. I find that gently folding them in with a spatula or wooden spoon is the best way to ensure they are evenly distributed without overworking the dough. This also helps maintain the integrity of the dough structure we’ve built. Some people like to reserve a small handful of chocolate chips to press onto the tops of the cookies before baking for an extra-chocolatey look, and I often do this too.
Chilling the Dough (The Secret to Bakery Style!)
This step is non-negotiable if you want truly bakery-style cookies. Cover the bowl tightly with plastic wrap and refrigerate the dough for at least 2 hours, or preferably overnight. Chilling the dough allows the flour to fully hydrate, the fats to re-solidify, and the flavors to meld together beautifully. This results in cookies that spread less during baking, have a chewier texture, and a more developed, richer flavor. Skipping this step will result in thinner, crisper cookies, which are good, but not the deeply satisfying chewiness we’re aiming for.
Baking the Cookies
When you’re ready to bake, preheat your oven to 375°F (190°C). Line baking sheets with parchment paper. Parchment paper prevents sticking and helps with even browning. Scoop rounded tablespoons of the chilled dough onto the prepared baking sheets, leaving about 2 inches between cookies to allow for spreading. If you didn’t press extra chocolate chips on top before chilling, you can do so now. Bake for 9 to 12 minutes, or until the edges are golden brown and set, but the centers still look slightly soft and underbaked. They will continue to cook on the hot baking sheet after you remove them from the oven.
Cooling and Enjoying
Allow the cookies to cool on the baking sheet for 5 to 10 minutes before carefully transferring them to a wire rack to cool completely. This resting period on the baking sheet is important for the cookies to firm up properly. Once cooled, these bakery-style chocolate chip cookies are ready to be enjoyed. They are fantastic on their own, or even better with a cold glass of milk. Store any leftover cookies in an airtight container at room temperature for up to 3-4 days.
Conclusion:
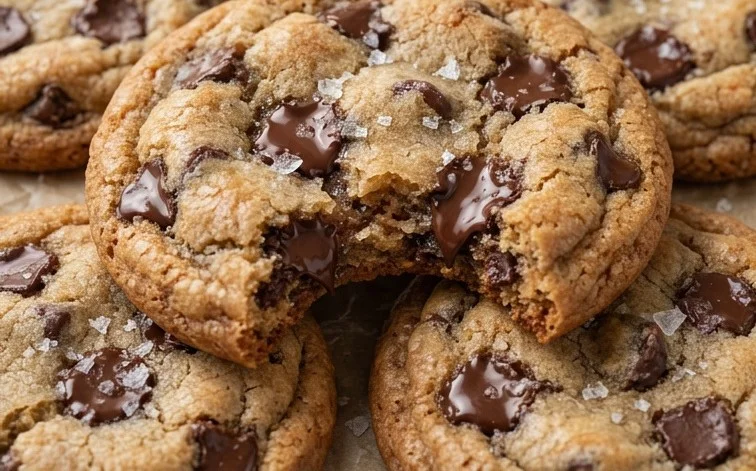
These bakery-style chocolate chip cookies are truly special. They hit all the right notes: a slightly crisp edge that gives way to a wonderfully chewy center, all studded with glorious pockets of melted chocolate. Using cool butter and creaming it properly with the sugars is the secret to their impressive height and tender crumb, making them a consistent success. Don’t be afraid to experiment with different types of chocolate chips, like dark or milk chocolate, for a slight variation in flavor. They are wonderful served warm with a glass of cold milk, or cooled and stored for a sweet treat anytime. These cookies are perfect for bake sales, holidays, or simply when you need a comforting homemade dessert.
Frequently Asked Questions
Why are my cookies flat?
Flat cookies often result from using butter that is too soft or melted. The butter needs to be cool enough that it holds its shape but is still pliable. Overmixing the dough after adding the flour can also develop the gluten too much, leading to flatter cookies. Be sure to only mix the flour in until just combined.
Can I use a different type of chocolate?
Absolutely! While semisweet is classic, feel free to use dark chocolate chips, milk chocolate chips, or even a mix. You can also chop up a chocolate bar for larger, irregular pockets of melted chocolate. For a richer flavor, consider adding some chopped nuts like walnuts or pecans, if you like.
How should I store these cookies?
Store cooled cookies in an airtight container at room temperature for up to 3-4 days. Adding a slice of bread to the container can help keep them soft and chewy. If you need them to last longer, they freeze well for up to 3 months.
Bakery Style Chocolate Chip Cookies
Achieve bakery-quality chocolate chip cookies with a perfect balance of chewy and crisp edges. This recipe yields soft, flavorful cookies with a rich chocolatey center.
Ingredients
-
3 cups (380 grams) all-purpose flour
-
1 teaspoon baking soda
-
1 teaspoon fine sea salt
-
2 sticks (227 grams) unsalted butter, (at cool room temperature (67°F))
-
1/2 cup (100 grams) granulated sugar
-
1 1/4 cups (247 grams) lightly packed light brown sugar
-
2 teaspoons vanilla
-
2 large eggs, (at room temperature)
-
2 cups (340 grams) semisweet chocolate chips
Instructions
-
Step 1
In a medium bowl, whisk together the all-purpose flour, baking soda, and fine sea salt. Set aside. -
Step 2
In a large bowl, cream together the unsalted butter, granulated sugar, and light brown sugar until light and fluffy. -
Step 3
Beat in the vanilla extract and then the large eggs, one at a time, until well combined. -
Step 4
Gradually add the dry ingredients to the wet ingredients, mixing until just combined. Do not overmix. -
Step 5
Stir in the semisweet chocolate chips. -
Step 6
Drop rounded tablespoons of dough onto ungreased baking sheets. Bake in a preheated oven at 375°F (190°C) for 10-12 minutes, or until the edges are golden brown and the centers are still slightly soft. -
Step 7
Let the cookies cool on the baking sheets for a few minutes before transferring them to a wire rack to cool completely.
Important Information
Nutrition Facts (Per Serving)
It is important to consider this information as approximate and not to use it as definitive health advice.
Allergy Information
Please check ingredients for potential allergens and consult a health professional if in doubt.

Leave a Comment